Excavate your micropondless, Basin, Step 5 – Aquascape MicroPond & MicroPondless Kits (99763, 99764, 99765 & 99769) User Manual
Page 5: Excavate your micropond, Pd pl
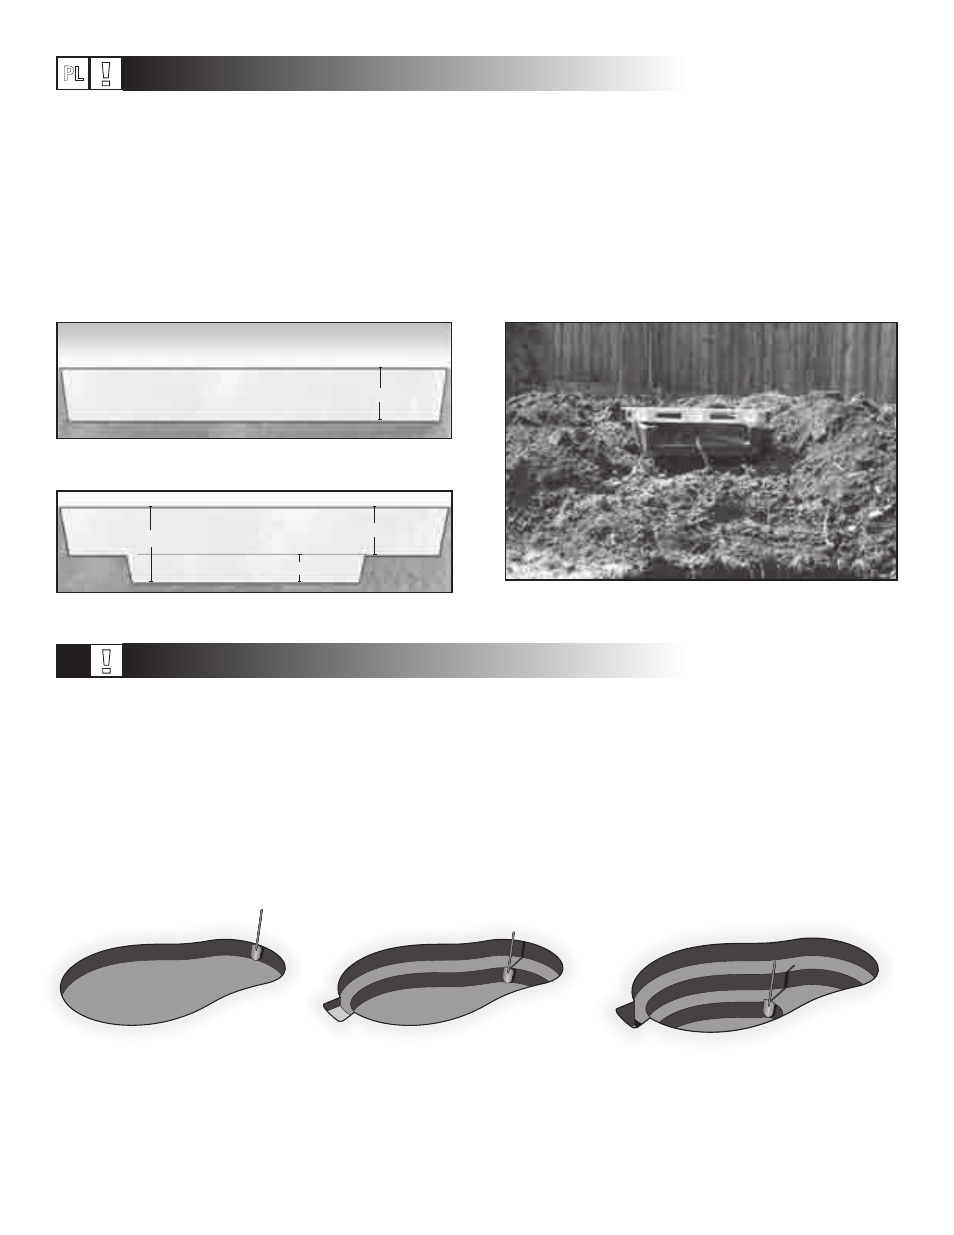
18”
18”
6”
24”
Deep Area for MicroSnorkel
™
Vault and
MicroCentipede
™
Module
5
Fig. 10
Soil backfilled around the MicroFalls
®
helps hide the filter
and creates a planting berm.
Fig. 9 Excavate the deep area of the basin.
Fig. 8
First, dig entire basin to 18” depth.
Excavate your MicroPondless
®
basin
The shape and depth
• Digging is very labor-intensive,
so pace yourself and get some
friends and family to help you.
• We suggest excavating the basin
no more than 24” deep. This
depth provides the proper water
volume in the basin to operate the
waterfalls.
(See figs. 8 and 9)
• All of the soil removed from the
excavation can be spread and
compacted around the Micro-
Falls
®
, creating a berm. The filter
should be completely surrounded
by soil by the end of the project.
(See fig. 10)
Leveling the edges
• One of the most important parts
of the excavation is getting the
perimeter of the basin level. An
excellent tool for this is a 2x4 set
across the basin. Set a 4-foot
bubble level on the 2x4 to make
sure the perimeter of the basin
is level. We recommend using a
transit or sight level on larger
projects. Check your progress
several times while digging.
• Re-check all your measurements,
including length and width of ba-
sin, plant shelf depth, and overall
basin depth.
STEP 5
Excavate your MicroPond
®
basin
The shape and depth
• Digging is very labor intensive,
so pace yourself and get some
friends and family to help you.
• We suggest excavating the pond
no more than 18-24” deep. This
depth provides the proper water
levels required for aquatic plants
and is deep enough to keep
fish alive during winter. See the
maintenance section for more
information on caring for fish.
• The excavation should be dug with
a series of shelves. The shelves
will add stability to the walls of
the pond and will also create
planting beds for different types
of aquatic plants.
• The first shelf should be about
8-10” down
(See fig. 11), or the
height of a standard shovel.
• The second is typically down
another 8-10”.
(See fig. 12)
• The third shelf (if desired) will be
excavated down another 6”
(See fig. 13), reaching a final
excavation of 24”.
Fig. 12 Dig second shelf one shovel depth
and start excavation of skimmer hole.
Fig. 11 First, dig entire pond one
shovel depth.
STEP 5
Fig. 13 Dig the pond to its max depth and finish
excavation of the skimmer hole.
0
PD
PL
!
!