Hooking up the pump and plumbing, Add water, Step 10 – Aquascape MicroPond & MicroPondless Kits (99763, 99764, 99765 & 99769) User Manual
Page 10: Step 11, Pd/pl, Overflow installation
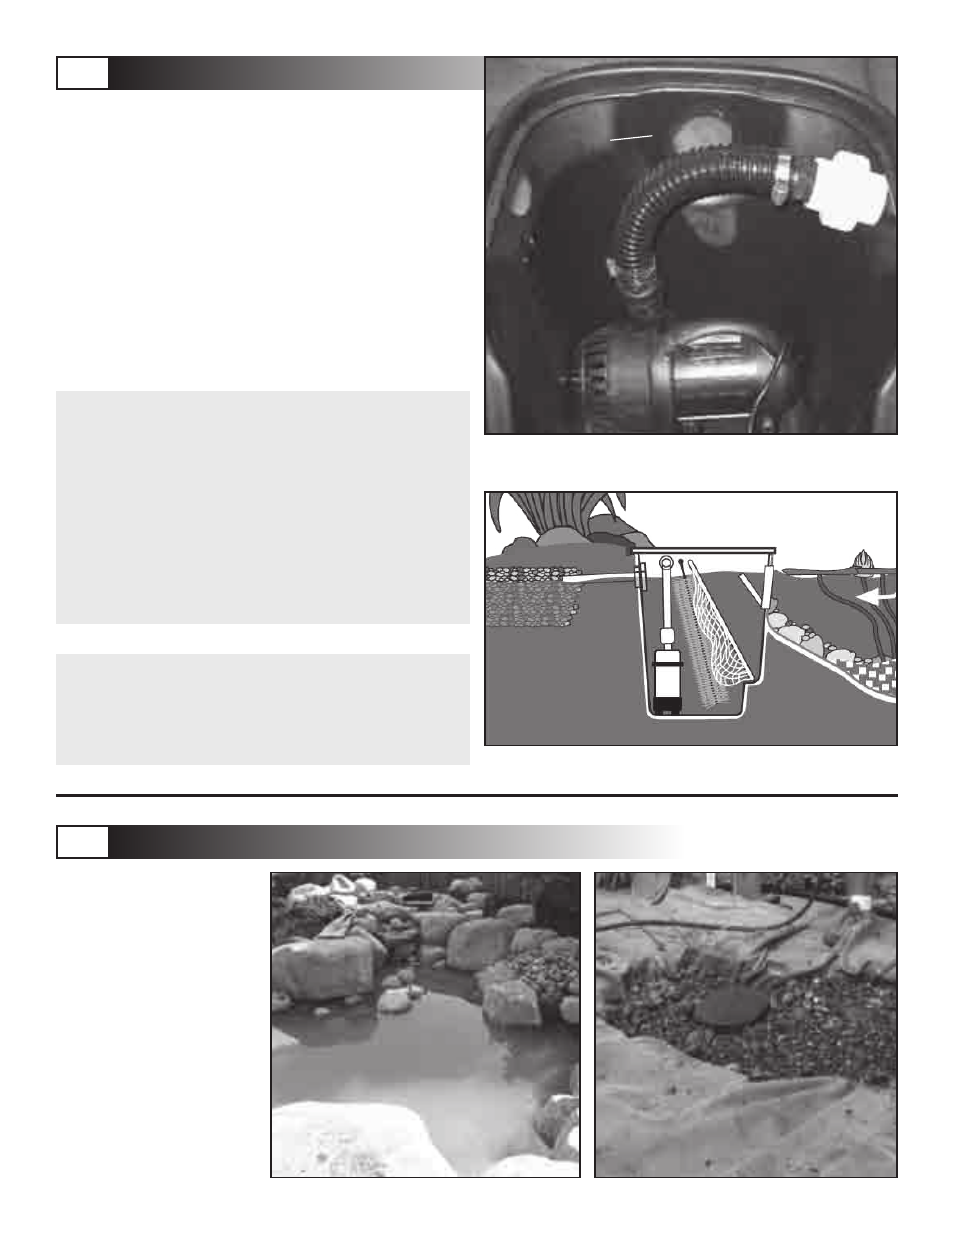
10
Hooking up the pump and plumbing
The MicroPondless
®
and MicroPond
®
utilize the same style pump and
plumbing fittings. Connect the
pump plumbing kit to the pump and
tighten all clamps before lowering into
the MicroSkim
®
or MicroSnorkel
™
Vault.
The plumbing assembly includes a
threaded union disconnect that
will allow you to remove the pump
when needed.
MicroPond
®
- The following steps are
specific to the MicroSkim
®
. Skip down if
you are hooking up the pump in a
MicroSnorkel
™
Vault.
• The MicroSkim
®
has two holes on ei-
ther side of the unit for the plumbing
to travel to the MicroFalls
®
. Choose
the plumbing hole that is most
convenient. The pipe simply passes
through the opening on either side
of the MicroSkim
®
.
(See fig. 29)
• The pump’s electrical cord can be set
in the slot located in the back, top
edge of the skimmer.
Fig. 30 Overflow detail
Fig. 29 Plumbing exit holes
Overflow
Exit Hole
Fill up the MicroPondless
®
or
MicroPond
®
basin with water. The
MicroPond
®
should be filled just
below the level of the overflow in the
MicroSkim
®
. The MicroPondless
®
is
typically filled to a point just below
the gravel.
Note: We recommend adding EcoSys-
tems
®
EcoStarter
™
to dechlorinate
and properly condition city water prior
to introducing fish to your MicroPond
®
.
See owner’s manual section for tips on
adding fish to the pond.
Add water
MicroPondless
®
- The kink-free
pipe from the MicroFalls
®
can
be trimmed to proper length and
inserted through the slot on the
side of the MicroSnorkel
™
Vault.
Insert the barbed fitting on the
end of the plumbing assembly into
the kink-free pipe and tighten the
clamp. The cord from the pump
can be buried just beneath the
stone and gravel and run over to
the electrical supply.
STEP 10
PD/PL
STEP 11
PD/PL
Overflow Installation
• Now install the barb fitting and
clamp included with your kit into
the bulkhead fitting. Use some of
the silicone sealant to coat the
threads of the fitting, in order to
help provide a water-tight seal.
A PVC slip fitting has also been
included in case you are using
flexible PVC pipe.
• Attach and trench a section of kink-
free pipe into place (3’ minimum).
Create a drainage area at the end
of the pipe by excavating a small
pit, roughly 16” in diameter and
at least 12” deep. Fill the pit with
excess gravel. This will allow water
in an overflow situation to flow
through the pipe and drain away
from the pond.
(See fig. 30)
• A layer of scrap underlayment
fabric, soil or sod can be added to
cover the drainage area.