Bring in the topsoil, Build the retaining wall, Step 13 – Aquascape MicroPond & MicroPondless Kits (99763, 99764, 99765 & 99769) User Manual
Page 12: Step 14, Build the waterfall cont, Pd/pl
12
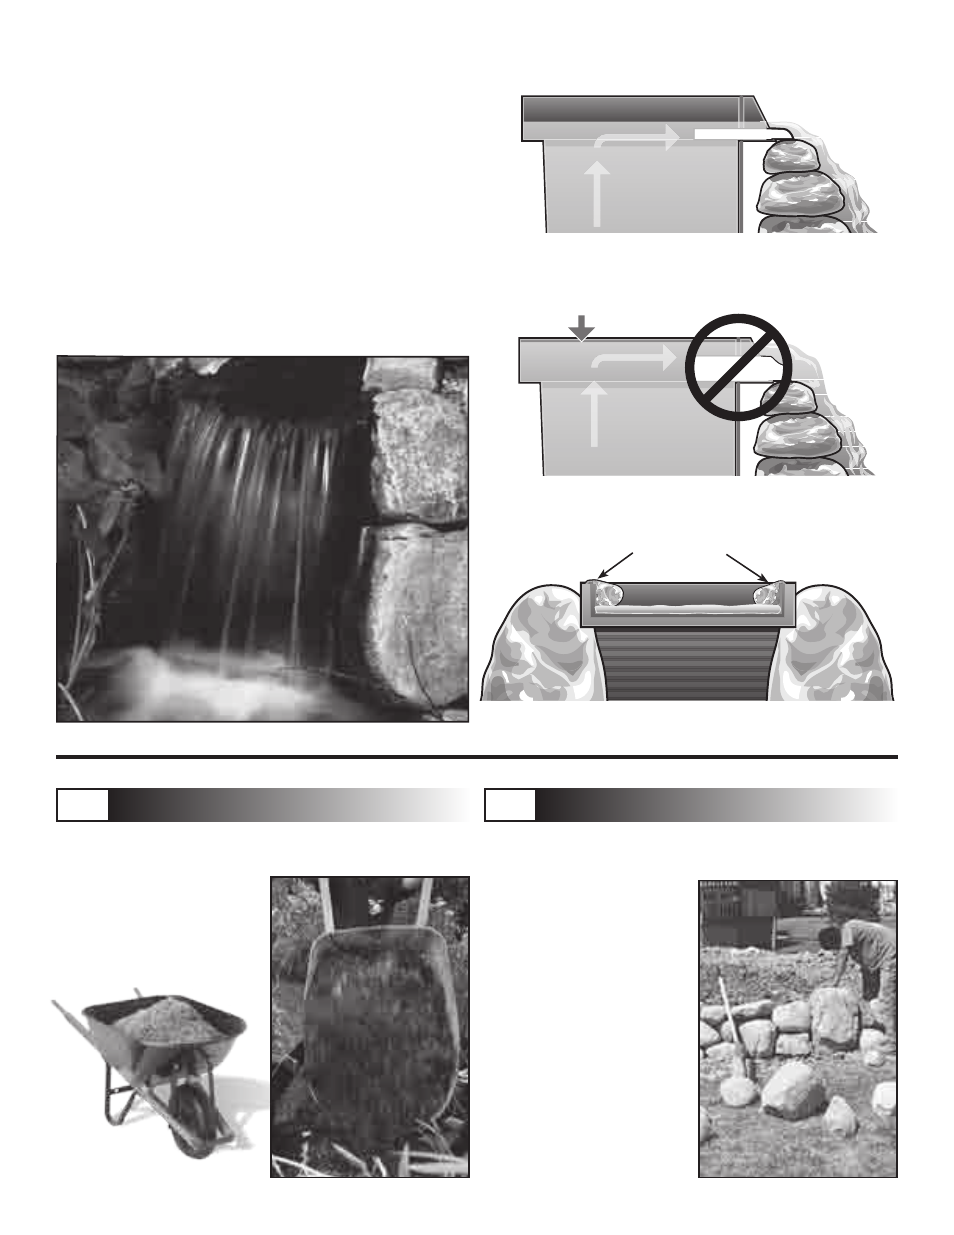
Fig. 40 If using a natural rock for your waterfall weir, make sure that
it is fairly thin. (no more than 3/4")
Fig. 41 If a thick rock along with a larger flow pump is used, the
water flow may be so great that it will flow over the sides of the MicroFalls
®
.
Small Rocks
Fig. 42 Place smaller rocks on rock ledge in the MicroFalls
®
.
Bring in the topsoil
• Add topsoil to the berm and
surrounding area in order to
provide a good substrate for
future landscape plantings.
Build the retaining wall
• Finish off the berm where the
MicroFalls
®
is buried by building
a small retaining wall out of boul-
ders. This step may or may not be
needed, depending on the size of
the berm and the transition into
the existing landscape.
• The MicroFalls
®
is designed with a
plastic lip for the water to cascade
off. You can use the plastic lip or
hide the lip using the MicroFalls
®
plastic waterfall stone (sold
separately) or even piece(s) of thin
(no more than 3/4” thick) natural
slate.
(See figs. 40 & 41) This
stone can be attached to the Mi-
croFalls
®
using Aquascape Black
Waterfall Foam (sold separately).
The black foam can be purchased
from your local Aquascape supplier
and will come in handy when filling
other gaps between the stones that
water is flowing over. The foam
keeps the water flowing over the
top of the waterfall stones. Without
the black waterfall foam, you may
lose some of the impact of your
waterfall as water travels beneath
the rocks.
• Place smaller rocks on the rock
ledge inside the MicroFalls
®
to
help hide it in the landscape.
(See fig. 42)
STEP 13
PD/PL
STEP 14
PD/PL
Build the waterfall cont...