Echo 74065S User Manual
Page 9
7
Warning: Hazardous Operations within 50 feet of unit.
Operation- Cont.
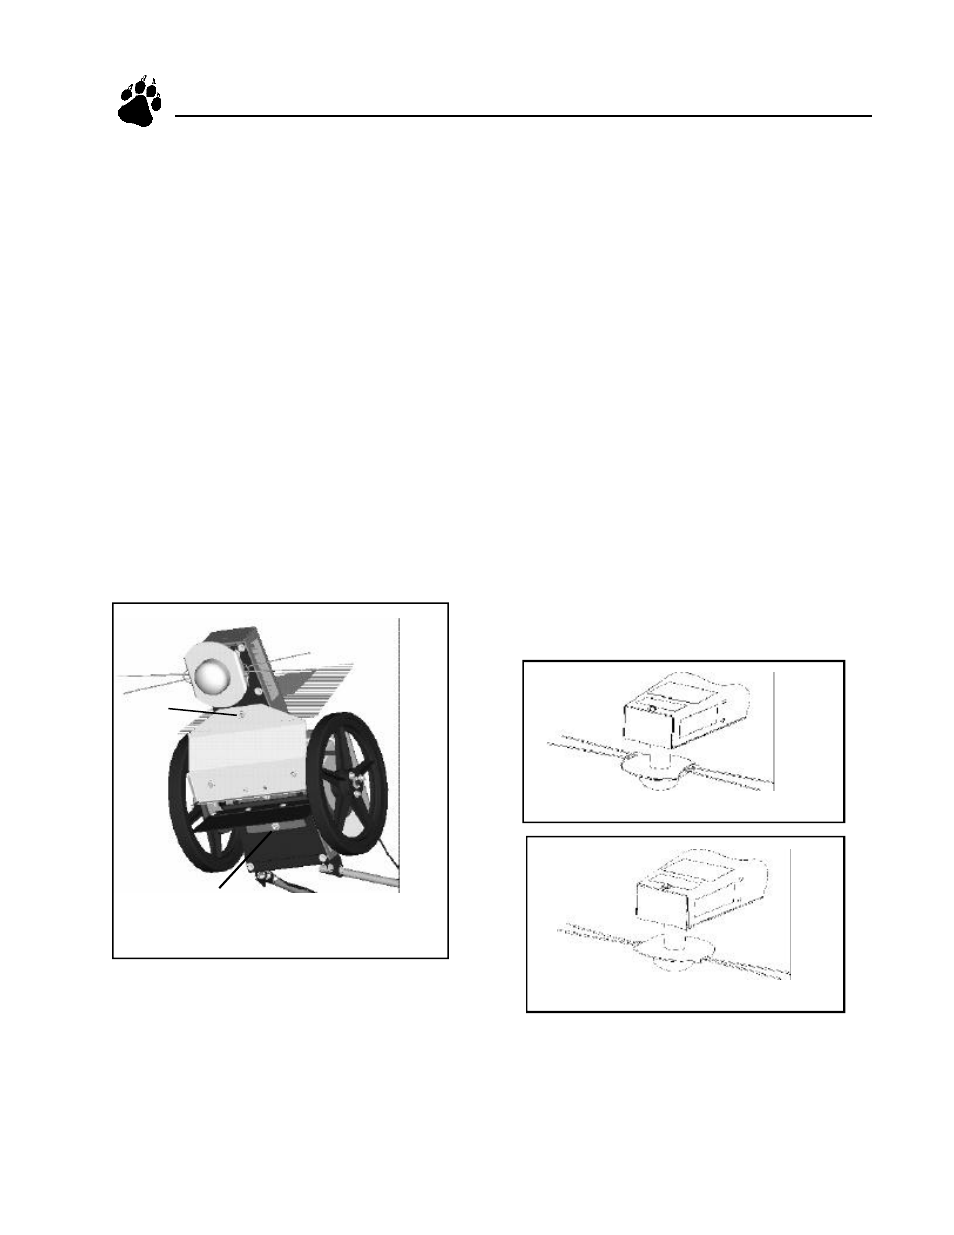
Model 73150 Trimming Adjustments
Trimming adjustments are used to edge and trim in hard to reach
places. To begin using trimming adjustments:
1. Loosen two nuts on the bottom of the trimmer; the first (A) is
located behind the trimmer spindle, while the other (B) is in
the center of the back of the transmission support plate. Refer
to Figure 7.
2. Pull one wheel back and push the other wheel forward to
pivot the trimmer axle. The trimmer axle can pivot either left
or right.
5. When finished using the offset feature, loosen the right axle nut
again, and lift the wheel and push forward.
6. Tighten the right axle bolt and resume regular trimming/mowing.
3. Tighten the nut loosened in Step 1.
4. Push the trimmer slowly.
5. When finished using the offset feature, loosen the right axle nut
again and lift the wheel and push forward.
6. Tighten the right axle bolt and resume regular trimming/mowing.
Models 74040/74050/74060/74065/74450/74455 Off
Center Tilt Feature (OCT)
The OCT feature is used to edge and trim in hard to reach places.
This features enables both the trimmer head and body to tilt for
trimming close to the ground. The degree of tilt is dependant on
the setting selected on the tilt control grip located on the right
side of the EZ TrimMower.
Four setting are available:
1. Level. The tilt control grip is set in the position closest to the
rear of the trimmer.
B
A
Figure 7
Remove the trimmer head weldment before turning the trimmer head
disk.
1. Insert a 9/16” open end wrench into trimmer frame as shown in
Figure 10.
2. Rotate trimmer head until wrench engages with trimmer shaft if
needed.
3. Twist the trimmer head weldment counterclockwise to remove.
Use channel lock or pipe wrench if necessary.
4. Turn trimmer head disk over and replace on trimmer spindle.
5. Return trimmer head weldment and turn clockwise to tighten.
The EZ TrimMower standard cutting height is 2-3/4 inches. Figure 8
below depicts the trimmer head assembly when purchased and at the
standard cutting height.
The cutting height is adjust down approximately 3/4 inch by turning
the trimmer head disk over as shown in Figure 9.
Figure 8
Figure 9
All Models Cutting Height Adjustment
2. 5.4 degrees. The tilt control handle is set in the second
position from the rear of the trimmer.
3. 10.3 degrees. The tile control handle is set in the third position
from the rear of the trimmer.
4. 13 degrees. The tilt control grip is set in the position closest to the
front of the machine for maximum tilt.