Apple iMovie '08 User Manual
Page 44

44
Chapter 2
Learn iMovie
To change the Ken Burns effect:
1
Select the photo in your project, and then click the Crop button in the iMovie toolbar.
2
In the viewer, click Ken Burns.
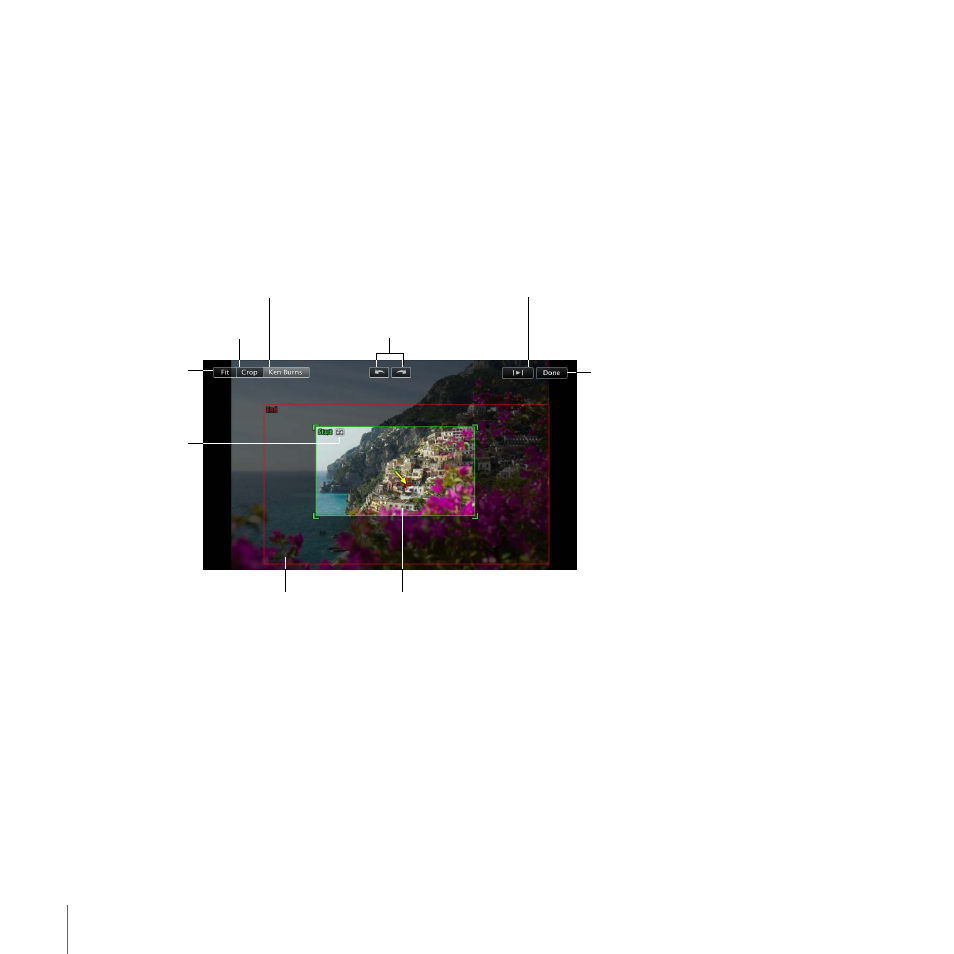
Two crop rectangles appear in the viewer. The green crop rectangle indicates the
startpoint of the Ken Burns effect and the red crop rectangle indicates the endpoint of
the Ken Burns effect. You can quickly exchange the positions of the red and green crop
rectangles by clicking the small button with two arrows inside the selected crop
rectangle.
3
Drag to resize and reposition the green crop rectangle until it highlights where you
want the Ken Burns effect to begin.
4
Drag to resize and reposition the red crop rectangle until it highlights the final position
for the Ken Burns effect.
The crop rectangles always retain the aspect ratio that you’ve chosen for your project.
5
To preview your work, click the Play button.
Drag and resize the red
crop rectangle to set the
end position.
Click to rotate
the entire image.
Click to crop the image
with no motion effects.
Click to restore the
image to full frame
with no motion effects.
Drag and resize the
green crop rectangle to
set the start position.
Click to create or change
the Ken Burns effect.
Click when
you’re done.
Click to preview
your work.
Click to switch
the places of
the startpoints
and endpoints.
