Hyline Offroad JK CRAWLER FRONT BUMPER User Manual
Page 3
T:\Hyline Offroad, LLC\Installation Instructions\400.100.110-JK STANDARD FRONT BUMPER\400.100.110 Installation Instructions.doc
Page 3 of 5
REV 4 02/23/12
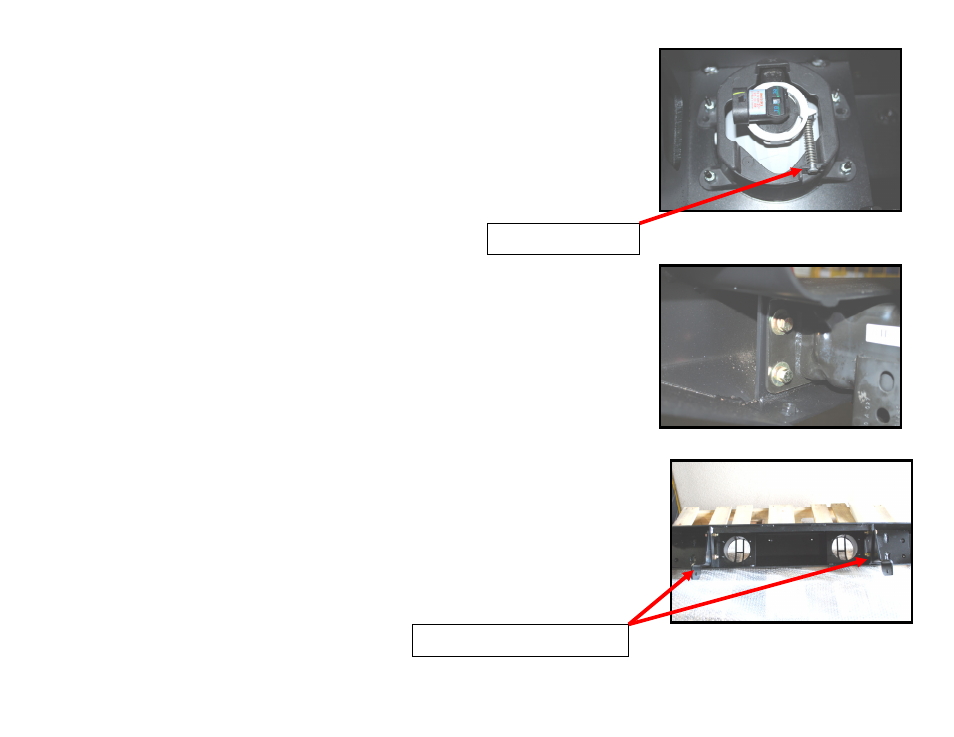
Step 5 – Install factory fog lights into Hyline Front Bumper. Make sure
the adjustment screw is facing toward the bottom of the bumper.
There is a hole in the bumper to allow adjustment after
Installation. Assemble fog lights using supplied 8-32 Lock Nuts
and Flat Washers. Tighten the nuts with 11/32” Deep Socket or
Nut Driver. (See Figure 2)
Step 6 – Install Hyline Front Bumper onto vehicle. Two people are
recommended for this step. Use supplied 7/16-20 Grade 8
Bolts, Lock Washers and Flat Washers to assemble bumper
to frame. (See Figure 3) Install the outside bolts first. This
will align the other holes inside the frame rails so you don’t
have to struggle. After all eight bolts are hand threaded you
may tighten all bolts to 78 ft/lb torque.
Step 7 – Install Mounting Brackets using supplied 7/16-20 Grade 8 Bolts
Lock Washers, Flat Washers, & Nuts. (See Figure 4, 5 &
Supplement Diagram 1 on Page 5) These figures are shown with
the bumper off the vehicle, however you should have the bumper
installed on vehicle prior to assembling brackets. 2012 and newer
Jeep models will require you to use the unique bracket with
weldnuts on the driver side only in place of the other bracket.
Figure 3
Figure 2
Adjustment Screw
Left & Right Mounting Brackets
Figure 4