Front bumper installation – Hyline Offroad JK CRAWLER FRONT BUMPER User Manual
Page 2
T:\Hyline Offroad, LLC\Installation Instructions\400.100.110-JK STANDARD FRONT BUMPER\400.100.110 Installation Instructions.doc
Page 2 of 5
REV 4 02/23/12
Front Bumper Installation
Step 1 – Remove plastic factory frame rail cover by unscrewing two
plastic screws. Be careful while unscrewing these. The plastic
is very weak and is easy to strip out. You will NOT be reusing
this cover. Also remove the factory plastic air dam, which is
located underneath the bumper.
Step 2 – If your vehicle is equipped with factory fog lights you will need
to unplug them. Pull out or cut the plastic wire ties that are
holding the wires in place (3 Wire Ties) DO NOT CUT WIRES.
Then, slide stock bumper out far enough to unplug the fog lights.
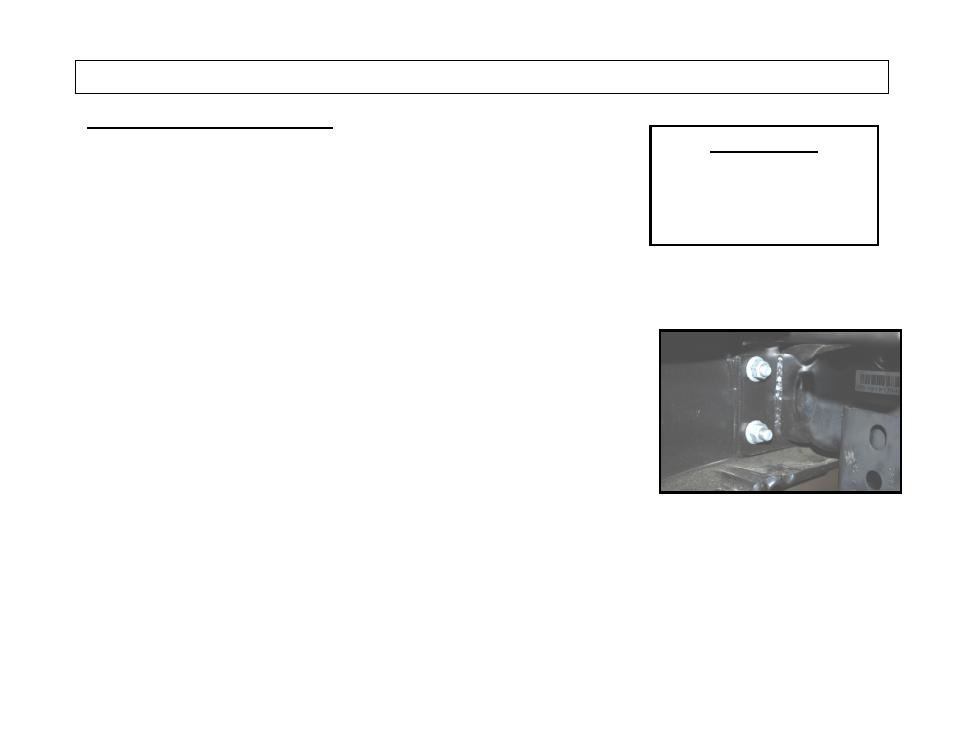
Step 3 – Remove Stock bumper by unbolting the eight (8) 18mm nuts
From backside of bumper. Nuts are located on the inside and
outside of frame rails (See Figure 1 - Outside frame rails shown)
Say goodbye to that flimsy plastic stock bumper.
Step 4 – If applicable, Unscrew Factory Fog Lights at this point using
phillips screw driver. (4 on each light)
PLEASE READ INSTRUCTIONS BEFORE BEGINNING INSTALLATION
If Applicable
Disconnect all Aftermarket
External Lighting Wiring that
is presently attached to
existing bumper.
Figure 1