Fast & Fluid Giotto Column User Manual
Page 19
Fast & Fluid Management
A Unit of IDEX Corporation
________________________________________________________________________________
________________________________________________________________________________
18
1154915C-it,en,fr.doc - 15/10/2003
Note :
The reduction unit which has been applied on the rotating table and all others
components DO NOT need ANY lubrication because they are life - lubricated.
In order to have a costantly good performance of Giotto manual dispenser the following procedure
are daily recomanded.
-
Check the quantity of colourant : mantain at least 2 litres of colourant in the canister.
-
Before each dosing stir the colourant.
-
Also if you don't use the dispenser daily, open and close the valve, pull and push the pump
handle without opening the valve.
Repeat the action two or three times.
-
Clean the nozzle using a moistened cloth to take off the dried colourants.
Depending on use it is important to carry out periodic check (about 6 months)
-
Check gauges for graduated scales and replace if required.
-
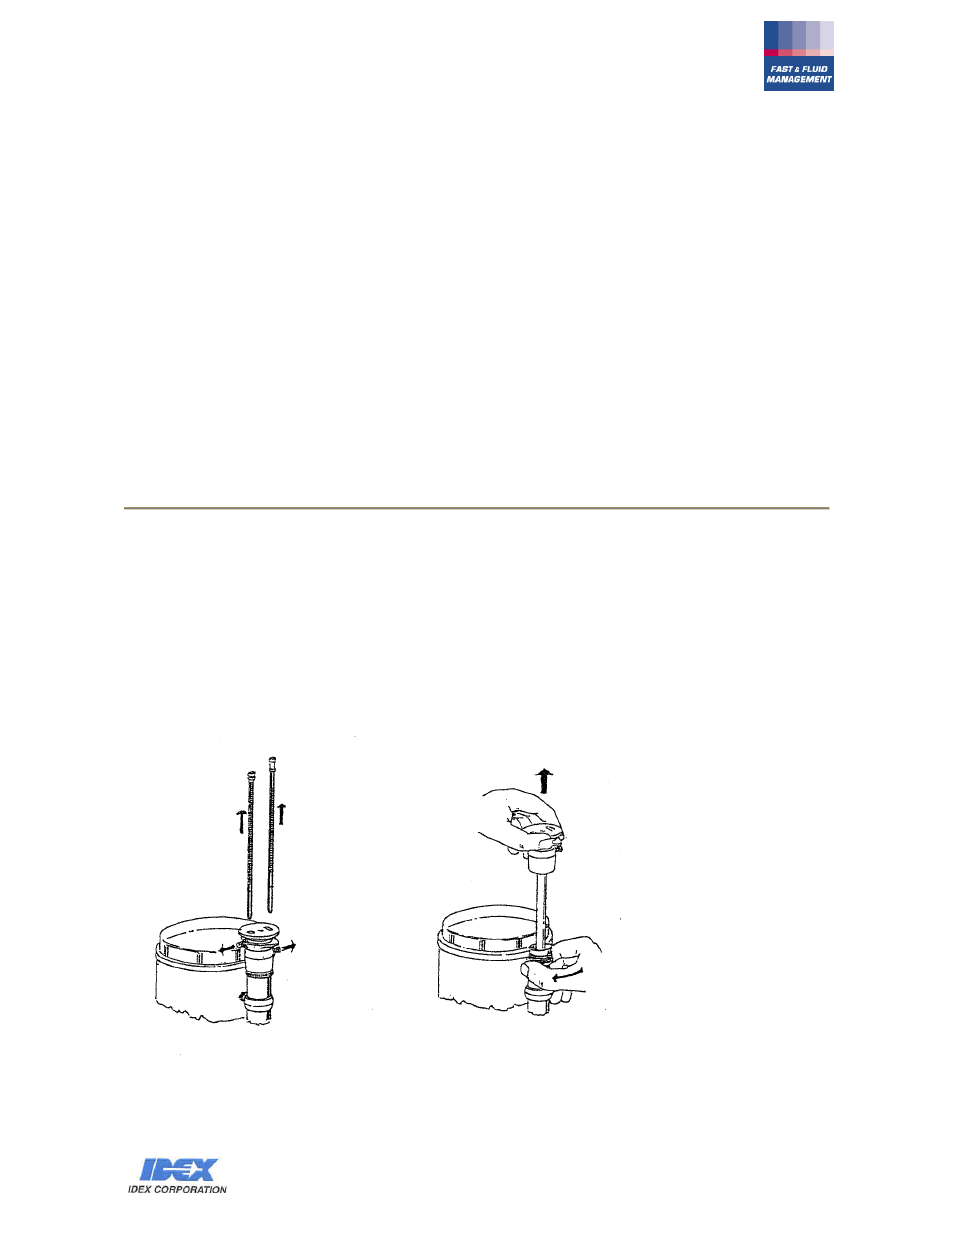
Lift both pumps to the maximum extention and check if the shafts have signs of
colourant which indicate the need to replace the piston seal as indicated in
(DIAGRAM 10)
-
Inspect the valve and canister for leaks , if required replace the "O" Ring
disassembling the valve as indicated in DIAGRAM 9.
-
When you discarge a canister for cleaning or maintenance you have to repeat the
" Dispenser Preparation" process.
11.- CONTAINER CLEANING
d)
Extract all paint from the containers
e) Put inside about 1 liter water and let operate for about 15 minutes together with the simultaneous
action of the stirrer
f)
Empty completely the containers operating the pumps : in this way it is possible to clean the
containers, the pistons and the valve. If this operation should be insufficient, extract completely
the measuring rods, screw out the ring nut body, extract the piston unit and remove the internal
piston.
DIAGRAM 10
Clean all elements carefully and remount them (following the same instructions for the dismounting
and carrying them out in the opposite sequence).