Fitting bull bar to vehicle – ARB 3915040 User Manual
Page 21
Last Rev Date: 28 OCTOBER 2008
Page 21 of 22
Fitting instructions# 3781218
Copyright © 2005 by ARB Corporation Limited. All rights reserved, this document must not be reproduced without the express authority of ARB Corporation Ltd
FITTING BULL BAR TO VEHICLE
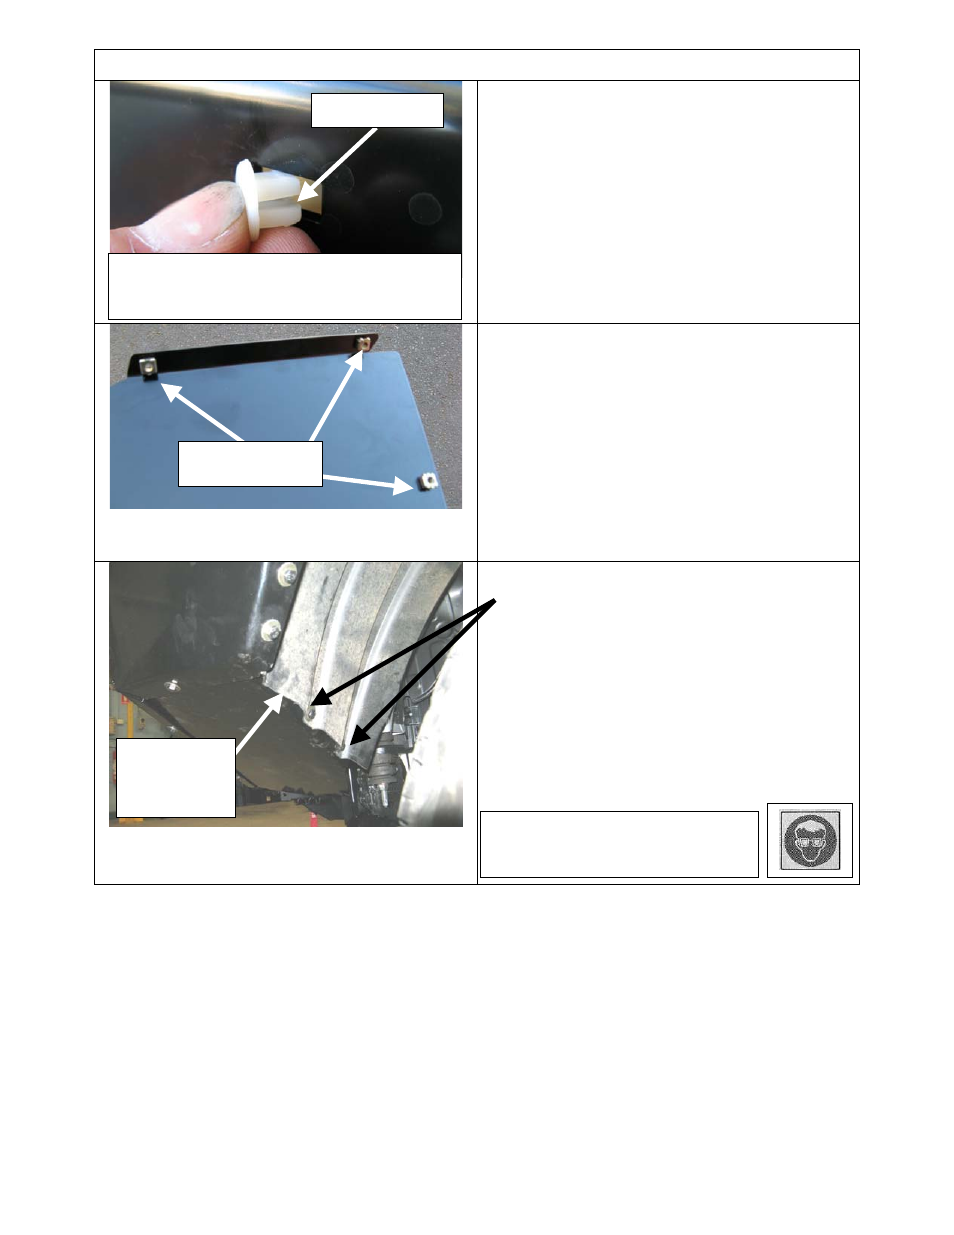
FITTING NUMBER PLATE
101. If winch fitted, apply double sided tape
strip to top back of number plate. If winch
not fitted, no adhesive strip is required.
102. Fit grommets to slots, with split horizontal
as shown
103. Fit number plate using supplied pan head
screws into grommets.
104. Tuck fender liner tab into wing return, trim
if necessary.
105. Fit 5 x M6 cage nuts to each wing splash
panel as shown on inside faces.
Note: LHS shown with 3 of 5 cage nuts inserted.
106. Fit panels up inside wings, secure using
M6 x 20 black bolts and washer sets. Fix
flange on panel to side of main mount
bracket using M8 bolt set.
107. Mark out and drill 2 x Dia 7.0 mm holes in
each fender liner for securing to the
splash panel flange.
Hint: Scribe a line on the liner parallel to the
splash panel, measure and mark the position of
the required holes up from the marked line.
108. Use M6 x 20 black bolts and washer sets
to secure the fender liner to the panels.
109. Trim the fender liner end flush with the
splash panel face as shown.
Warning: Drilling operations can
result in flying debris, safety
glasses should be worn.
Fit cage nuts to
inside faces
Trim this
edge flush
with face of
panel
Split horizontal
NOTE: Number plate sits above RFL opening
in pan when winch fitted, when no winch ,
number plate covers RFL opening in lower