Bull bar fitment to vehicle – ARB 3421520 User Manual
Page 17
Last Rev Date: 14/10/2010
Page 17 of 22
Fitting instructions# 3787836
Copyright © 2005 by ARB Corporation Limited. All rights reserved, this document must not be reproduced without the express authority of ARB Corporation Ltd
BULL BAR FITMENT TO VEHICLE
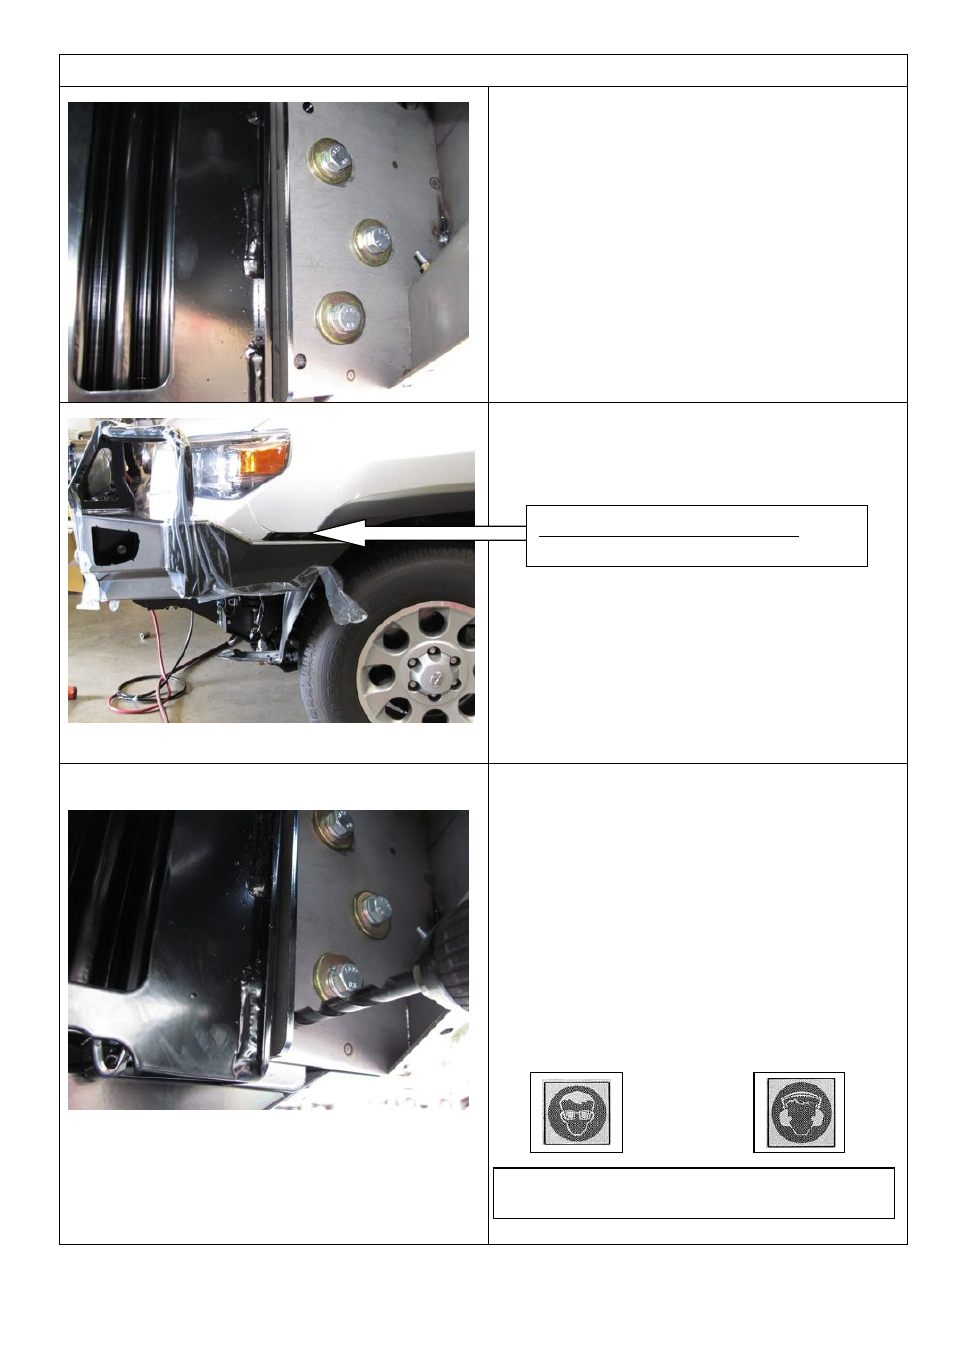
67. With assistance guide the bull bar into
position on the vehicle. The uprights on the
bull bar sit outside the impact absorber
blades.
68. Bolt the bull bar into position using the M12
bolts, spring washer, large body washer and
flange nuts 3 places per side of bull bar as
shown. Tighten the bolts firmly ± but allow
enough movement for the bull bar to be
adjusted
69. If winch fitted route cables up into the engine
bay and secure.
70. Ensure the bull bar is sitting on the vehicle
level and the gap between the bumper bar
cut and the bull bar wing is even.
71. If the bull bar is not centred on the vehicle,
back off the mount bracket bolts to chassis,
tap the mount brackets sideways with a soft
hammer until the bar is central. Retention
bolts to specified torque
72. Once happy with the position of the bull bar
and the clearance gap is 16-20mm, tighten
all the mount bolts to specified torque
73. Using an electric drill and a Dia10.0 mm drill
bit, drill two pinning bolt holes through the
bull bar upright each side using the holes in
the mount bracket flanges as a guide. One
hole is located in the lower lug of the mount
face and one up above the welded nuts. Use
access through the light surround opening for
the top hole.
74. Fit the pinning bolts to the bull bar in the
drilled positions using 4 x M10 SEMS bolt
and washer sets and M10 flange nuts and do
up to specified torque.
16-20 mm (5/8 -´*$3
REQUIRED
Warning: Drilling operations can result in flying
metal debris, safety glasses should be worn.