Replacing the fusing unit – Brother HL-3450CN User Manual
Page 139
CHAPTER 5 MAINTENANCE
5-23
Replacing the Fusing Unit
1.
Press the Power button to turn off the printer. Unplug the printer. To avoid
injury, wait until the printer has cooled down sufficiently before replacing
the Fusing Unit.
2.
Open the Top Cover.
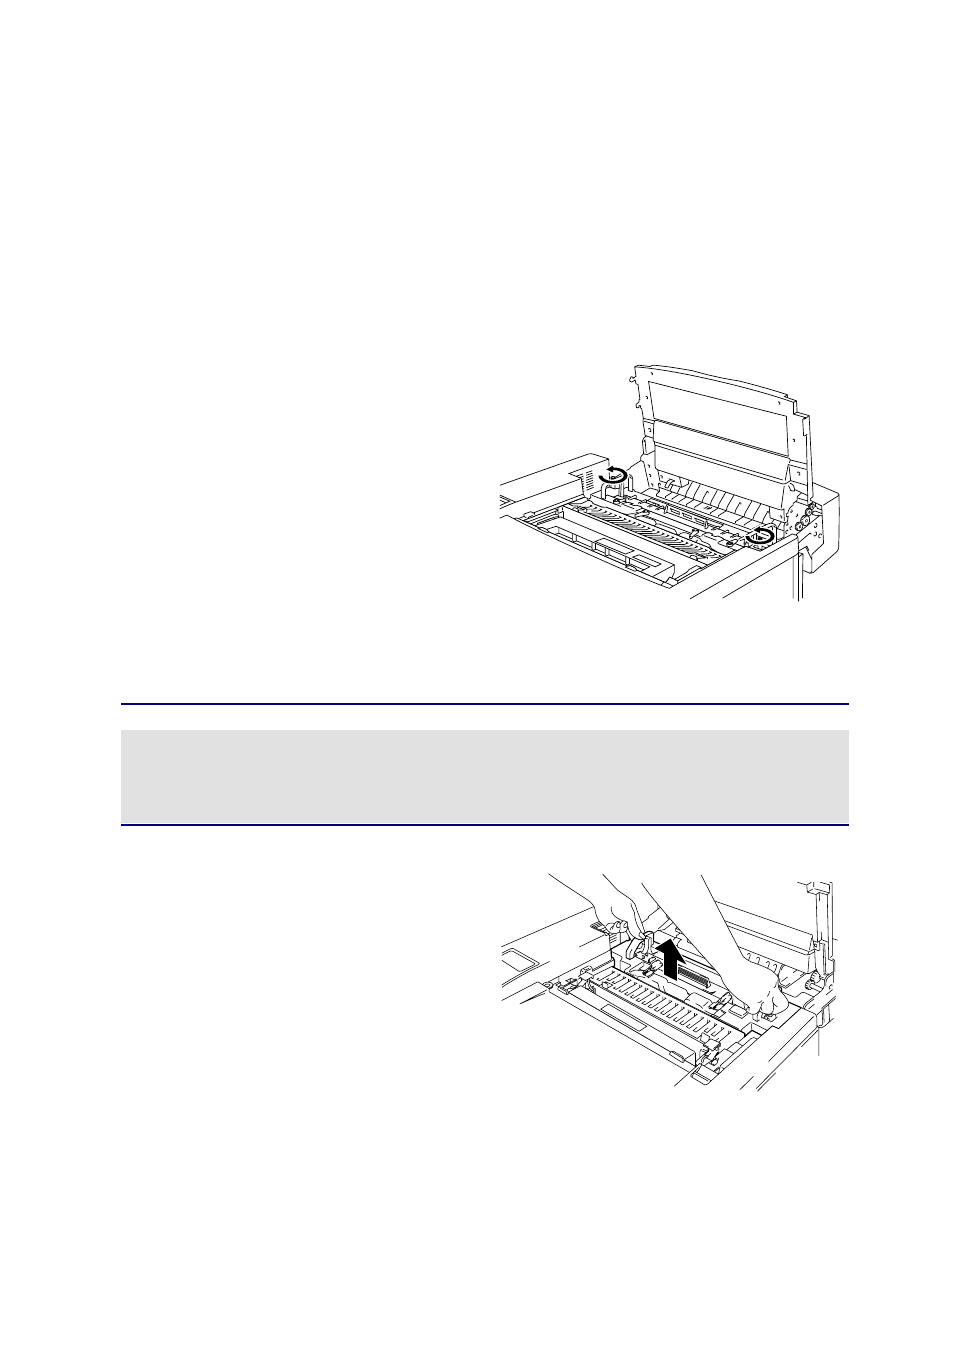
3.
Unscrew the two long screws as
shown to release the Fusing unit
from the printer.
Fig. 5-19
Note
Please wait for 30 minutes after installing a new Fusing Unit to allow
the oil to circulate completely through to the Heat Roller. If you begin
using a new Fusing Unit immediately, poor print quality may result.
4.
Remove the Fusing Unit from the
printer by holding the handles on
both sides.
Fig. 5-20
See also other documents in the category Brother Printers:
- HL-2240 (522 pages)
- HL-2240 (21 pages)
- HL-2240 (150 pages)
- HL-2240 (2 pages)
- HL 5370DW (172 pages)
- HL-2170W (138 pages)
- HL 5370DW (203 pages)
- HL 2270DW (35 pages)
- HL 2270DW (47 pages)
- HL 5370DW (55 pages)
- HL-2170W (137 pages)
- HL-2170W (52 pages)
- PT-1290 (1 page)
- DCP-385C (122 pages)
- MFC 6890CDW (256 pages)
- DCP-585CW (132 pages)
- DCP-385C (2 pages)
- DCP-383C (7 pages)
- Pocket Jet6 PJ-622 (11 pages)
- Pocket Jet6 PJ-622 (48 pages)
- Pocket Jet6 PJ-622 (32 pages)
- Pocket Jet6Plus PJ-623 (76 pages)
- PT-2700 (62 pages)
- PT-2700 (90 pages)
- PT-2700 (180 pages)
- PT-2100 (58 pages)
- PT-2700 (34 pages)
- HL 5450DN (2 pages)
- DCP-8110DN (22 pages)
- HL 5450DN (168 pages)
- HL 5450DN (2 pages)
- HL 5470DW (177 pages)
- HL 5450DN (120 pages)
- DCP-8110DN (13 pages)
- HL 5470DW (34 pages)
- HL-S7000DN (9 pages)
- HL 5470DW (30 pages)
- MFC-J835DW (13 pages)
- DCP-8110DN (36 pages)
- HL-7050N (17 pages)
- HL-6050DN (138 pages)
- HL-6050D (179 pages)
- HL-6050D (37 pages)
- PT-1280 (1 page)
- PT-9800PCN (118 pages)