Installation – Pioneer AXM-P90RS User Manual
Page 36
4
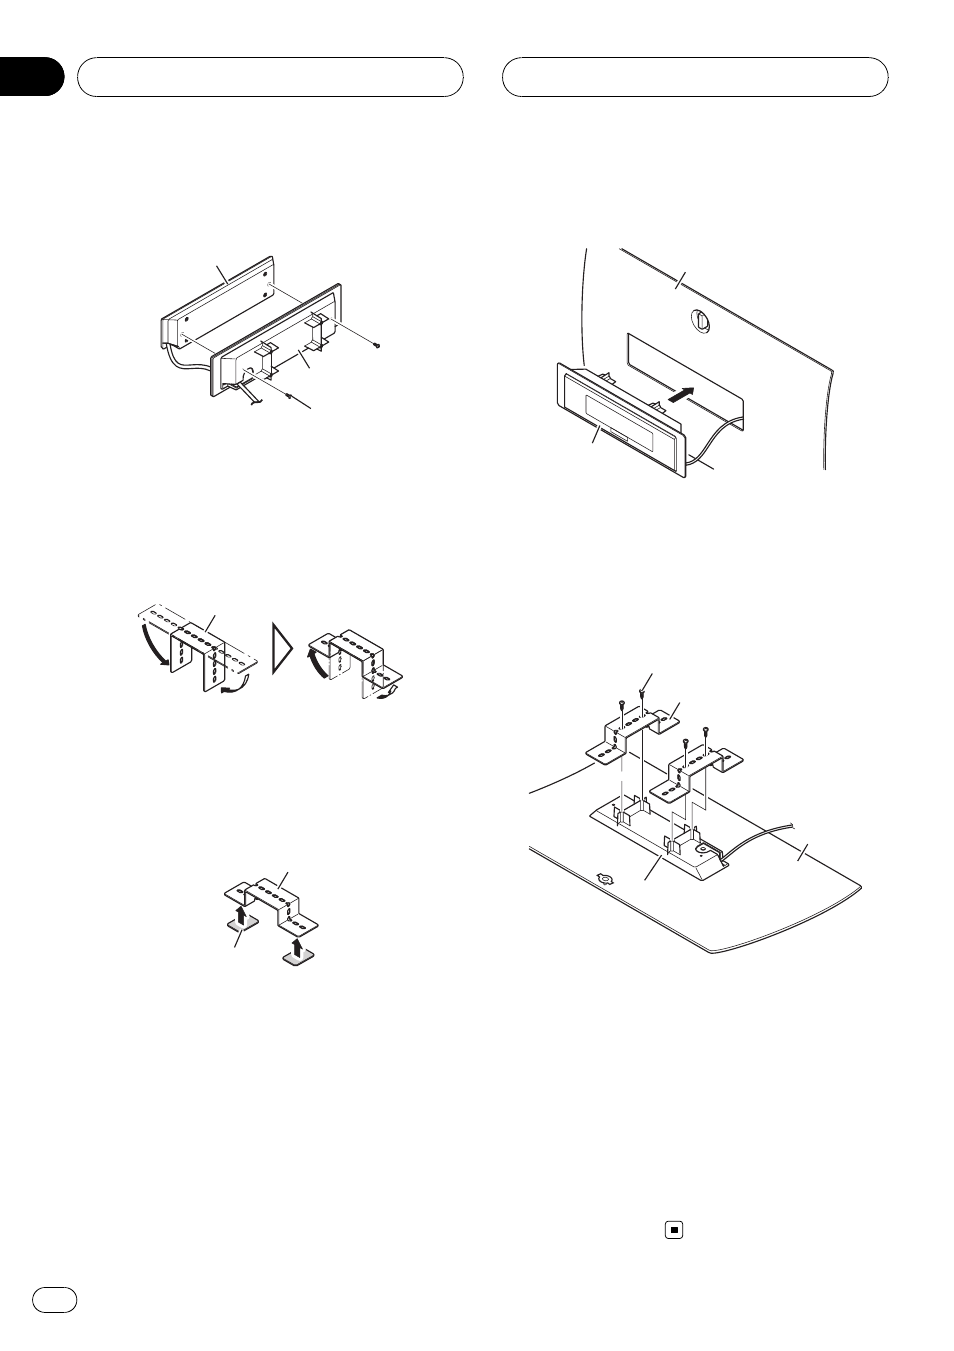
Attach the display unit and mounting
bracket with the supplied screws.
2
1
3
1 Display unit
2 Mounting bracket
3 Screw (2.6 mm × 5 mm)
5
Bend the metal bands as illustrated.
Bend the metal bands to fit the place where
you want to install the display unit.
1
1 Metal band
# The metal bands are stiff. To bend the metal
bands, we recommend that you use pliers or vise.
6
Affix the double-sided tape to both
ends of the metal bands.
2
1
1 Metal band
2 Double-sided tape
7
Apply the display unit to the dashboard
or console panel.
2
1
1 Dashboard or console
2 Display unit
8
Attach the mounting bracket and metal
bands with the supplied screws.
! Make sure that the display unit is firmly
seated.
1
2
3
4
1 Screw (3 mm × 12 mm)
2 Metal band
3 Dashboard or console
4 Mounting bracket
9
Route the display cable.
Secure the display cable so that it will not in-
terfere with operation of the vehicle.
# To protect the display cable, wrap protection
tape around it where they lie against metal parts.
10 Fix the dashboard or console panel to
the original place.
Installation
En
36
Section
09