Installation installing the hide-away unit, Installing the hide-away unit, Installation – Pioneer AXM-P90RS User Manual
Page 32
Important
! Check all connections and systems before
final installation.
! Do not use unauthorized parts. Use of un-
authorized parts may cause malfunctions.
! Consult your dealer if installation requires dril-
ling of holes or other modifications to the vehi-
cle.
! Install the unit where it will not get in the dri-
ver
’s way and will not injure passengers if
there is a sudden stop.
! When mounting this unit, make sure none of
the leads are trapped between this unit and
the surrounding metalwork or fittings.
! Do not mount this unit near heater outlets
where it would be affected by heat, or near the
doors where rainwater might splash onto it.
! Before drilling any mounting holes, always
check behind where you want to drill the
holes. Do not drill into the gas line, brake line,
electrical wiring or other important parts.
! If this unit is installed in the passenger com-
partment, anchor it securely so it does not
break free while the vehicle is moving, caus-
ing injury or an accident.
! If this unit is installed under the front seat,
make sure it does not obstruct seat move-
ment. Route all leads and cords carefully
around the sliding mechanism so they do are
not caught or pinched in the mechanism and
cause a short-circuit.
Installing the hide-away unit
1
Attach the mounting brackets to the
hide-away unit.
1
2
3
1 Hide-away unit
2 Screw (4 mm × 8 mm)
3 Mounting bracket
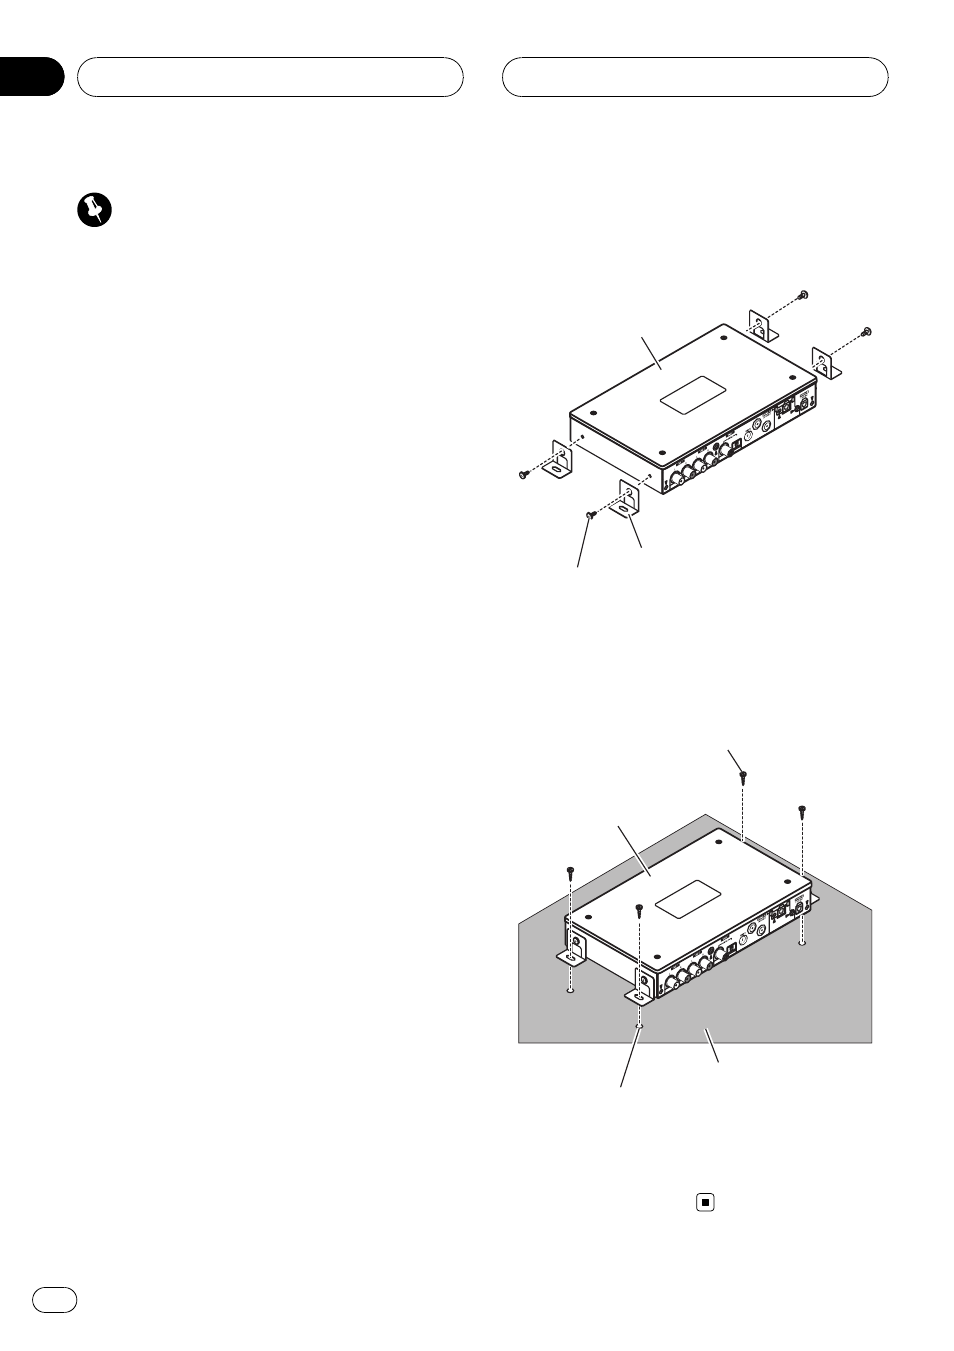
2
Install the hide-away unit in the car.
1
2
3
4
1 Hide-away unit
2 Tapping screw (4 mm × 12 mm)
3 Drill a hole of 2 mm to 2.5 mm
4 Car mat or chassis
Installation
En
32
Section
09