Connecting the camera to a printer, G "connecting the camera to a printer" (p. 146) – Olympus E-500 User Manual
Page 146
146
Direct printing (PictBridge)
9
Pr
inting
Connecting the camera to a printer
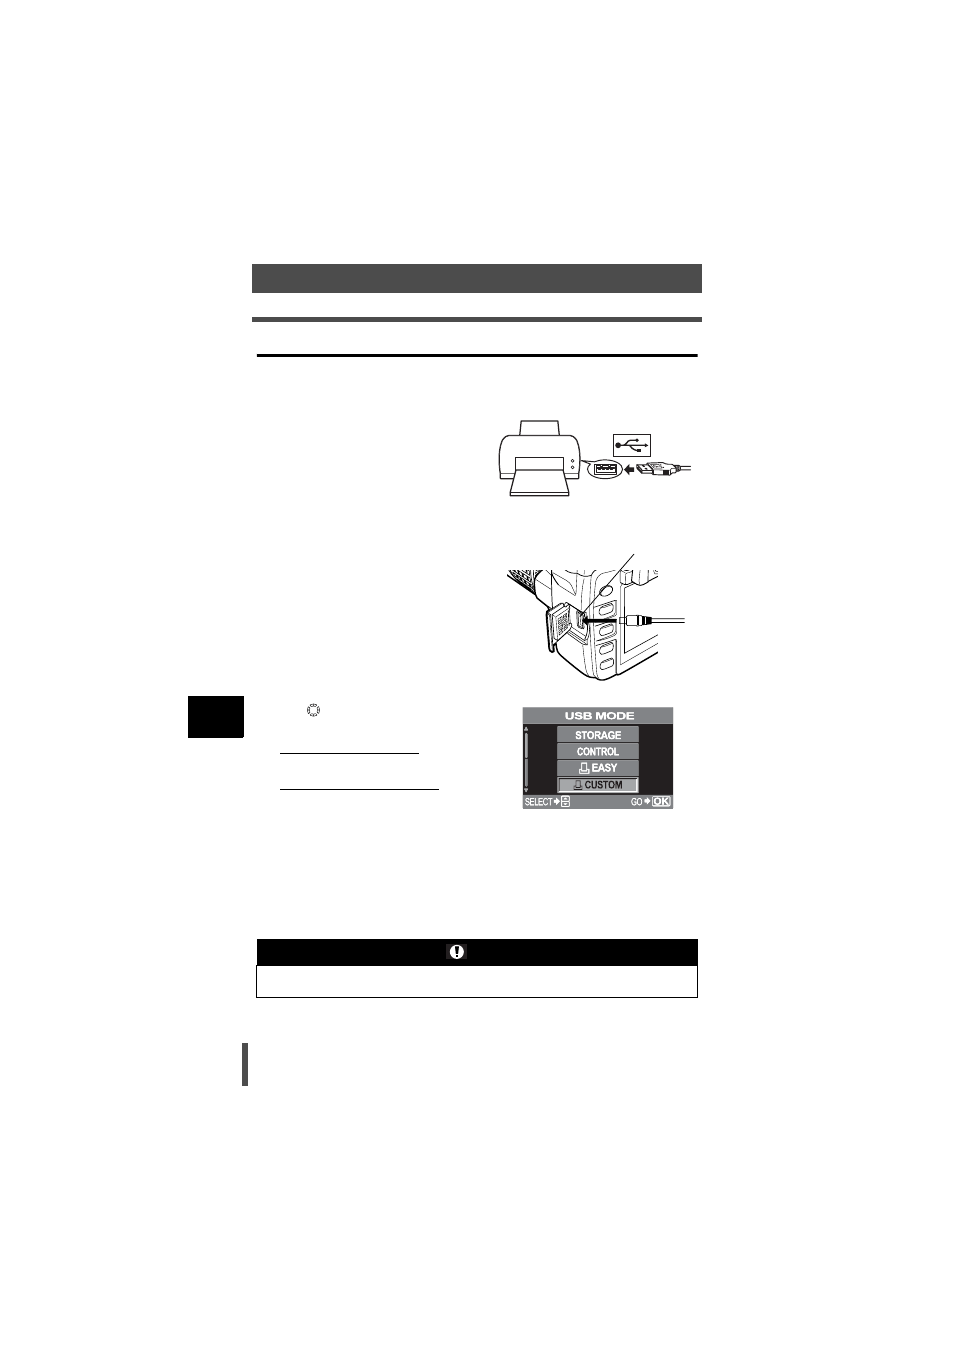
Use the USB cable provided to connect the camera to a PictBridge-compatible
printer.
1
Turn the printer on and plug the
printer end of the USB cable into
the printer's USB port.
• For details on how to turn the printer
on and the position of the USB port,
refer to the printer's instruction
manual.
2
Plug the USB cable into the
camera's multi-connector and
turn the camera on.
• The selection screen for the USB
connection is displayed.
3
Use
to select [
< EASY] or
[
< CUSTOM].
If you select [
< EASY]
Go to "Easy printing" (P. 147).
If you select [
< CUSTOM]
ONE MOMENT is displayed and
the camera and printer are
connected. The PRINT MODE
SELECT screen is displayed on
the monitor. Go to "Flowchart for
custom printing" (P. 147).
Notes
• If the screen is not displayed after a few minutes, turn off the camera and start again
from Step 2.
Multi-connector