2 setting the dip-switches, Setting the dip-switches, Figure 5: dip-switch settings – Kramer Electronics VS-88HDxl User Manual
Page 18: Table 3: machine # dip-switch settings, Table 4: dip-switch settings, Table 3, Connecting the vs-88hdxl, 14 table 3: machine # dip-switch settings
KRAMER: SIMPLE CREATIVE TECHNOLOGY
Connecting the VS-88HDxl
14
Table 3: Machine # DIP-Switch Settings
Machine #
DIP-SWITCH
1
2
3
4
1 (Single or
master unit
OFF
ON
)
OFF
OFF
OFF
OFF
OFF
OFF
2
OFF
ON
OFF
OFF
3
ON
ON
OFF
OFF
4
OFF
OFF
ON
OFF
5
ON
OFF
ON
OFF
6
OFF
ON
ON
OFF
7
ON
ON
ON
OFF
8
OFF
OFF
OFF
ON
9
ON
OFF
OFF
ON
10
OFF
ON
OFF
ON
11
ON
ON
OFF
ON
12
OFF
OFF
ON
ON
13
ON
OFF
ON
ON
14
OFF
ON
ON
ON
15
ON
ON
ON
ON
Note: After changing the address, the device must be reset by turning OFF
and ON.
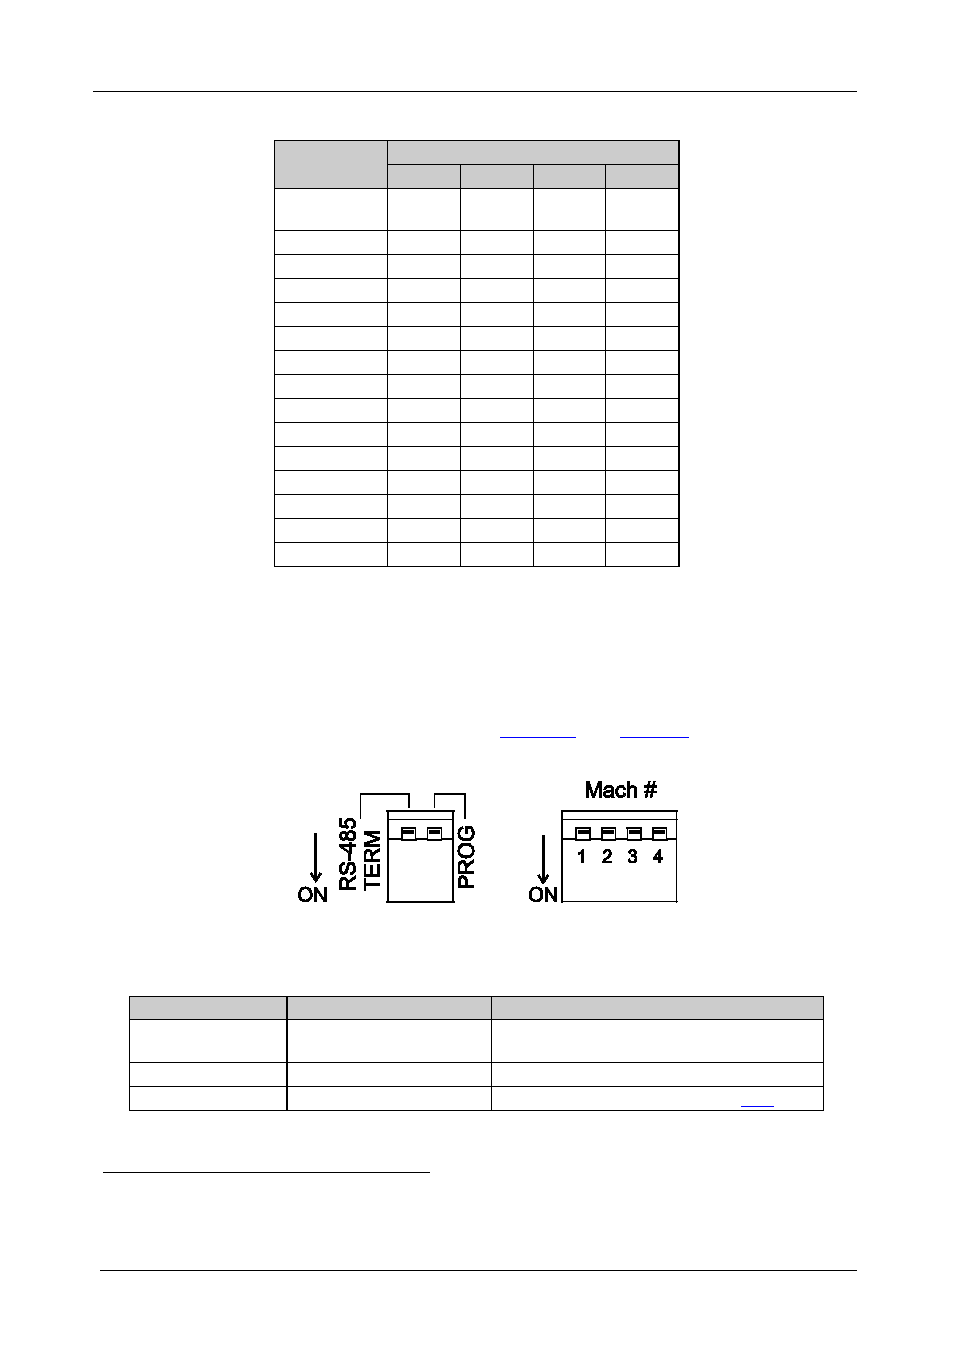
6.4.2 Setting the DIP-Switches
When controlling a unit via the RS-232 or RS-485 ports set the
DIP-switches on the rear of the unit.
DIP-switches
:
Figure 5: DIP-Switch Settings
Table 4: DIP-Switch Settings
DIPS
Function
Description
RS-485 Term
RS-485 line termination
OFF for no RS-485 line termination
ON for RS-485 120
Ω line termination
PROG
Firmware update
Set ON only to update device firmware
MACH # 1, 2, 3, 4
Self Address
Sets the MACHINE # (see section
1 A single or master unit can have the address 0 or 1
2 The default address is 0 (all DIP-switches are OFF)