Category cable wiring – Muxlab USB 2.0 4-Port Extender Kit User Manual
Page 6
USB 2.0 4-Port Extender Kit
Installation Guide
6.2.3.
Installing the Receiver
(Remote Unit)
1. Plug the other end of the Cat. 5 cable into the Link port (RJ-45) on the receiver.
2. Plug the 5VDC, 2A power adapter into the receiver, and AC plug into the power
receptacle.
Note: Make sure to plug the 5VDC 2A power adapter on the receiver side.
3. The Red Power LED indicator lights on.
4. Connect the USB devices through USB cables into the Receiver’s USB ports labeled 1
to 4 on receiver.
LED
Status
Definition
Color
Power
Red
Indicates that the 5VDC power adapter is plugged in.
Activity
Green
Indicates that both the transmitter and the receiver are
powered on and the Cat5 cable is connected properly.
Link
Orange
Indicates that the USB ports are plugged in.
6.3 Checking the Installation
1. Check the Activity (Green) and Link (Orange) LED indicators light on both the
transmitter and the receiver.
2. For Windows users (2000, XP, Vista, 7, 8, and 8.1), open Device Manager to confirm
the extender has been installed correctly. Expand the Entry and check the USB
controllers. If the extender is installed correctly, it should be listed as a “Generic USB
Hub.”
3. For Mac OS X users, open the System Profiler to confirm that the extender has been
installed correctly. In the left column under Hardware, select “USB” and check the right
panel. If the extender has been installed correctly, you should find it listed as a “Hub”
under the USB High-Speed Bus/USB Bus.
4. If the extender is not detected correctly or fails to detect, go to the Troubleshooting
section of this manual.
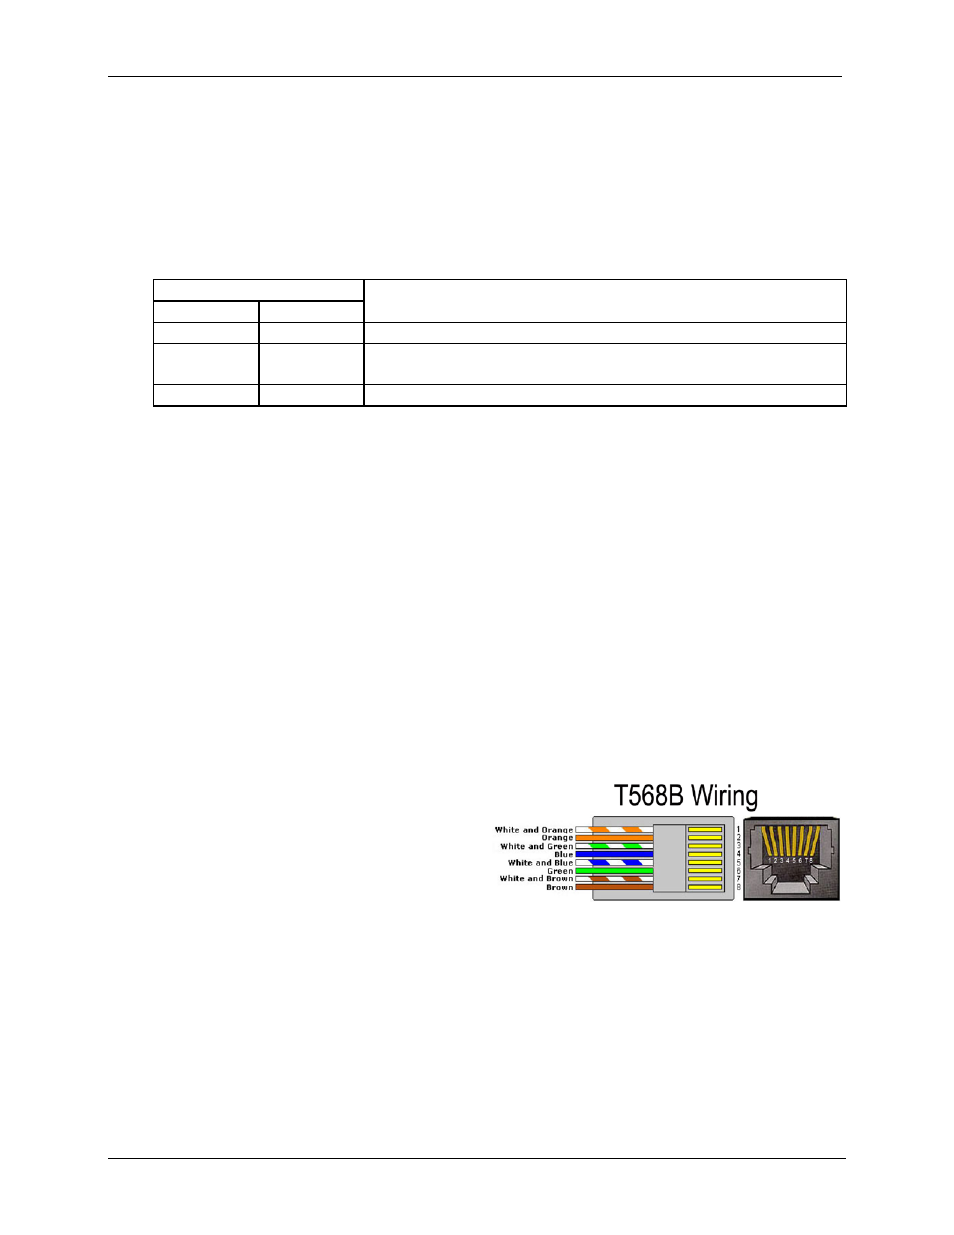
7. Category cable wiring
Take precaution selecting the Cat. 5 wires
before connecting; use a cable tester to check
the wires are correctly terminated. (Incorrect
Termination may cause damage to the
receiver unit). Recommend to use T568B
wiring as shown.
© MuxLab Inc. 2014
6