How to check camber, Correct caster checking procedure – Mittler Bros Machine & Tool 57400 Caster Camber User Manual
Page 2
+1
+2
+3
+4
+5
+6
+7
+8
-8
-7
-6
-5
-4
-3
-2
-1
-6
1/2
-5
1/2
-4
1/2
-3
1/2
-2
1/2
-1
6
1/2
5
1/2
4
1/2
3
1/2
2
1/2
1
20 Degree Angle
20 Degree Angle
Camber Negative
Camber Positive
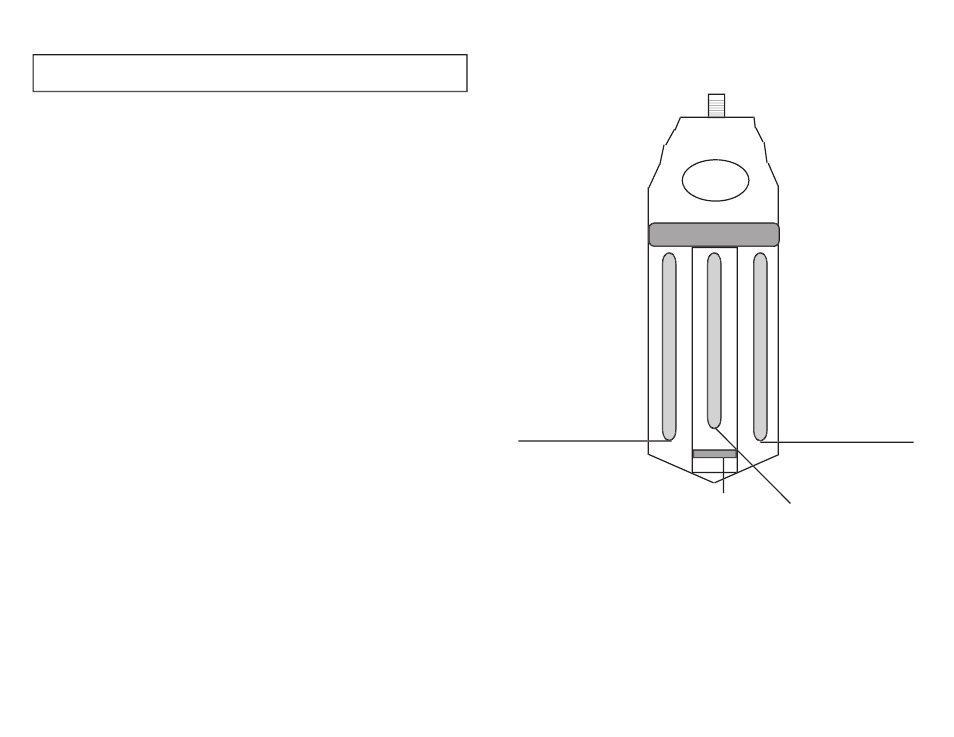
Caster
Threaded Bolt for
Adapter Interchange
1.
Remove the dust cover from both sides of your
vehicle.
2.
If you are using a screw on style gauge you
may be required to remove the cotter pin
and lock nut assembly to expose the threads.
3.
Attach the gauge to the spindle or hub.
4.
Position wheels straight ahead.
5.
You may now take a direct reading to
determine how much camber you have.
Read to the center of the bubble.
1.
Position gauge on spindle or hub.
2.
Turn wheel towards the out direction 20 degrees. If you
do not have turn plates, the end of the gauge has been
machined with 20 degree angles for a easy reference.
This machined area will be parallel with the centerline
or side of your vehicle.
3.
Using the adjusting screw on the bottom of the gauge,
adjust this until your caster vial (center vial) reads 0.
4.
Turn your wheels until they are 20 degrees in. You
will now have moved the wheel through 40 degrees of
rotation. Level the gauge by the end level vial.
5.
Take a direct reading from the caster vial. This is your
caster.
CORRECT CASTER CHECKING PROCEDURE:
HOW TO CHECK CAMBER:
LEVEL
VIAL
HINT: Always keep the Caster Camber gauge parallel to the horizon.
You may do so by checking the level vial.