Important please read first – Edsal 1UFE9 User Manual
Page 2
This instruction sheet was designed to help you assemble this unit in the proper way, please follow them using all
parts and fasteners provided. Any alteration or deviation from this instruction sheet can result in unit failure. If
you have any assembly problems or questions, please feel free to contact our Alera Manufacturing facility at 1-
800-336-0671 and ask for customer service. We have people available to assist you if need be with any part of
this assembly process.
IT IS HIGHLY RECOMMENDED TO ASSEMBLE THIS UNIT AT EYE LEVEL, AND WITH THE HELP OF AN
ADDITIONAL PERSON. Using a RAISED surface such as a TABLE or DESK, will greatly EASE the ASSEMBLY
PROCESS. Assembly attempted on a much lower surface such as the floor, is still possible but does make the
assembly process longer and harder. During the shipping and handling of this product, some of the panels may
have a MINOR bend such as on a corner, or a door hinge pin. This minor variation can be REPAIRED SIMPLY
by using a SMALL TOOL or your HAND to move the material back to its designed form. Some of the materials
used in the packaging to protect the parts from damage may leave dust or smudges on the steel panels. It is
RECOMMENDED AFTER ASSEMBLY IS COMPLETE to use a MILD SOAP and WATER with a SOFT CLOTH
to wipe the unit clean.
Assembly Instructions
Assembly Instructions
Assembly Instructions
-
-
-
Page 2
Page 2
Page 2
Important Please Read First
Important Please Read First
Important Please Read First
This assembly process uses screws, and nuts to hold the parts together. To speed the assembly proc-
ess, have the necessary nut driver or socket wrench, and a screwdriver ready. Also have your pack-
aged hardware at close reach. After unpacking all the panels, visually inspect the corners. These are
the most susceptible to damage through the shipping and handling process. If you find a corner bent or
out of place, use your hand and gently move the corner back to the designed shape.
Getting Started
Getting Started
Getting Started
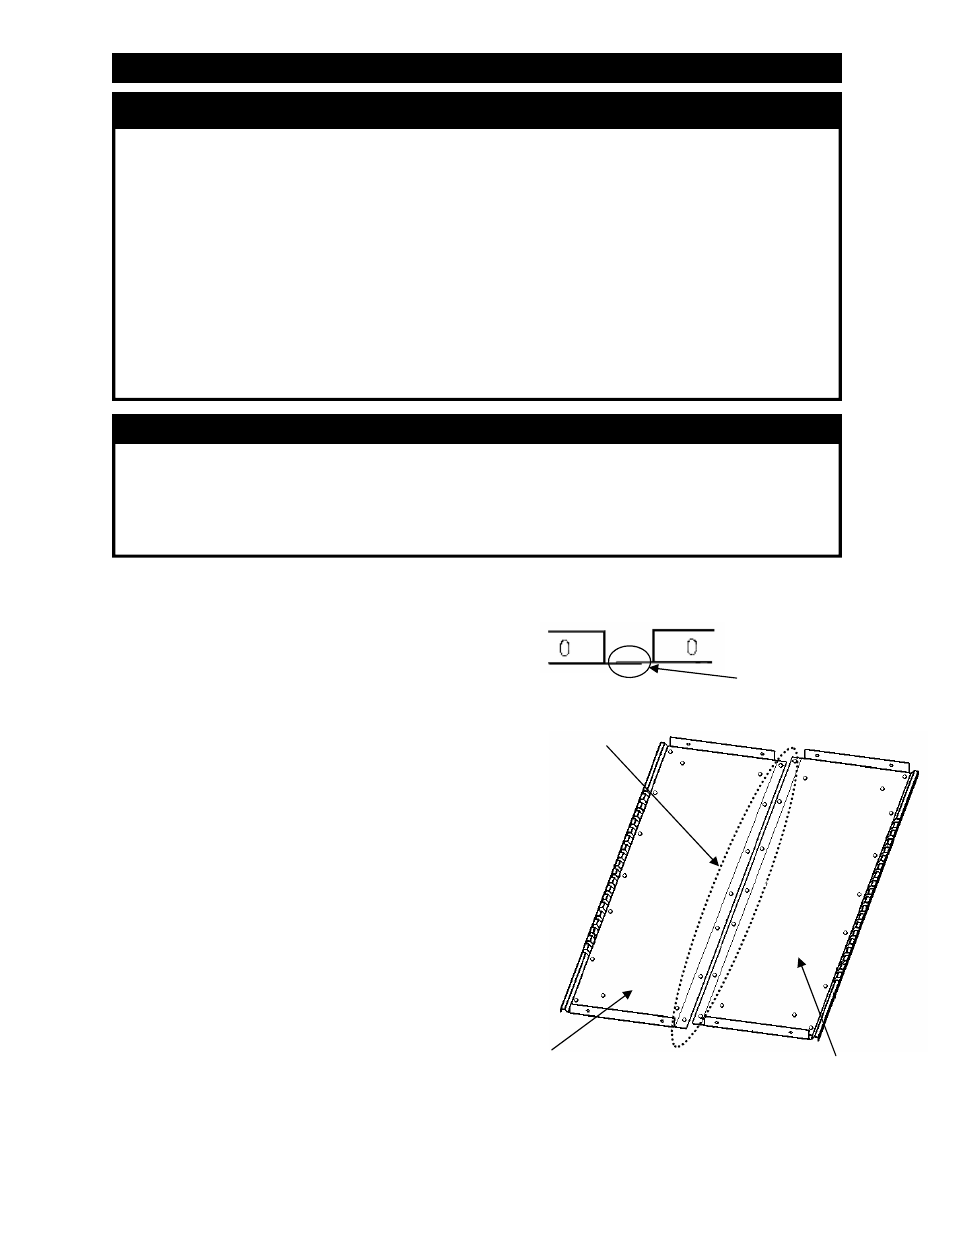
Step 1 - Back Assembly
Place the left and right hand backs on a level surface.
Position the parts so that the offsets over lap (see figure
1 for reference). Check that the screw holes on the back
panels have properly aligned. Use your small tipped
screwdriver to assist in aligning the screw holes if neces-
sary. Using the 10-24 x 3/8” screws and nuts provided,
bolt the backs together to complete the back assembly
(see figure 1 for reference).
Figure 1 – Back Assembly
Backs Overlap
Screw locations
Left Hand Back
Right Hand Back
Unit Top
Unit Bottom