Myron L 729II User Manual
Page 22
18
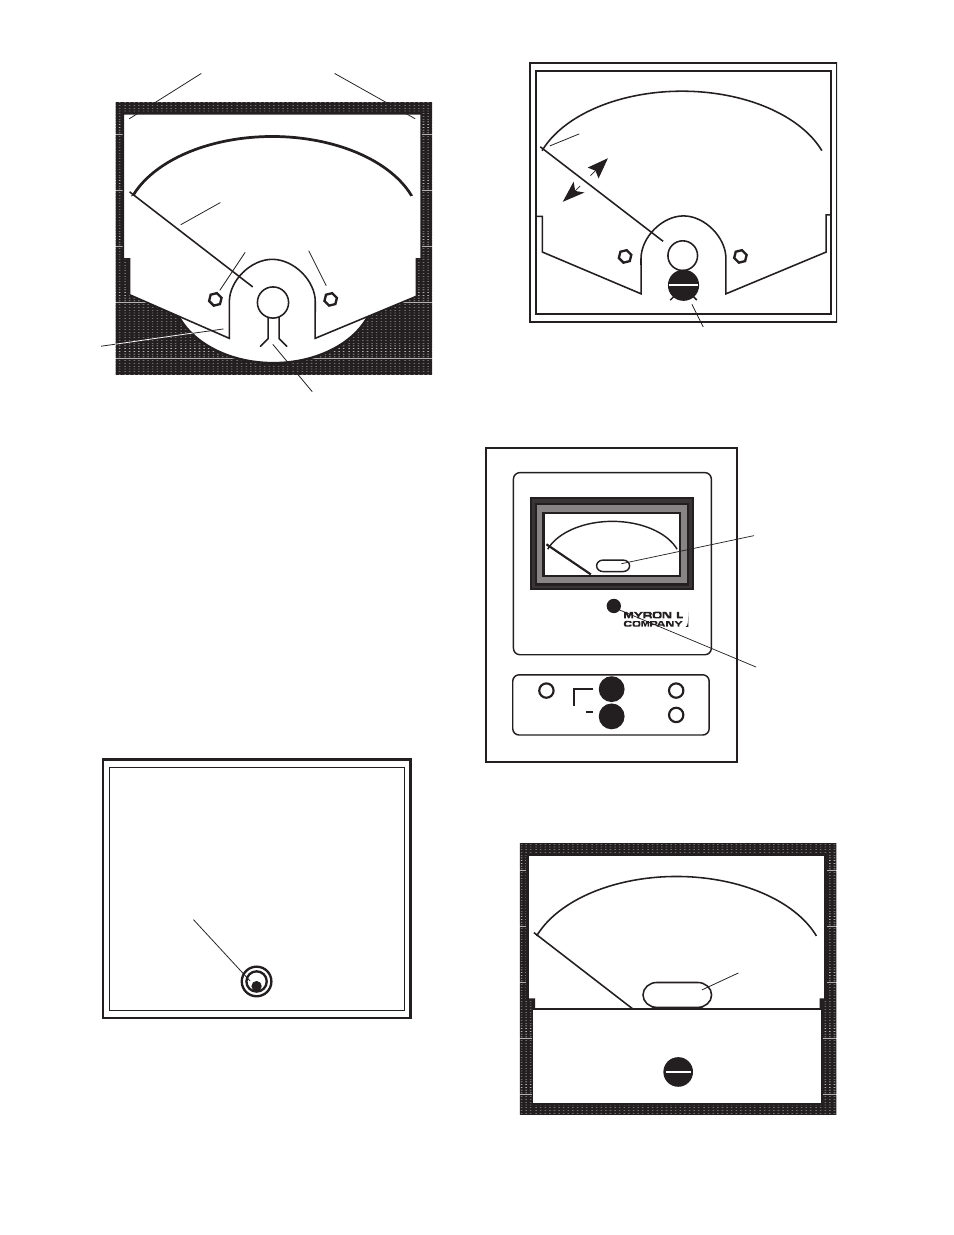
4. LABEL CHANGE
Since you have re-ranged your Monitor/controller it may be
necessary to relabel it. If you made any one of the following
changes it will be necessary to “add or change” the designator
label on the Front Panel. Pick the correct label and apply to the
Front Panel as shown in figure II.G.10. If there is an overlay
label already in place remove it and clean the surface with
isopropyl alcohol (rubbing alcohol) before installing the new
label. A clean surface will allow the new label to adhere to the
surface better.
1. Did you change from µS to mS, PPM or PPT?
2. Did you change from mS to µS, PPM or PPT?
3. Did you change from PPM to PPT, µS or mS?
4. Did you change from PPT to PPM, µS or mS?
5. Do you need to install a Multiplier label as in figure
II.G.11.
REASSEMBLY
1. Carefully reinstall the front panel, bottom first, ensure
no wires have been pinched.
2. Reinstall the four (4) screws and tighten.
3. To operate, turn power ON.
Grasp Scale Here
and Slide Out TOP
SCALE
(dial)
Pointer
(needle)
Inverted "Y"
1/8" (3.18mm)
Hex Screws (2)
METER CASE
Press
Lightly
Here
0
CENTER Zero Adjust (ZA) PIN
SCALE
(dial)
X
1000
Multiplier Label
(
X
1000 example)
0
FRONT PANEL
Multiplier Label
(X1000 example)
750II
MICROSIEMENS / CM
X1000
ZERO ADJUST
under rubber plug.
HIGH
LOW
SET POINT
Zero Adjust (ZA)
Align Pointer with FIRST Line
0
Figure II.G.7
CLEAR PLASTIC COVER
(Inside View)
Figure II.G.8
CLEAR PLASTIC COVER
(case not shown for clarity)
Figure II.G.9
Figure II.G.10
OEM ANALOG METER
Figure II.G.11