Vertical contact toaster, Maintenance (continued) – A.J. Antunes & Co VCT-20 9200552 User Manual
Page 14
14
VERTICAL CONTACT TOASTER
P/N 1010719 Rev. E 02/13
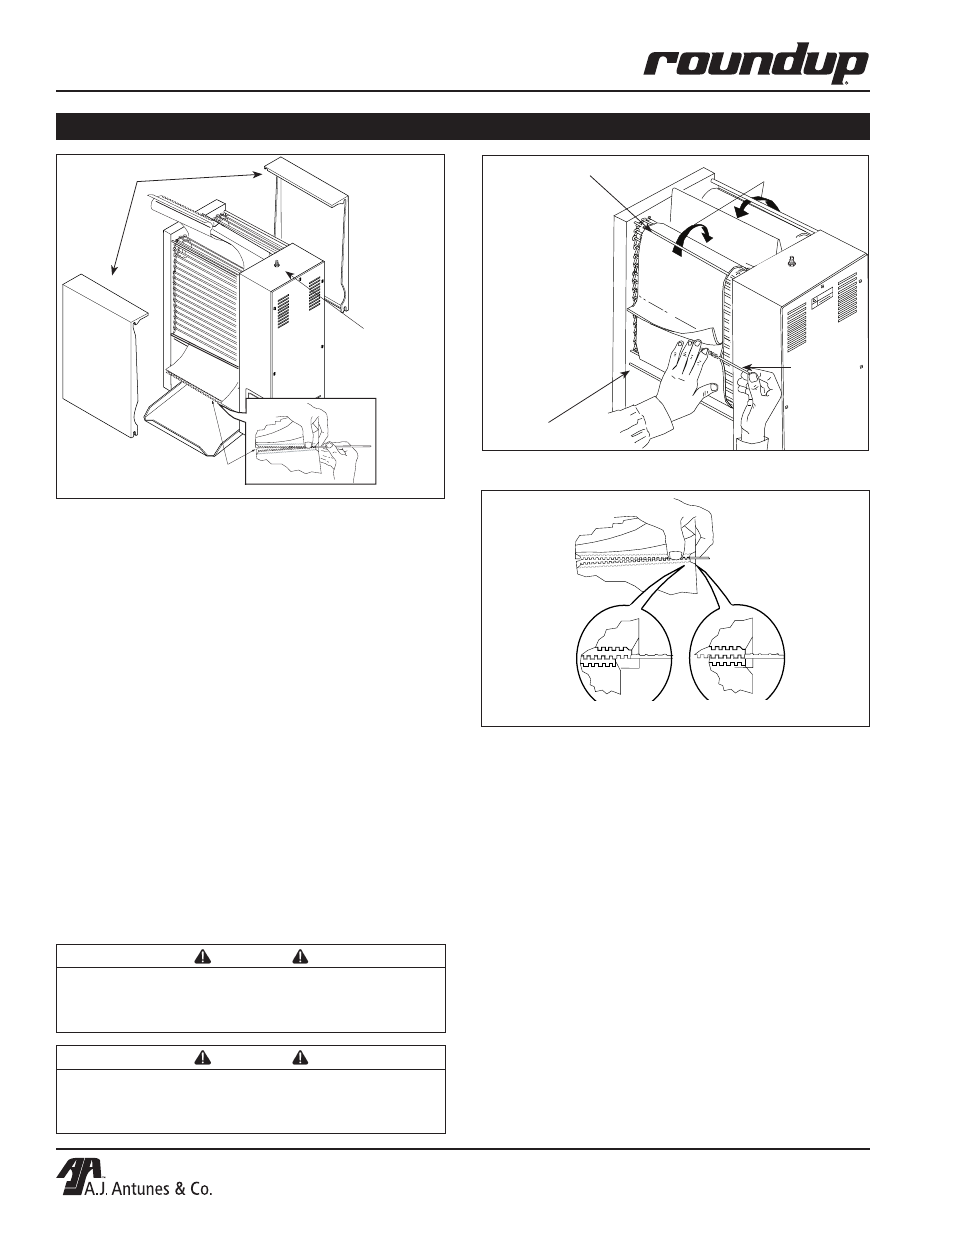
Figure 11. Removing Belt Wrap
Belt Wrap Pin
Conveyor
Cover Assy.
Interlock
Switch
NOTE: Check the release sheet to make sure it is
not caught in the conveyor. Additional release
sheets can be obtained through your authorized
service agency under part no. 7000110 (3 pack) or
7000111 (10 pack).
Replacing Belt Wraps
1. Turn off rocker switch, unplug the power cord and
allow the unit to cool down before proceeding.
2. Remove the Heat Shield, Front Conveyor Cover,
Rear Conveyor Cover, Bun Chute and Release
Sheet.
3. Turn bun compression Control Knobs to “6”
(Figure 6).
4. Move belt wraps until connecting hinge is
exposed and centered, then remove both front
and rear belt wraps (Figure 11).
5. The belt wraps must be installed properly in order
to work correctly (Figure 12).
CAUTION
Figure 12. Installing Belt Wrap
Figure 13. Aligning Belt Teeth
Belt Wrap
Pin
Belt Rotation
Upper Support Rod
Lower Support Rod
6. Install the belt wraps as shown in Figures 12 &
13.
7. Set bun compression control knobs to “6”
(Figure 6).
8. Install a new release sheet (Figure 11).
9. Install the front conveyor cover and rear conveyor
cover.
10. Push the cover so the top cover slots slide over
the top conveyor support rods and latch into
place.
11. Install bun chute and heat shield.
MAINTENANCE (continued)
CAUTION
Be sure conveyor belt wrap is positioned UNDER
the upper and lower support rods or damage to
the unit will occur.
CAUTION
Be sure conveyor belt wrap ends are aligned as
shown in Figure 13 or damage to the conveyor
belt wrap will occur.
INCORRECT
CORRECT