Nikon 900 User Manual
Page 33
- 33 -
Basic Photography: Using the Flash
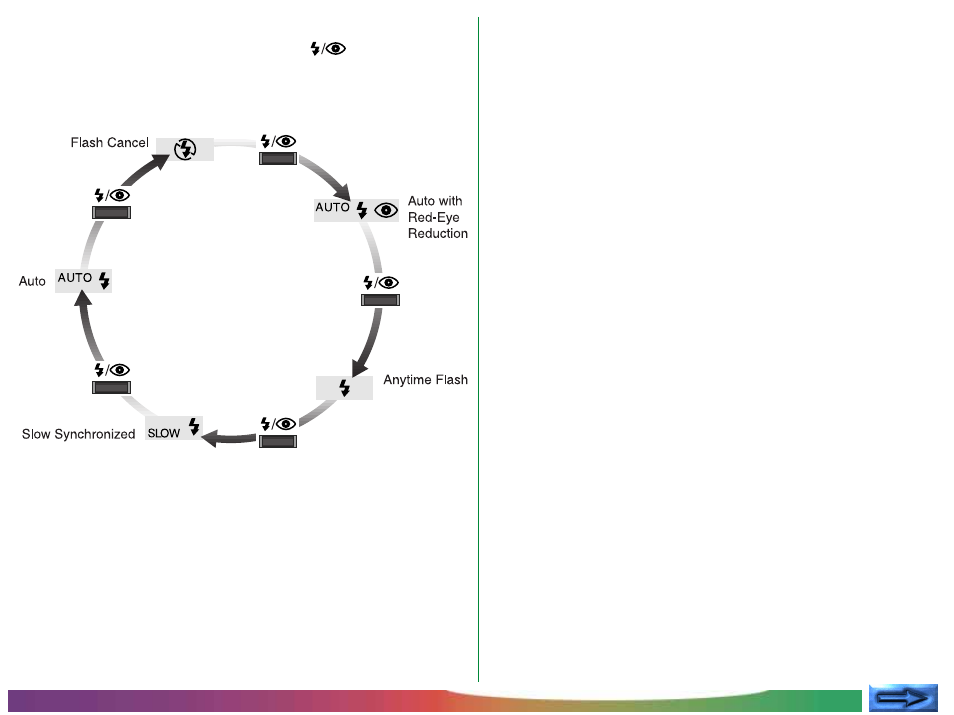
The current flash setting can be changed when the camera is in
A-REC or M-REC modes by pressing the
button to cycle
through the flash modes in the order “Auto,” “Flash Cancel,”
“Auto with Red-Eye Reduction,” “Anytime Flash,” and “Slow
Synchronized.”
Note:
The current flash mode is stored in memory when the
camera is turned off and will be restored when the camera is next
turned on.
When the flash is set to “Auto”, pressing the shutter release
button half-way will activate the auto exposure circuitry, causing
the flash to charge when there is not enough light. A flash
setting of “Anytime Flash” or “Slow Synchronized” causes the
flash to charge each time the shutter release button is pressed.
The red flash indicator next to the viewfinder will blink while the
flash charges. When the flash is fully charged, the flash indicator
will turn off, and you can press the shutter button the rest of
the way down to fire the flash and record a photograph.
Remember that when lighting is poor, shutter speed is slowed,
making images more susceptible to blurring. If possible, use a
tripod when making photographs in poor lighting conditions.
Note:
When using the flash, be careful not to place your finger
over the flash window.
✔Caution:
Using the flash close to your subject’s eyes could
produce temporary visual impairment.
Note:
The COOLPIX 900’s built-in flash has a range of two
meters at maximum zoom, three meters at minimum zoom
(maximum angle). At a focus setting of “Infinity,” the flash will
automatically be set to “Flash Cancel” and will not fire even when
lighting is inadequate.