1 connecting to the ethernet – Allied Telesis AT-ARW256E User Manual
Page 6
AT-ARW256E Quick Installation Guide
Chapter 1: Connecting the Wireless ADSL
Router to Your Computer/Notebook
Power off your Computer/Notebook or/and any connected devices before
connecting to the Wireless ADSL Router!
1.1
Connecting to the Ethernet
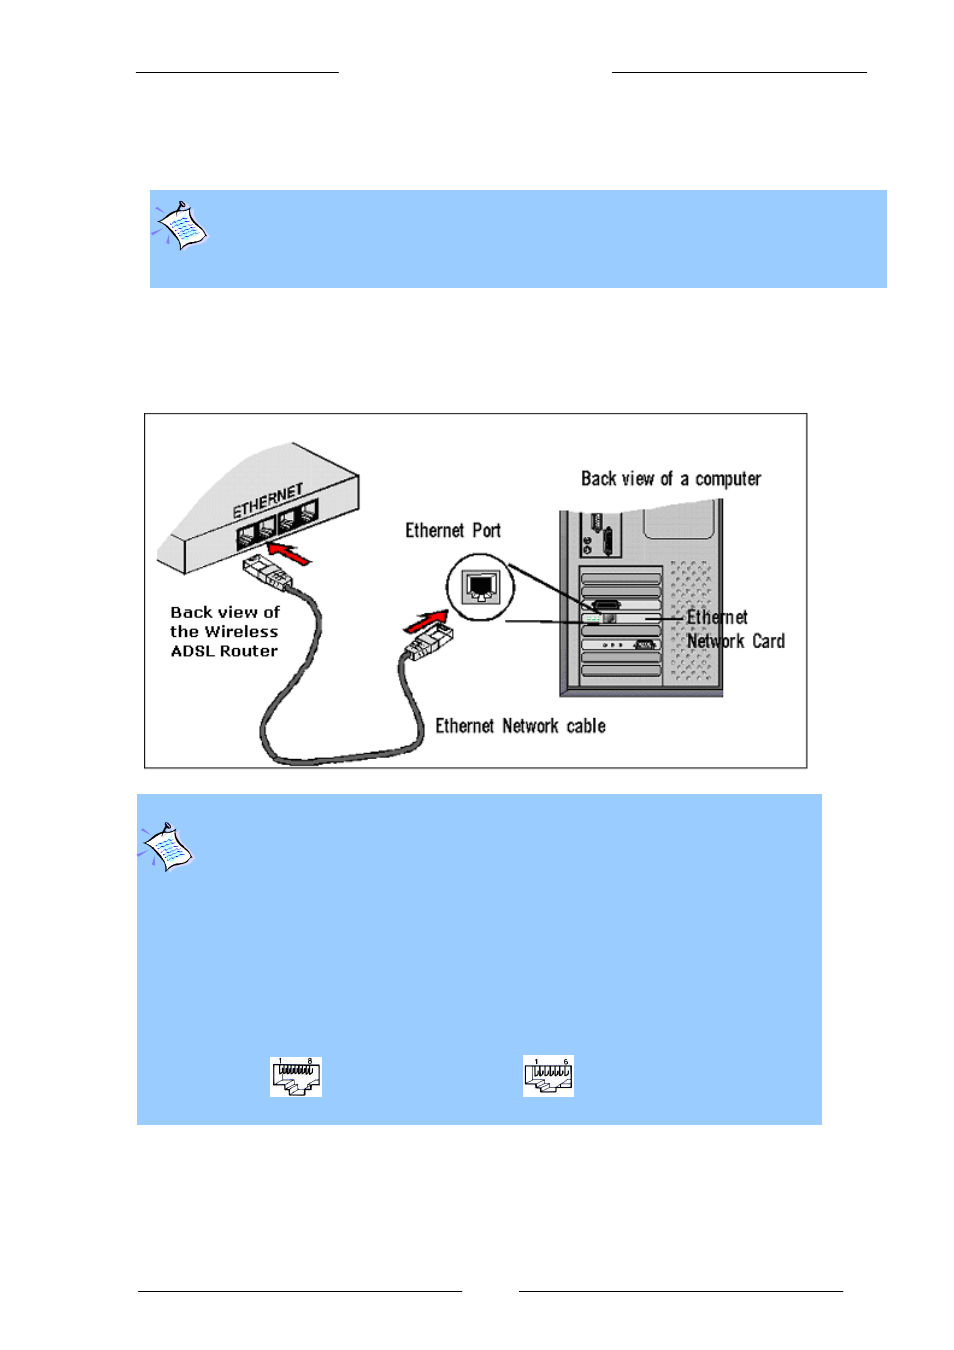
Connect your computer(s)/notebook(s) to the Wireless ADSL Router as illustrated. The
following illustration shows the connection of a single computer.
NOT SURE HOW THE ETHERNET PORT LOOKS LIKE?
The following are some tips to help you locate your Ethernet Ports on your
Computer/Notebook. Alternatively, you may refer to the documentation that comes
with your Computer/Notebook.
Locating the Ethernet Port on your Computer/Notebook
Most Computers/Notebooks have labels describing the Ports. For Ethernet Port,
you will see either ETHERNET, ETH or RJ45 labelled near the Port.
If your Computer/Notebook does not have such descriptions, try the following.
-
Picture A gives the illustration of an Ethernet Port. All Ethernet Ports have
8 conductors on it. Do not mistaken with the LINE Port (Picture B) that has only 6
conductors.
-
The Ethernet Port is slightly bigger than the LINE Port.
A. ETHERNET
B. LINE
Page 6 of 32