2 starting the alliedview nms server on solaris, 2 starting the alliedview nms server on solaris -2 – Allied Telesis Telesyn AlliedView NMS System 9.0 User Manual
Page 34
Starting the AlliedView NMS Server on Solaris Starting the NMS Server from the Services Win-
AlliedView NMS Installation Guide (Starting Up AlliedView NMS 9.0)
5-2
2.
In the Control Panel, double-click the Administrative Tools folder.
3.
In the Administrative Tools folder, double-click Services. The Services window will appear.
4.
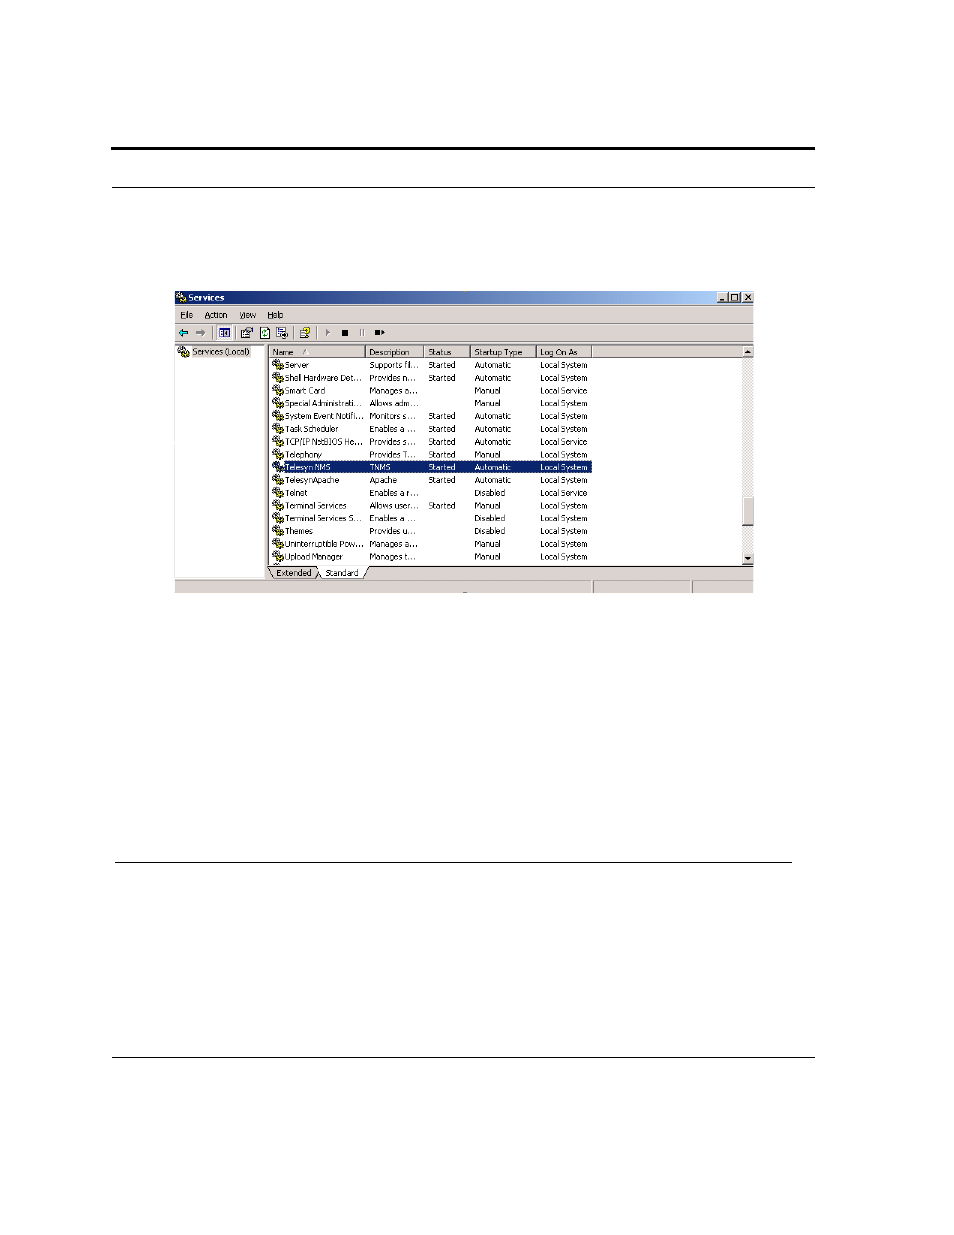
In the Services window, scroll down until you find item Telesyn NMS. This item is the AlliedView NMS
Service. Refer to the following figure for an example.
FIGURE 5-1
AlliedView NMS Automatic Service
If you chose not to install the NMS as an automatic Service, the AlliedView NMS service Startup Type will be
shown as Manual and the Status field will be blank in the Services window as shown in the previous figure.
Note:
If AlliedView NMS is an automatic Service, the Startup Type will be Automatic.
To manually start the AlliedView NMS Service, right-click Telesyn NMS in the Services window, and then
select Start from the pop-up menu. The Service Control pop-up window may appear briefly, and then the
AlliedView NMS Status field will change to Started in the Services window. Allow approximately 60 seconds
for the server to initialize. After the 60-second initialization period, the AlliedView NMS Server will be ready to
accept client connections.
Note:
The Telesyn Apache will always appear as Automatic regardless of the the state of
TelesynNMS.
5.2 Starting the AlliedView NMS Server on Solaris
To start the AlliedView NMS Server on a Solaris platform, perform the following steps:
1.
Log on as root or as a user with root privileges.
2.
Change your current directory (cd) to /opt/AlliedViewNMS/bin.
3.
Execute file startnms.sh.