Mystic, Installation (cont.) – Maximum Mystic User Manual
Page 2
MYSTIC
INSTALLATION (CONT.)
30 Samuel Barnet Boulevard
New Bedford, MA 02745
(508) 995-2200
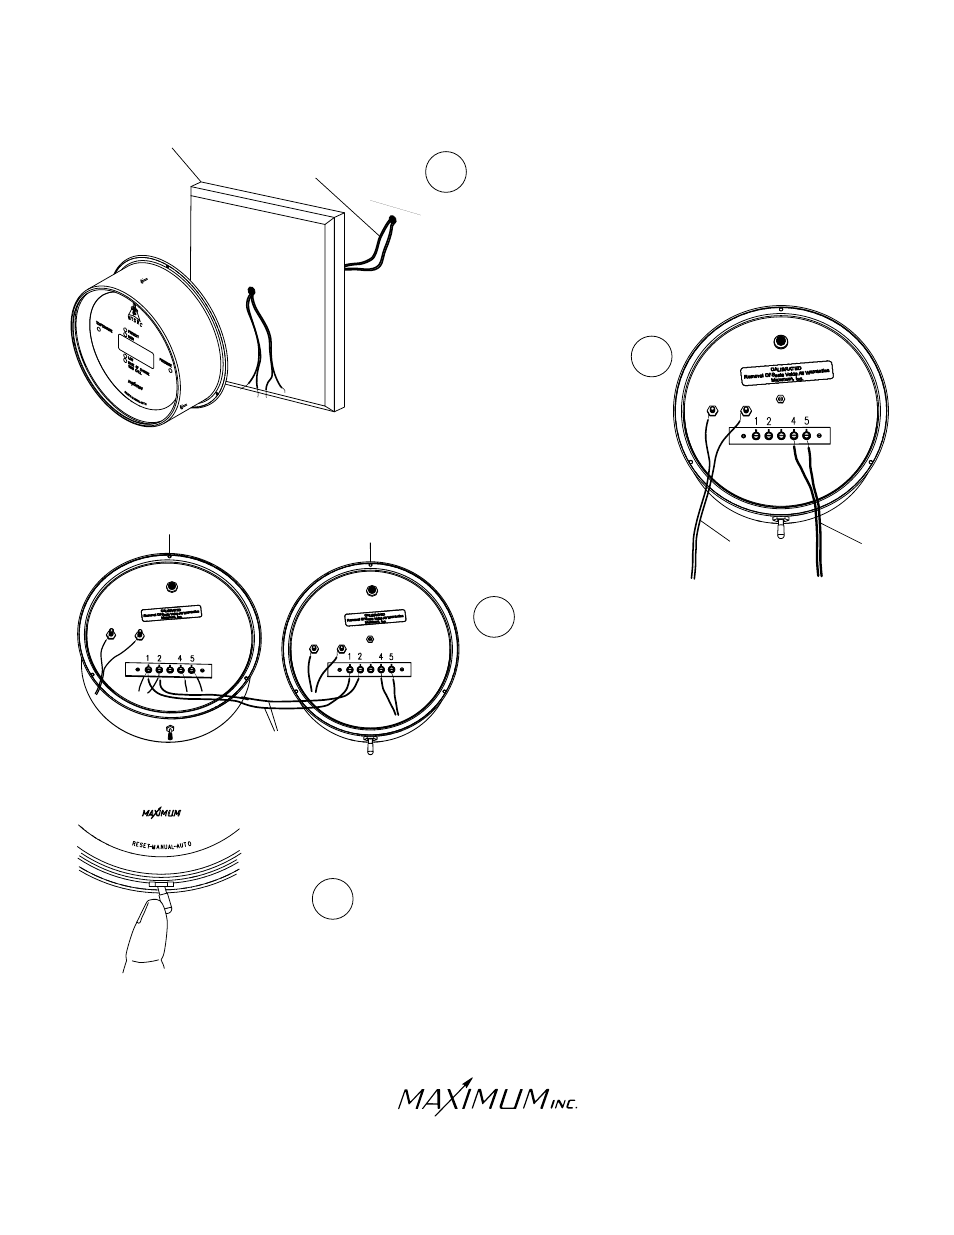
Feed the cables from the AC adapter and the temperature
sensor through the wall to Mystic. We recommend using one
of our pre-drilled panels for mounting Mystic. Take precautions
to avoid crimping the wires under the lip of the brass readout.
Connect the AC adapter wires with
the hex nuts. The polarity does not
matter. Connect the two wires from
the air-temperature sensor to
terminals 4 and 5. Again, the polarity
does not matter.
If you own a Merlin, connect the jumper wire (supplied)
to terminals #1 and #2 on Merlin. There will now be two
wires connected to terminals #1 and #2. Connect the
other end of the jumper wires to terminals #1 and #2 of
Mystic. Note that terminal #1 of Merlin connects to
terminal #1 of Mystic and #2 connects to #2.
Plug the AC adaptor into a 110VAC outlet. Mystic will power
up and self test briefly then the center display will show the
pressure adjustment mode. You must exit the adjustment
mode by moving the switch to Auto and releasing it.
6
7
8
9
CABLE FROM
AC ADAPTER
MERLIN
MYSTIC
JUMPER WIRE
CONNECTING
MERLIN AND MYSTIC
CABLE FROM
TEMPERATURE
SENSOR
OPTIONAL PANEL
CABLES FROM AC ADAPTER
AND TEMPERATURE SENSOR
WALL
NOTE: After any full reset, Mystic will display the pressure adjustment mode. It is never necessary to
perform the pressure adjustment again. Simply exit this mode by moving the switch to Auto and
releasing it.
3
3
3