4 sealing and desiccating the enclosure, Sealing and desiccating the enclosure, Rs-232, and cs i/o) to be used at a time – Campbell Scientific UT20 and UT30 Tower-based Weather Stations User Manual
Page 45: Figure 8-12), N figure 8-12, In figure 8-12
UT20 and UT30 Tower-based Weather Stations
4. Attach the barrel plug of the pn 15966 wall charger to the MD485’s Pwr
port, then plug the wall charger into an AC outlet.
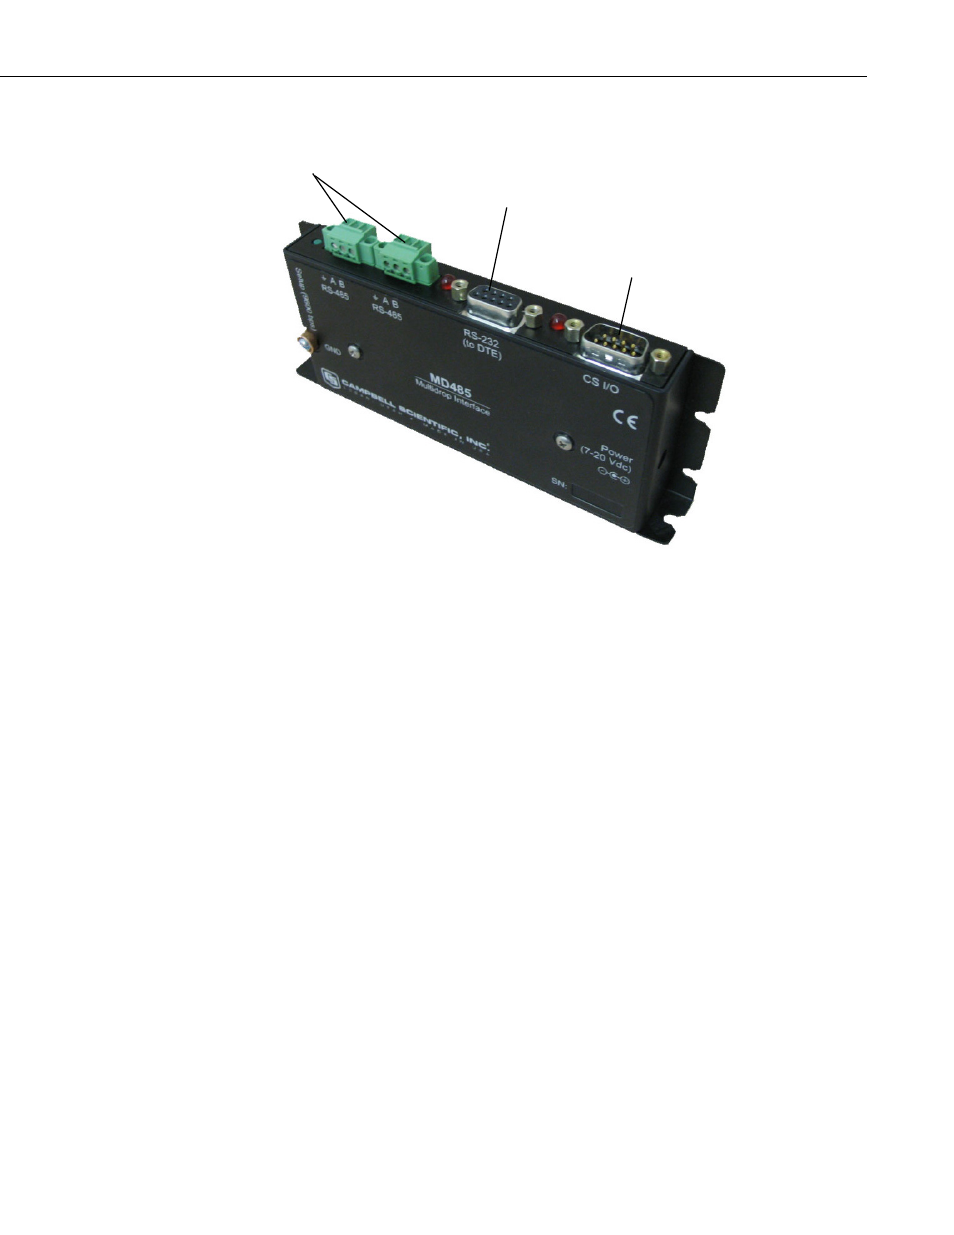
FIGURE 8-12. You can configure any two types of interface ports
(RS-485, RS-232, and CS I/O) to be used at a time
8.4 Sealing and Desiccating the Enclosure
Campbell Scientific enclosures include an Enclosure Supply Kit with the
following items:
(4) Desiccant packs
(1) Humidity indicator card
(6) 4-inch cable ties
(6) 8-inch cable ties
(4) Cable tabs
(1) 4 oz. sealing putty
Items in the Enclosure Supply Kit are used to strain relief the sensor leads, seal
cable entry, and desiccate the enclosure (see FIGURE 8-13).
1. Secure the sensor leads to the left side of the enclosure and to the
datalogger using cable ties and tabs.
2. Seal around the sensor leads where they enter the enclosure. Place a roll
of putty around the sensor leads and press it around the leads and into the
coupling to form a tight seal.
3. Remove the RH indicator card and two desiccant packs from the sealed
plastic bag. Remove the backing from the indicator card and attach the
card to the right interior wall of the enclosure.
The humidity indicator card has three colored circles that indicate the
Connects to a PC via
the pn 10873 cable
Connects to the
datalogger CS I/O port
via an SC12 cable
Connects to another MD485
via the CABLE2TP-L three
conductor 22-AWG cable
35