3 loggernet setup, 4 connect, Loggernet setup – Campbell Scientific NL240 Wireless Network Link Interface User Manual
Page 14: Connect, 2. loggernet setup
NL240 Wireless Network Link Interface
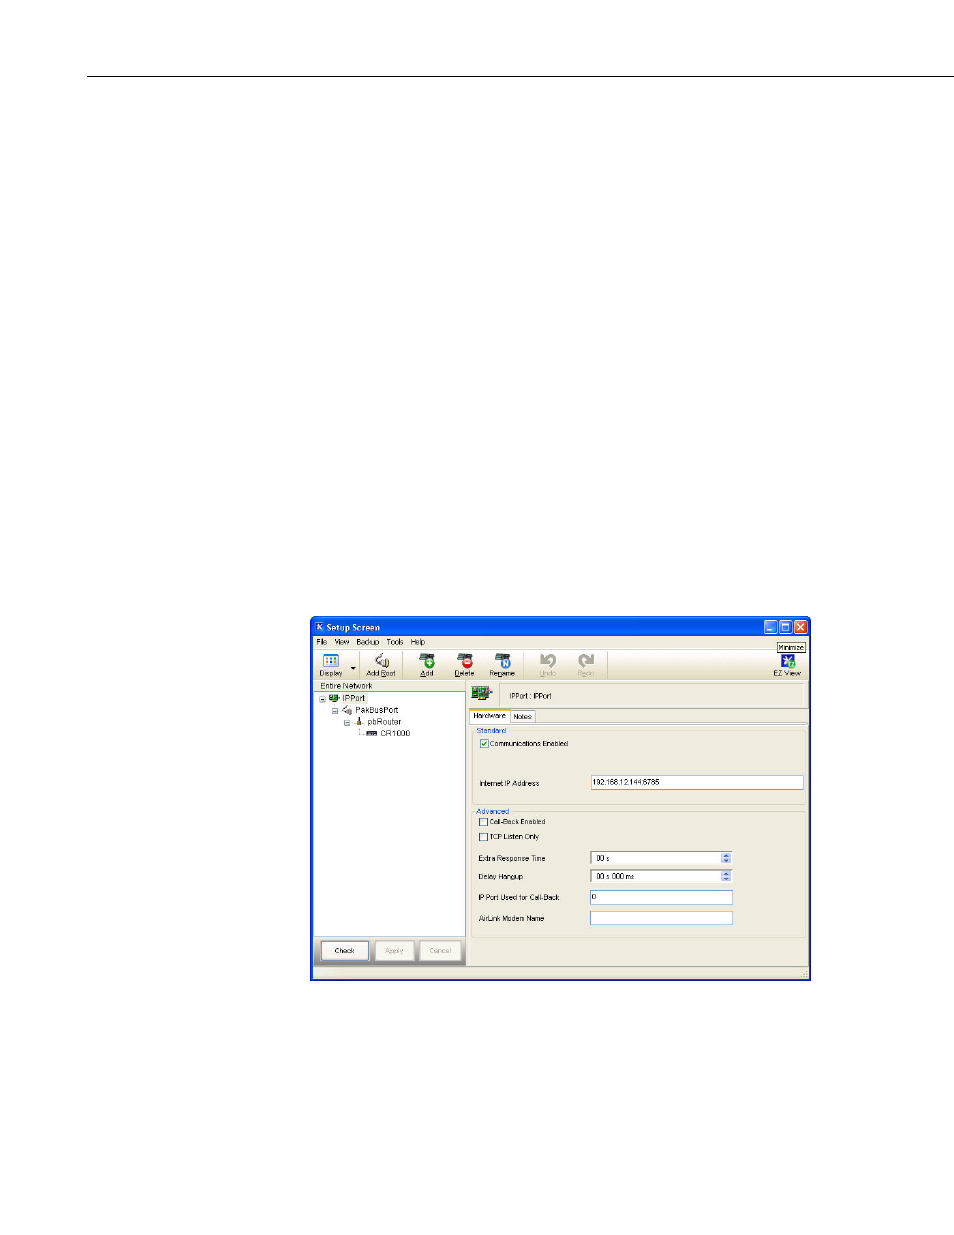
3.3 LoggerNet Setup
The next step is to run LoggerNet and configure it to connect to the datalogger
via the NL240.
•
In the LoggerNet Setup screen, press
Add Root and choose IPPort. Input
the NL240 IP address and port number. The IP address and port number
are input on the same line separated by a colon. IPv6 addresses will need
to be enclosed in square brackets when specifying a port number. An
IPv4 address may look like 192.168.1.100:6785. An IPv6 address may
look like [2001:db8::1234:5678]:6785. A fully qualified host name entry
may look like yourlogger.com:6785.
•
Add a PakBus® Port (PakBusPort).
•
Add a PakBus® Router (pbRouter). Input the PakBus address of the
NL240. The NL240 default PakBus address is 678.
•
Add the datalogger and input the PakBus® address of the datalogger.
•
Press
Apply to save the changes.
•
You can verify that your settings are correct by selecting the datalogger in
the Network Map, selecting the Clock tab, and pressing
Check Clocks. If
your settings are correct, you should see the current clock of your server
and datalogger.
FIGURE 3-2. LoggerNet setup
3.4 Connect
You are now ready to connect to your datalogger using the LoggerNet Connect
screen.
4