Campbell Scientific CM6/CM10 Tripod Weather Station Installation User Manual
Page 16
Section 2. CM6/CM10 Tripod Installation
attaches to the foot (Figure 2-2), measure up 23” on the CM10, or 26” on
the CM6, and mark each leg with a felt tip pen.
4. Each leg has a slide collar with a single bolt for loosening or tightening
the collar (Figure 2-2). Loosen the bolt on each collar with a 1/2” wrench.
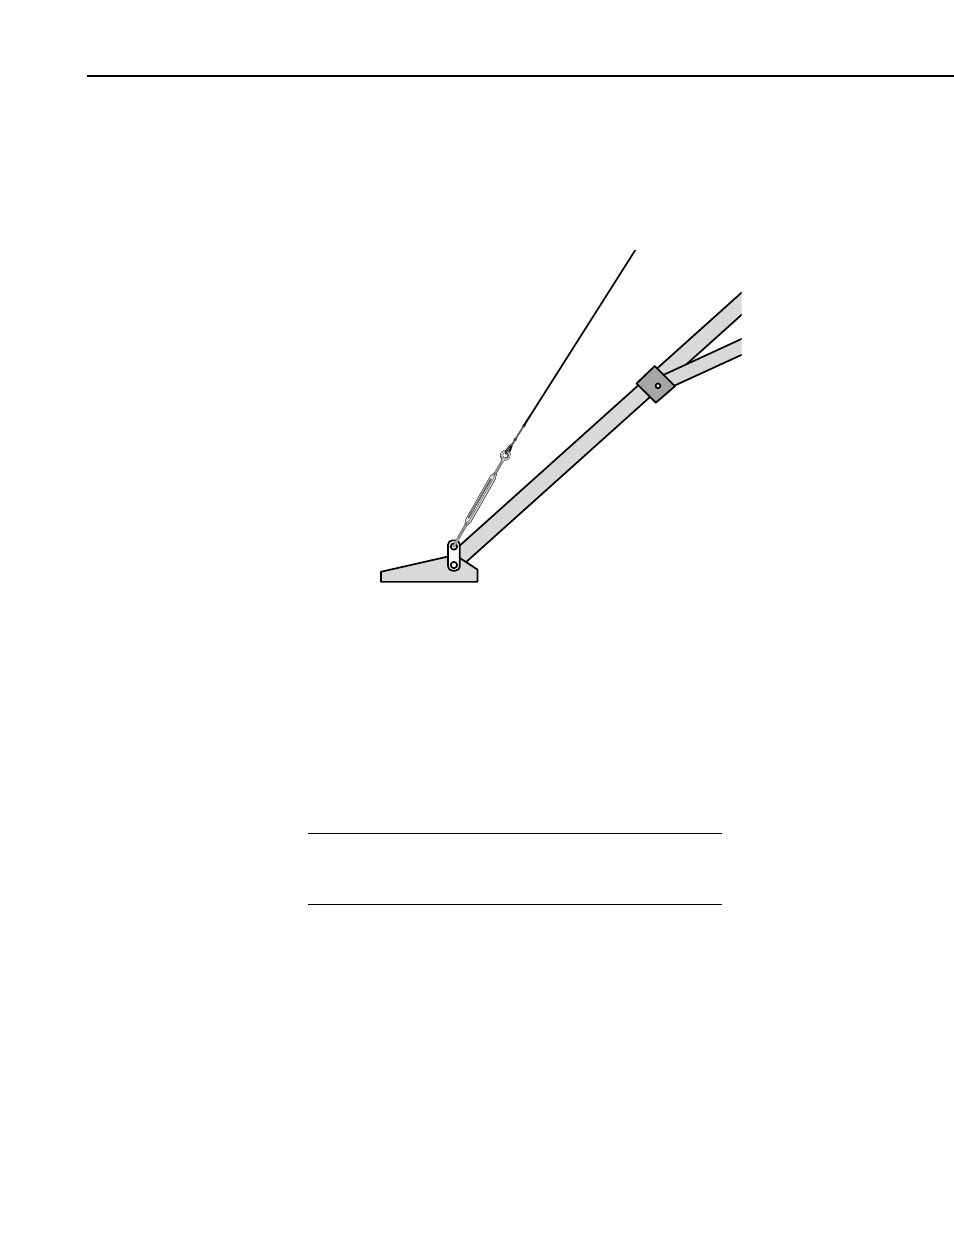
FIGURE 2-2. Extending the Tripod Legs
5. Stand the tripod upright and orient it so one leg points south (Figure 2-3).
Extend the leg until the top of the slide collar is even with the mark from
Step 3 and tighten the bolt. Extend the other legs in the same manner.
6. Plumb the mast by adjusting the south and northeast facing legs. Loosen
the slide-collar bolt on the south facing leg. With the level on the south
side of the mast, adjust the leg so the level reads plumb, then tighten the
bolt. Repeat the same procedure for the northeast facing leg with the level
on the east side of the mast.
Adjusting the legs can be made easier by spraying the slide
collar and leg with a silicon spray, and tapping on the leg with a
hammer.
NOTE
7. Three rebar stakes are provided for securing the tripod to the ground.
Drive the stakes through the holes in the feet. Some users prefer to drive 4
foot “T” posts next to each leg, and attach the legs to the posts with 2” u-
bolts.
2-4