Ashcroft, Previous type 1009 duralife, Calibration procedure – vacuum range – Ashcroft 1036 Gauge with 1037 Fitting User Manual
Page 12
ASHCROFT
®
Previous Type 1009 Duralife
®
Calibration Procedure – Vacuum Range
1. Remove ring, window and gasket pointer.
2. Using a pencil, refer to dial and mark the 0 and
25˝ Hg positions on the case flange.
3. Remove dial.
4. Apply 25˝ Hg vac.
5. Lightly press pointer onto pinion carefully aligning it
with the 25˝ Hg vac. mark on the flange.
6. Release vacuum fully.
7. Note agreement of pointer to zero mark on flange.
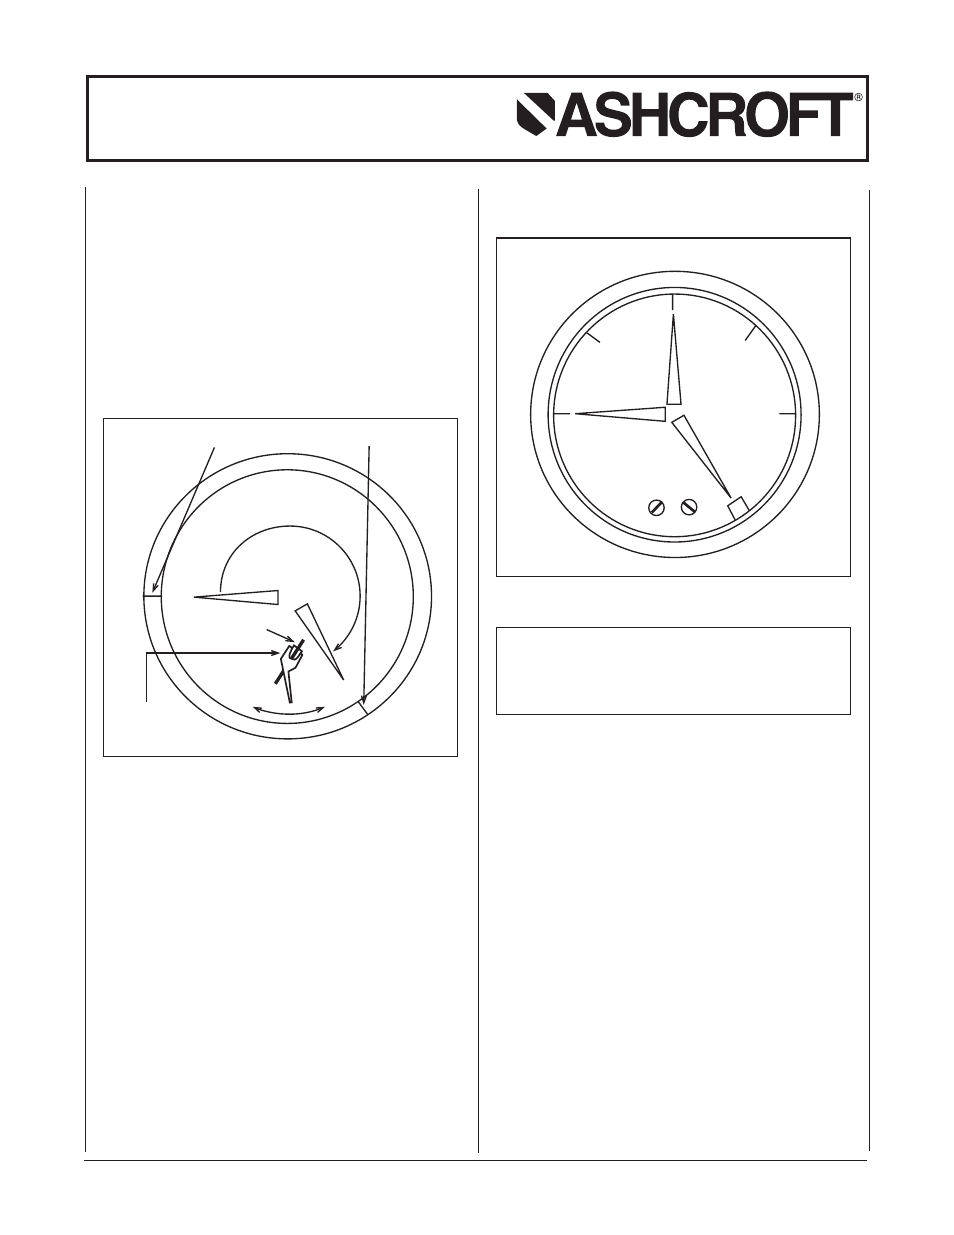
8. If span is high or low, turn span block as shown in
Figure 1.
9. Repeat steps 4 through 8 until span is correct.
10. Remove pointer.
11. With 25˝ Hg vac applied, reassemble dial, dial screws
(finger tight) and point.
12. Apply 15˝ Hg vac. and note accuracy of indication.
If required, slide dial left or right to reduce error to 1%
maximum.
13. Firmly tighten dial screws.
14. Firmly tap pointer onto pinion.
15. recheck accuracy at 15 and 25˝ Hg vac. (Figure 2).
16. Reassemble window, gasket and ring.
Notes: See page 10 for any tools required to calibrate.
For model s pr oduced pr i or t o
Sept ember 2008 f or 2
1
⁄
2
˝ ver si on and
December 2008 f or 3
1
⁄
2
˝ ver si on.
Back of gauge will have a date code sticker.
© 2010 Ashcroft Inc., 250 East Main Street, Stratford, CT 06614-5145, USA, Tel: 203-378-8281, Fax: 203-385-0499, www.ashcroft.com
All sales subject to standard terms and conditions of sale. I&M008-10077 9/01 AMR 05/10
0
25
Span Block
Decrease
7/64 Open
End Wrench
Increase
Pencil Marks on Case Flange
25
15
0
Figure 1 –
Figure 2 –
12
- 1009 - Stainless Steel Pressure Gauge 1008S/SL - Stainless Steel Pressure Gauge 1008S - Stainless Steel Pressure Gauge 1189 - Low Pressure Bellows Gauge 1188 - Low Pressure Bellows Gauge 1187 - Low Pressure Bellows Gauge 1150H - Reid Vapor Gauge 1122 - Industrial Gauge 1220 - Industrial Gauge 1017 - Industrial Gauge 1220 - Receiver Gauges 1017 - Receiver Gauges 1010 - Receiver Gauges 1009 - Receiver Gauges 1220 - Refrigeration Gauges 1017 - Refrigeration Gauges 1010 - Refrigeration Gauges 1009 - Refrigeration Gauges 1220 - Hydraulic Gauges 1017 - Hydraulic Gauges 1010 - Hydraulic Gauges 1009 - Hydraulic Gauges 1010 - Industrial Gauge 2462 - Duragauge® Pressure Gauge 1379 - Duragauge® Pressure Gauge 1377 - Duragauge® Pressure Gauge 2462 - Receiver Gauges 1377 - Receiver Gauges 1379 - Receiver Gauges 1279 - Receiver Gauges 1259 - Pressure Gauge 1082 - Pressure Test Gauge