Danger – State GS6 75 YRVHTL User Manual
Page 47
Installing Anode Rod:
1. Use Tefl on® tape or an approved pipe sealant on
threads of the new anode rod.
2. Place the anode rod in the spud (top of the tank) and
turn clockwise until the threads are hand tight. Using
a ratchet and 1-1/16” socket tighten down water tight.
3. Open a nearby hot-water faucet to purge air from the
water line. Open the incoming water supply and fi ll
water heater tank completely (Note: To assure the
water heater tank is full, keep the hot-water faucet
open for 3 minutes after a constant fl ow of water is
obtained).
4. Turning off the hot-water faucet, check for water
leaks around anode rod and immediately correct any
if found.
5. Reinstall the insulation and anode cap which were
removed in step 6 of removal instructions.
6. With all components clean and secure, reconnect the
electric power to the heater.
7. Reset the thermostat to the desired temperature
setting and turn the gas control switch back to the
“ON” position (see Figure 48).
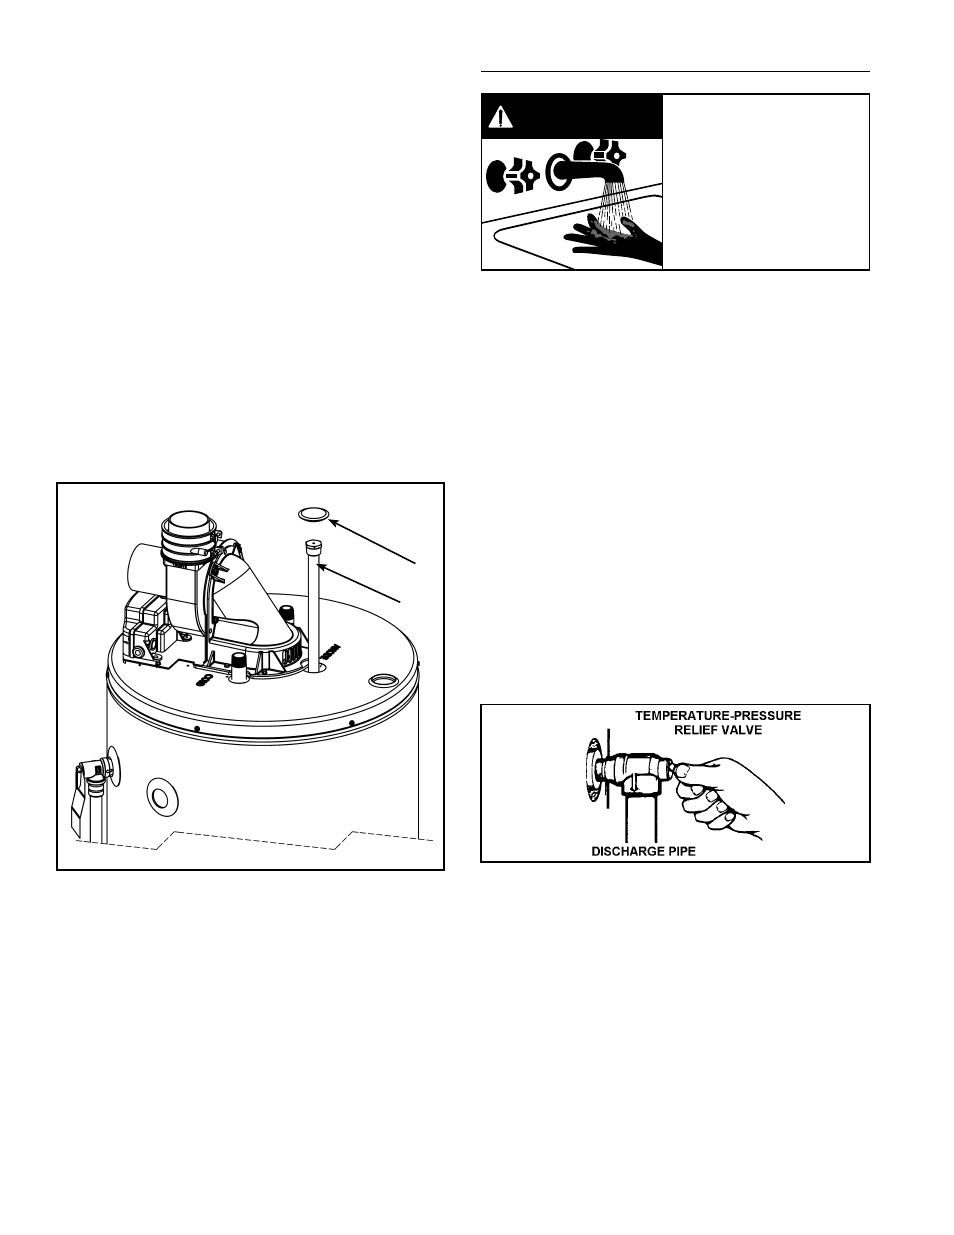
CAP
ANODE ROD *
* THE ANODE ROD IS COVERED
BY URETHANE FOAM LOCATED
UNDER THE CAP. CHIP AWAY
THE FOAM TO EXPOSE THE
TOP OF THE ANODE ROD
Figure 53.
TEMPERATURE-PRESSURE RELIEF VALVE TEST
• Burn hazard.
• Hot water discharge.
• Keep clear of
temperature-pressure
relief valve discharge.
BURN
HOT
HOT
DANGER
It is recommended that the temperature-pressure relief
valve be checked to ensure it is in operating condition at
least once a year.
When checking the temperature-pressure relief valve
operation, make sure that (1) no one is in front of or around
the outlet of the T&P valve discharge line, and (2) that
water discharge will not cause any property damage, as
water may be extremely hot. Use care when operating
valve as the valve may be hot.
To check the relief valve, lift lever at the end of valve
several times (see Figure 54). The valve should seat
properly and operate freely.
If after manually operating the valve, it fails to completely
reset and continues to release water, immediately close
the cold-water inlet to the water heater and drain the water
heater, see “Draining and Flushing” section. Replace
the T&P valve with a properly rated/sized new one, see
“Temperature-Pressure Relief Valve” for instructions on
replacement.
Figure 54.
If the Temperature-Pressure Relief Valve on the water
heater weeps or discharges periodically, it may be due to
thermal expansion.
Note: Excessive water pressure is the most common
cause of temperature-pressure relief valve leakage.
Excessive water system pressure is most often caused
by “thermal expansion” in a “closed system.” See “Closed
Water Systems” and “Thermal Expansion” sections of this
manual. The T&P valve is not intended for the constant
relief of thermal expansion.
www.statewaterheaters.com
47