ididit Retrofit Steering Column: 1970-75 Camaro User Manual
Page 10
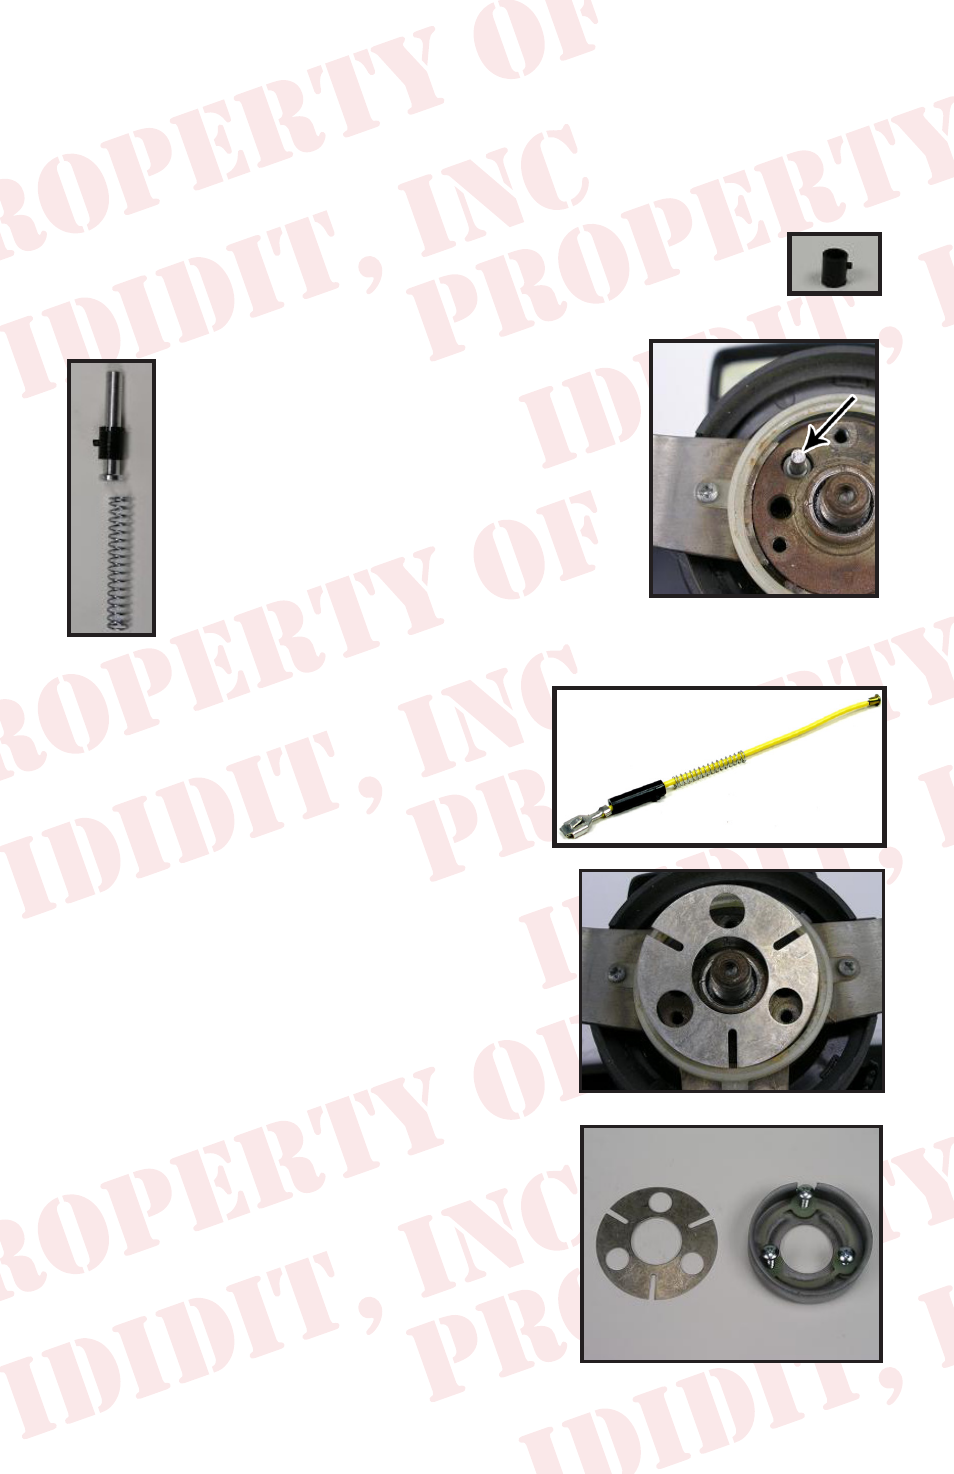
Steering Wheel Installation:
The original wheel will bolt on almost like it was on the original col-
umn. Torque to 45 ft. lbs. The one thing that is different is the retainer
for the horn pin. Originally this was a snap-in item, now it has a twist
lock. This item is a small black plastic piece in the electrical bag. We
bagged it all by itself so it wouldn’t get lost. It looks like this:
The complete assembly should go in this order:
1.) Retainer is inserted onto aluminum
plunger with locking tab towards
plunger/flat.
2.) Spring is inserted into steering
column horn cam.
3.) Aluminum plunger & retainer are
pushed into horn cam with plunger/flat
first. (Figure 18)
4.) While pushing plunger turn Retainer
so that it locks in groove of horn cam.
(Figure 18)
If you have an aftermarket steering
wheel, you may need a wire to attach
the horn (shown right). We have in-
cluded it with your column, just in case.
(PART# 9000000400)
The large nut on the column to secure the
wheel should be torqued to 45 ft. lbs and
requires a 7/8” socket.
It is wise to either unplug the column or
the horn while installing the contact plate.
The contact plate is beveled and should
be installed with the outside being the low
part and the center sitting up. (Figure 19)
Then install the can and plastic piece so
it fits down into the can. (Figure 20) The
notch in the edge of the can should be at
12 o’clock. These screws should be tight.
Now center your horn button and push
back in place (reconnect horn or column
plug). Test the horn.
Horn Wire
Retainer
8
(Figure 19)
(Figure 20)
1
2
(Figure 18)