For an over-the-rail bedliner – Extang Platinum BlackMax: Ford F150 Flareside 97+ User Manual
Page 2
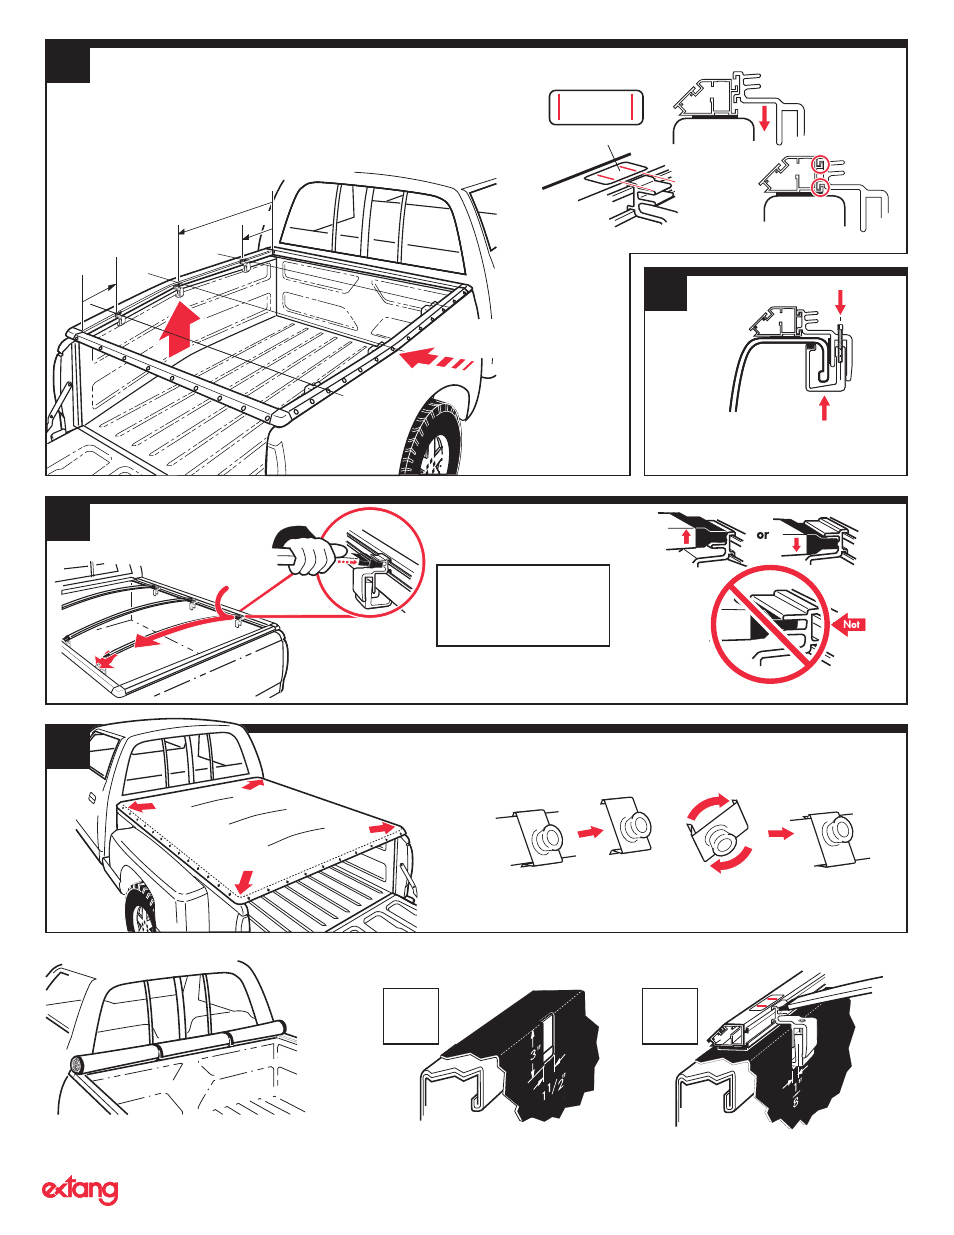
Attach tarp by starting
at the corners, and
snap in place.
Studs Down
Slides Off
Rotate 180°
Studs Up
SUMMER SETTING
Takes up slack in tarp
caused by warm weather.
WINTER SETTING
Allows more slack in tarp
for cold temperatures.
Start at
Corners
TIG
HTE
R
LOOSER
SPECIAL FEATURE
Weather-adjustable Snaps
TIGHTER
LO
OSE
R
TIGHTER
LO
OSE
R
TIG
HT
ER
LO
OS
ER
6
Side Rail Clamp Spacing
(Same for each side)
See the stickers located on each side rail for clamp position, or refer to the
dimensions given below.
Note: Remove stickers after installation.
Install one middle clamp first and then install the
opposite middle clamp next.
Note: You will need to push the frame
assembly in slightly to install the second middle clamp.
Install this
Clamp First
Insert side rail clamp all the way into rail.
For an OVER-THE-RAIL Bedliner
A
DIAGRAM
B
DIAGRAM
Extang Corporation, 5400 S. State Road, Ann Arbor, MI 48108, 734 677-0444, Fax: 734 677-8409
Visit us at:
extang.com
Place Clamp
Here
STICKER
Attach “U” clamp to side rail
clamp with allen bolt. Insert side
rail clamp all the way into rail.
For each clamp mark on your bedliner a 1-1/2” x 3”
hole as shown above. Remove clamp. Cut holes in
bedliner. Reinsert side rail clamp. Return to step 6.
Side rail clamped to bed
with bow attached.
Insert bow onto top
or bottom peg.
(Top peg for performance,
Bottom for good looks.)
Ends are spring loaded for easy
installation. Push and hold on
spring end and let the other end
slide on with the spring action.
EASY USE OF TRUCK BED
Tarp may be rolled up and secured with
Velcro® for bulk hauling.
7
8
9
SPECIAL
FEATURE:
Two pegs
offer two
height
adjustments.
Note:
Bow End does not
fit between pegs.
Upper
Peg
Lower
Peg
Do Not
Place
Between
the Pegs
9”
38”
12”
Install this
Clamp Next