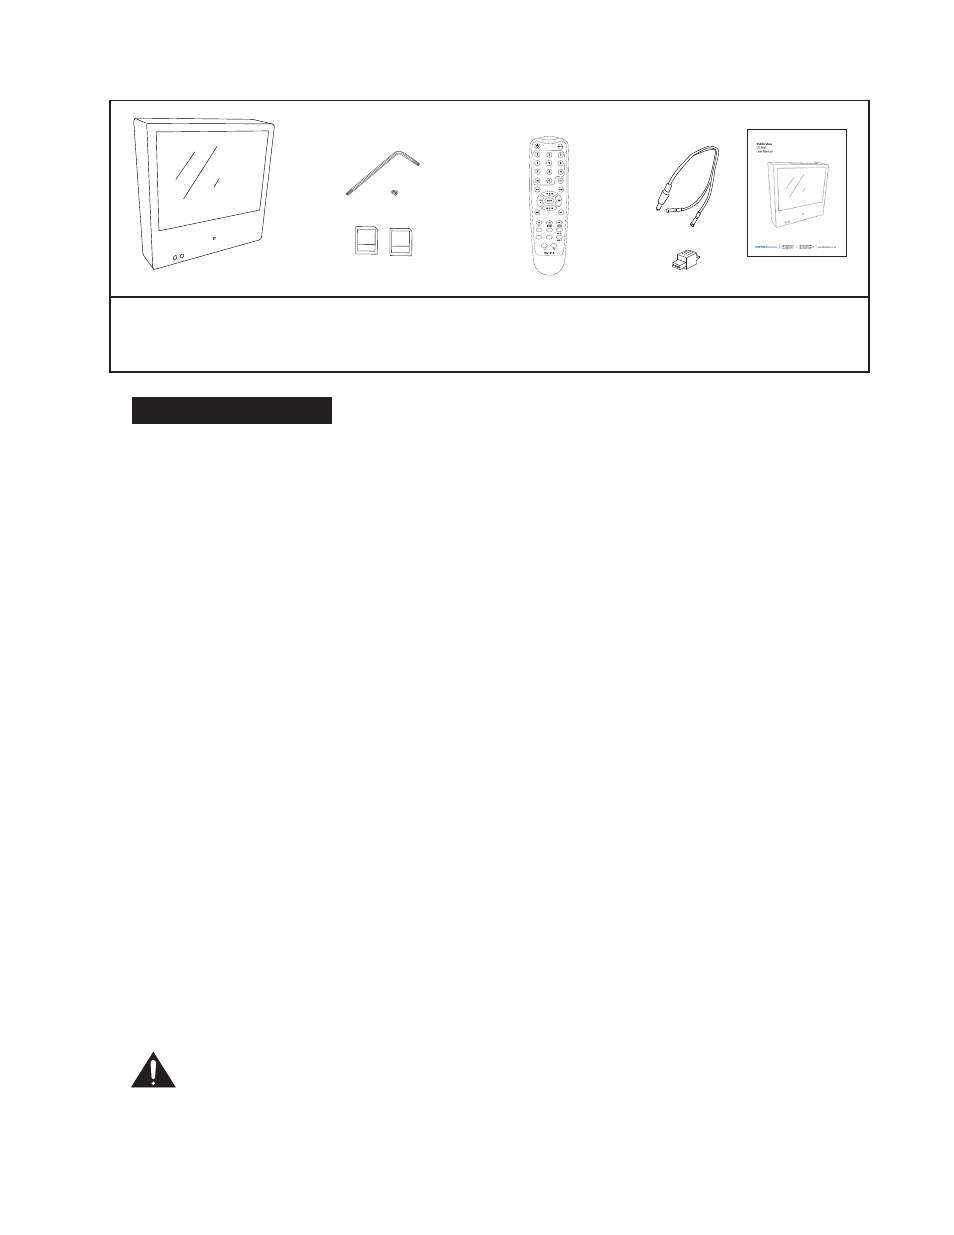
Package contents – Clinton Electronics CE-M8SD-B User Manual
Page 4
4
Installation and Set up
Unpacking your display
Your Public View display comes with all of the items shown above. Carefully remove the
display from its packing and set the unit on a firm surface. Save the packing in case of future
service requirements.
Installation of the display
The display should be located where it will have the most effect on deterring potential
shoplifting. Keep in mind the lighting conditions, viewing area, ease of installation, and
distance from the power supply when choosing a location. The display is compatible with
many available wall and ceiling mounts, consult your dealer for suggestions. The rear of the
display has a VESA 75mm & 100mm mounting patterns that accepts M4x8mm screws. Please
refer to the installation instructions on the particular mounting bracket and details of how to
install.
Connecting the display
This display requires a 24V DC power supply. Locate the applicable AC to DC power supply in
a suitable location where there is a power source, and access to run the low voltage cable to
the display.
For single unit power supplies, you will need to keep the distance from the power supply to
the display less than 75 ft. For multiple unit power supplies, the power supply can be located
at further distances from the displays at a central location. Please refer to the specific power
supply installation instructions for recommended wire size and distances.
Caution: Do not connect the power connector to the display when energized,
doing so may damage the electronics inside the display. Connect power supply
to unit, then to 120v wall outlet.
WHEN SD CARD IS INSERTED,
YOU MUST POWER CYCLE.
You can do this by pushing the POWER
button on the long remote,
or by unplugging the power cord from the wall.
SD Card
16
GB
SD Card
2
GB
CE-M8SD-B
with access door and
security screw
Security Allen Wrench
Extra Security Screw
16 GB SD-Card (for DVR)
2 GB SD-Card (for media)
Remote Control
(batteries included)
User Manual
Power Pigtail
(for Hardwiring)
Alarm Plug
WHEN SD CARD IS INSERTED,
YOU MUST POWER CYCLE.
You can do this by pushing the POWER
button on the long remote,
or by unplugging the power cord from the wall.
SD Card
16
GB
SD Card
2
GB
PACKAGE CONTENTS
WHEN SD CARD IS INSERTED,
YOU MUST POWER CYCLE.
You can do this by pushing the POWER
button on the long remote,
or by unplugging the power cord from the wall.
SD Card
16
GB
SD Card
2
GB
WHEN SD CARD IS INSERTED,
YOU MUST POWER CYCLE.
You can do this by pushing the POWER
button on the long remote,
or by unplugging the power cord from the wall.
SD Card
16
GB
SD Card
2
GB
ON
1 2 3 4
Motion
Chime
SD-Audio
Alarm
WHEN SD CARD IS INSERTED,
YOU MUST POWER CYCLE.
You can do this by pushing the POWER
button on the long remote,
or by unplugging the power cord from the wall.
SD Card
16
GB
SD Card
2
GB
WHEN SD CARD IS INSERTED,
YOU MUST POWER CYCLE.
You can do this by pushing the POWER
button on the long remote,
or by unplugging the power cord from the wall.
SD Card
16
GB
SD Card
2
GB
POWER
AUTO
UP
DOWN
MENU
SD Card
16
GB
SD Card
2
GB