Installation instructions, Warning, 6 connect electrical – GE PV970NSS User Manual
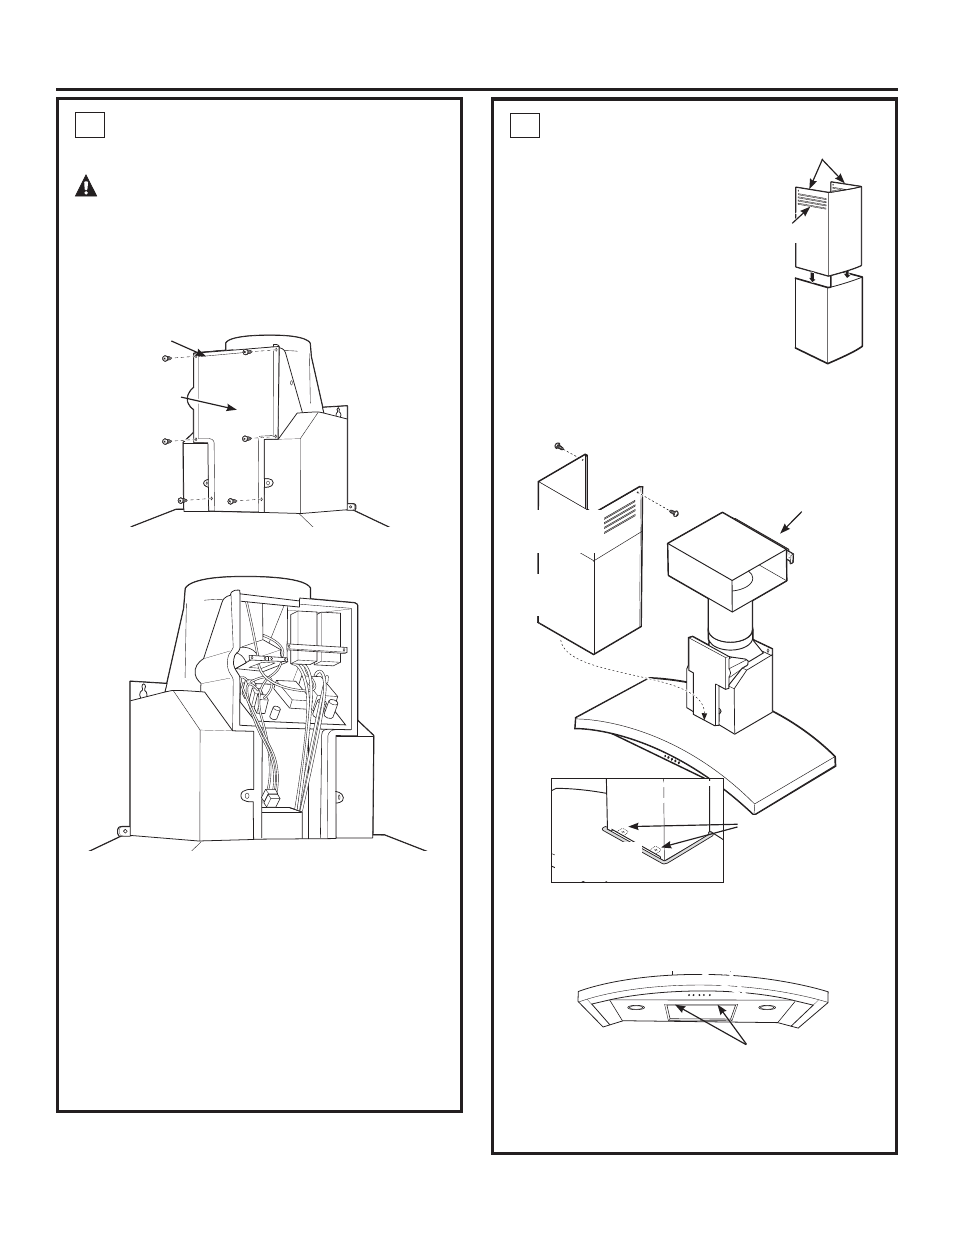
Page 21: 7 install duct covers
49-80549-2
21
Installation Instructions
6 CONNECT ELECTRICAL
Verify that power is turned off at the source.
WARNING:
If house wiring is not 2-wire
with a ground wire, a ground must be provided by the
installer. When house wiring is aluminum, be sure to
XVH8/DSSURYHGDQWLR[LGDQWFRPSRXQGDQG
aluminum-to-copper connectors.
5HPRYHWKHVFUHZVRQWKHMXQFWLRQER[FRYHUDQG
the knockout on the top left side.
6HFXUHWKHKRXVHZLULQJWRWKHMXQFWLRQER[ZLWKD
strain relief.
• Connect the white lead to the branch circuit white
lead.
• Connect the black lead to the branch circuit black
lead.
&RQQHFWWKHJUHHQ\HOORZOHDGWRWKHEUDQFKFLUFXLW
green lead or bare ground lead.
• Secure all the connections with wire nuts on each
electrical connector.
3XVKWKHZLUHVLQWRWKHMXQFWLRQER[DQGUHSODFHWKH
cover. Be sure the wires are not pinched.
• Secure the MXQFWLRQER[FRYHUZLWKthe 6 original
screws.
Junction
ER[FRYHU
Knockout
7 INSTALL DUCT COVERS
• Remove protective plastic
covering.
• Assemble duct covers
according to application.
NOTE: The upper duct cover
has vent holes on one end
intended for use when the hood
is installed for recirculating
purposes. Be sure the vented
HQGLVDWWKHWRSWKHYHQWKROHV
will be visible in this installation.
Slide the upper duct cover into
the folded ends of the lower duct cover.
• Place the decorative duct covers on top of the hood.
([WHQGWKHLQQHUGXFWFRYHUXSZDUGWRWKHFHLOLQJ
bracket.
• Secure with 2 screws to the duct cover bracket.
•
Remove the packing material from the filter opening.
• Locate the screw holes on the inside front edge of
the opening. Install 2 screws to secure the lower
duct cover to the hood.
Mounting screws
Vent holes
Screw holes
Lower duct
cover seat
Duct cover
support
bracket
Lower
duct cover
Upper duct
cover
Duct cover
attachment tabs