Conversion, Before you begin, Procedure – Bosch HGIP054UC User Manual
Page 5: Tools and parts needed, Parts included, General information, Preparation, Convert pressure regulator from 6" w.c. to 11" w.c
English 2
Conversion
Before You Begin
Tools and Parts Needed
•
7 mm Socket Driver w/ 3" extension
•
Torx (T20)-head screwdriver
•
Adjustable Wrench
•
Flathead Screwdriver (1/8" or smaller)
•
Phillips Head Screwdriver
Parts Included
•
Conversion Kit Instructions
•
Conversion Sticker
•
4 LP Orifices
General Information
Always Provide Adequate
Gas Supply
This appliance is shipped from the factory for use with
natural gas. Use this kit to convert the appliance for LP gas
use if necessary. Observe the following:
Be sure the range is converted for use with the appropriate
gas before using it.
This appliance is designed to operate at a pressure of 10"
of water column when used with LP gas.
When checking for proper operation of the regulator, the
inlet pressure must be at least 1" greater than the operating
(manifold) pressure above. When converting for LP gas
use, the pressure supplied to the regulator must be
between 11" and 14" of water column.
The pressure regulator located in the inlet of the range
manifold must remain in the supply line.
Use a flexible metal appliance connector or rigid pipe to
connect the Range to the gas supply. The connector should
have an I.D. of 1/2" and be 5' in length (Exception:
Maximum connector length in Massachusetts installations
is 3'). In Canada, the connector must be single wall metal
and not longer than 6'.
Preparation
CAUTION: Turn off Gas and Electricity
Before proceeding with the conversion; shut off the gas
supply to the appliance prior to disconnecting the electrical
power.
1. Turn all control knobs to the "OFF" position.
2. Shut off the outside propane tank gas valve to the
range.
3. Remove range power cord from electrical outlet or turn
breaker off at breaker box
Procedure
Convert Pressure Regulator from 6"
W.C. to 11" W.C.
1. Remove Warming Drawer; Pull drawer out until stop is
reached. Facing the range, push clip on left side up
and clip on right side down. Pull drawer the rest of the
way out.
2. Remove cover plate from interior back wall by
removing single screw on left side of panel. Use a torx
T-20 head screwdriver.
3. Remove the hexagon cap from the top of the regulator
with an adjustable wrench.
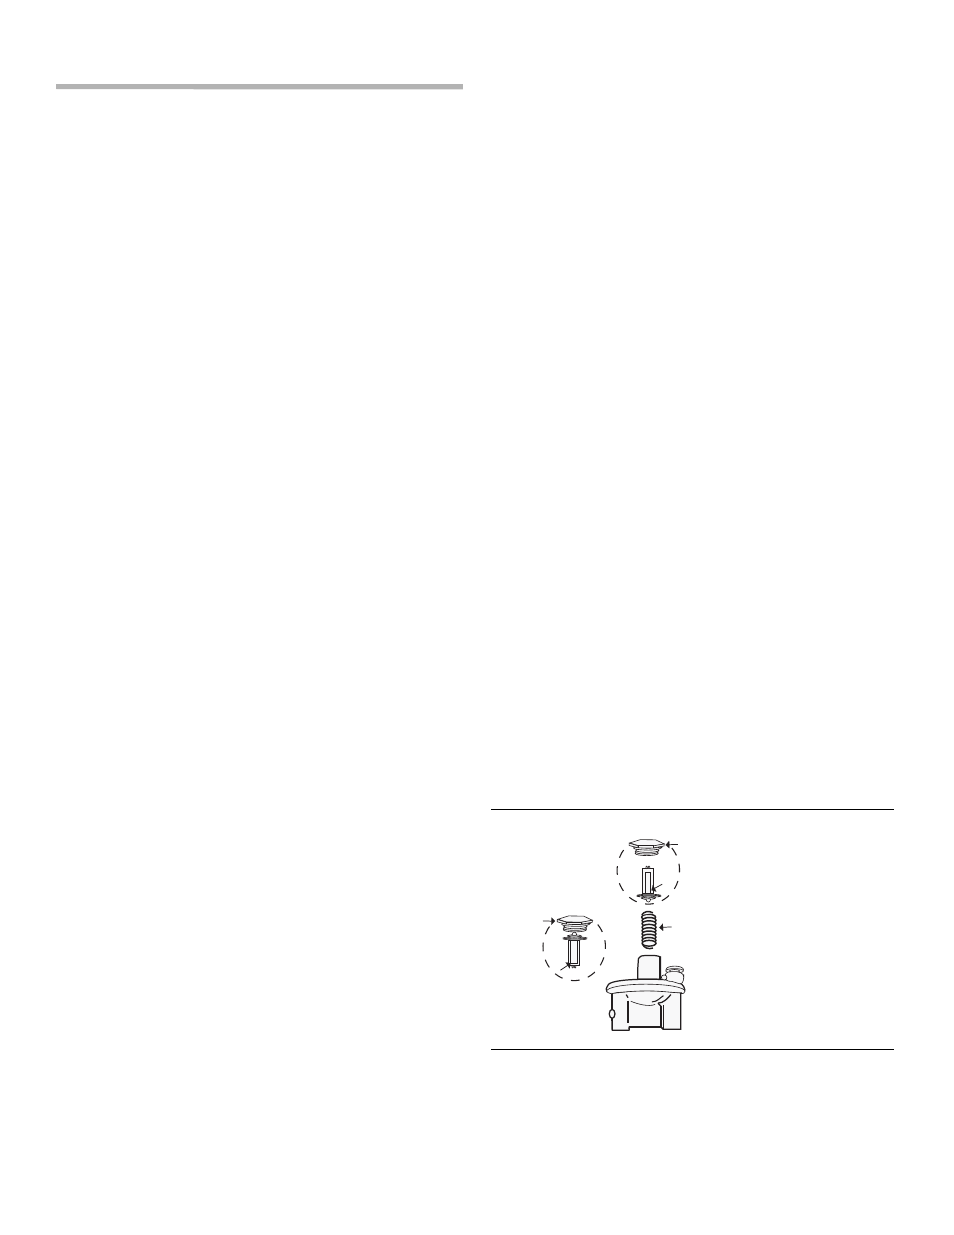
4. Pop out the plastic stem in the cap and turn it over
pressing it firmly in place so that the letters "LP" (rather
than "NAT") are seen upright in the stem.
5. Replace the cap and button assembly into the top of
the regulator sealing it firmly. Make certain spring is still
in place (See Fig. 1). DO NOT OVER TIGHTEN.
6. Fill out and affix the CONVERSION STICKER on the
back side of the cover plate so that it appears on the
back side of range next to the regulator.
NA
T
LP
NAT
Hex
Cap
Pin
Position
for Nat.
Gas
Pin
Pin Position
for Propane
Hex
Cap
LP
Pin
Spring
PRESSURE REGULATOR VIEW