Tutorial – Brother PE-DESIGN Lite User Manual
Page 18
14
Tutorial
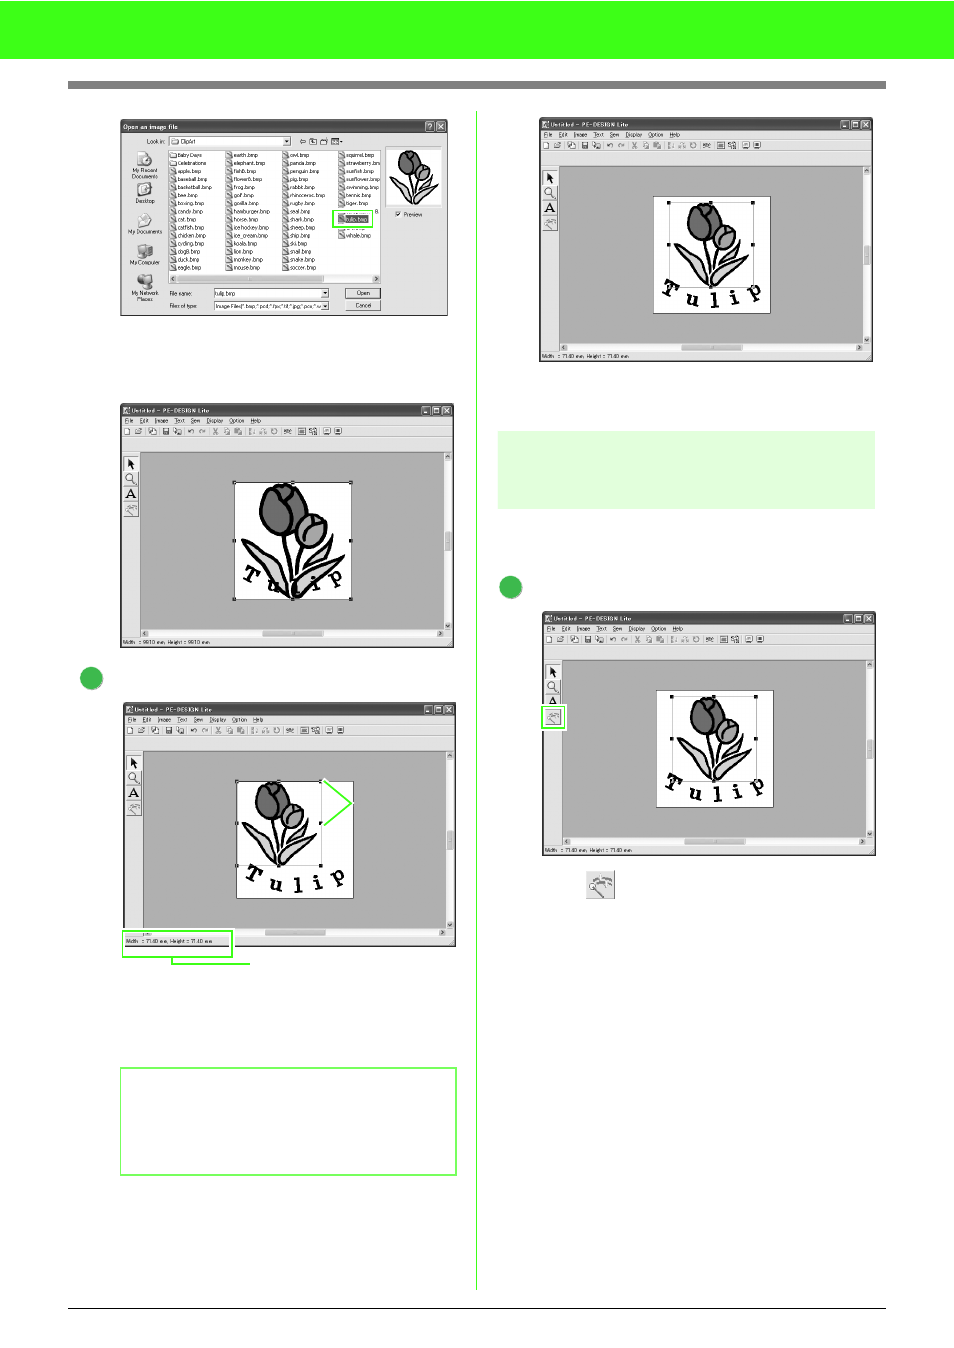
Select the sample file tulip.bmp, and then
click Open, or double-click the file’s icon.
→ The image appears in the Design Page.
Adjust the image size and position.
Drag the handle to adjust the selected image
to the desired size.
Move the pointer over the selected image, and
then drag the image to the desired position.
Step 4
Automatically converting
the image to an embroidery
pattern
Next, the image will automatically be converted to
an embroidery pattern.
Start Auto Punch.
Click
on the Tool Box.
→ The Auto Punch dialog box appears.
b
Memo:
If the handles have disappeared, right-click
the image, and then click Modify Image in the
menu that appeared.
2
The Status bar shows image
dimensions (width and height).
Handles
1
See also other documents in the category Brother Sewing machines:
- XL 2600i (82 pages)
- PE-770 (88 pages)
- PE-770 (2 pages)
- PE-770 (40 pages)
- SE-400 (16 pages)
- LS-2125i (2 pages)
- LS-2125i (67 pages)
- CS-6000i (68 pages)
- CS-6000i (2 pages)
- CE-5000PRW (68 pages)
- LX-3125 (96 pages)
- SE-400 (24 pages)
- 3034D (76 pages)
- 3034D (2 pages)
- HE 120 (183 pages)
- Innov-IS 500D (12 pages)
- CS-8060 (116 pages)
- CS 80 (115 pages)
- PC-420 (153 pages)
- NX-400 (153 pages)
- NX-200 (111 pages)
- PC-210 210PRW (2 pages)
- PC-210 210PRW (111 pages)
- Innov-IS 4000D (8 pages)
- Boutique 27 37 (111 pages)
- 2340CV (21 pages)
- 2340CV (40 pages)
- DS-120 (100 pages)
- PE-700II 750DUSB (40 pages)
- Innov-is 2200 (48 pages)
- NX-2000 (40 pages)
- NX-2000 (88 pages)
- NX-2000 (2 pages)
- 885-X08 (104 pages)
- PR-600 600C (20 pages)
- INNOVIS 500 (8 pages)
- PS-21 (46 pages)
- PC 6500 (140 pages)
- PE-750D (40 pages)
- XL-6061 (101 pages)
- XL-5051 (45 pages)
- BAS-326F-0 (81 pages)
- CS 100T (67 pages)
- EX 660 (67 pages)
- XL-5010 5020 5030 (82 pages)