Printing images – Brother MFC-9440CN User Manual
Page 97
Printing photos from a digital camera
81
13
a
Press Menu, 5, 3.
USB Direct I/F
3.PictBridge
b
To set the PictBridge settings, press a or
b
to choose 1.Paper Size,
2.Orientation, 3.Date & Time,
4.File Name, or 5.Print Quality.
Press OK.
c
Press a or b to choose an option for
each menu setting.
Press OK.
d
Press Stop/Exit.
Repeat b to c for each PictBridge
setting.
Note
• Camera settings are prioritized as long as
your camera is not set to use your
machine’s settings (default settings). If
your camera is set to use your machine’s
settings, the machine will print your photo
using the settings below.
• Please refer to the documentation
supplied with your camera for more
detailed information on changing
PictBridge settings.
Printing images
13
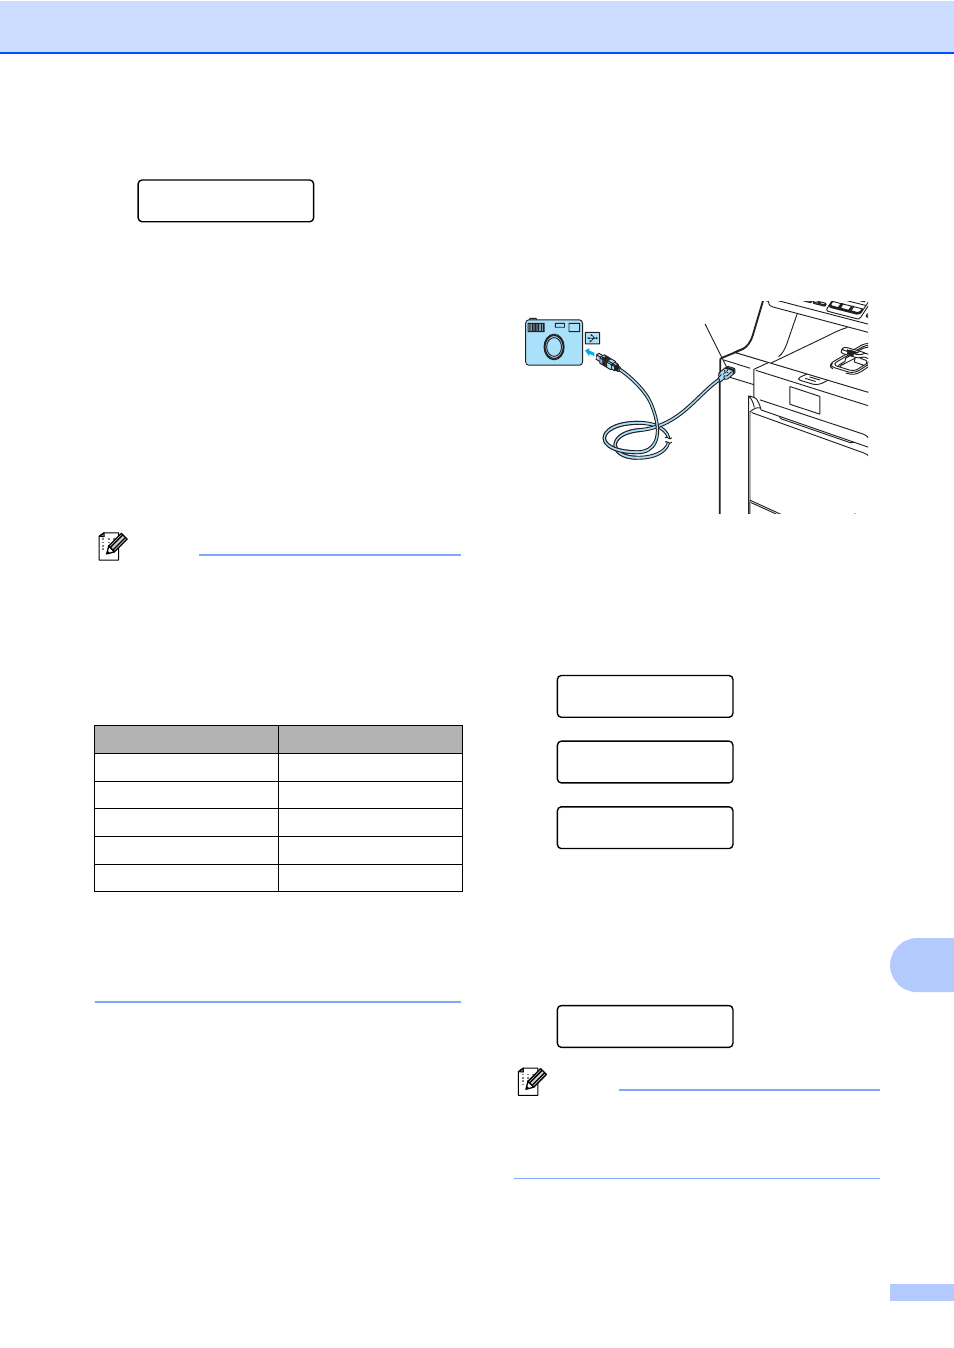
a
Make sure that your camera is turned
off. Connect your camera to the USB
direct interface (1) on the front of the
machine using a suitable USB cable.
b
Turn on the camera. Make sure your
camera is in PictBridge mode.
When the machine has recognized the
camera, the LCD shows the following
message depending on which mode the
machine is in:
04/20 15:30 Fax
Camera Connected
Scan:Select ab
Camera Connected
Stack
Copies:01
Camera Connected
c
Set your camera to print an image. Set
the number of copies if you are asked.
When the machine starts printing an
image, the LCD will shows the following
message:
PictBridge
Printing. Keep...
Note
Please refer to the documentation
supplied with your camera for detailed
operations how to print using PictBridge.
Machine settings
Default settings
Paper Size
Letter
Orientation
Portrait
Date & Time
Off
File Name
Off
Print Quality
Normal
1