Brother MFC-J410W User Manual
Start here, Quick setup guide, Unpack the machine and check the components
1
Start Here
Quick Setup Guide
USA/CAN Version 0
MFC-J265W
MFC-J270W
MFC-J410W
MFC-J415W
Before you can use the machine, please read this Quick Setup Guide for the correct setup and installation.
1
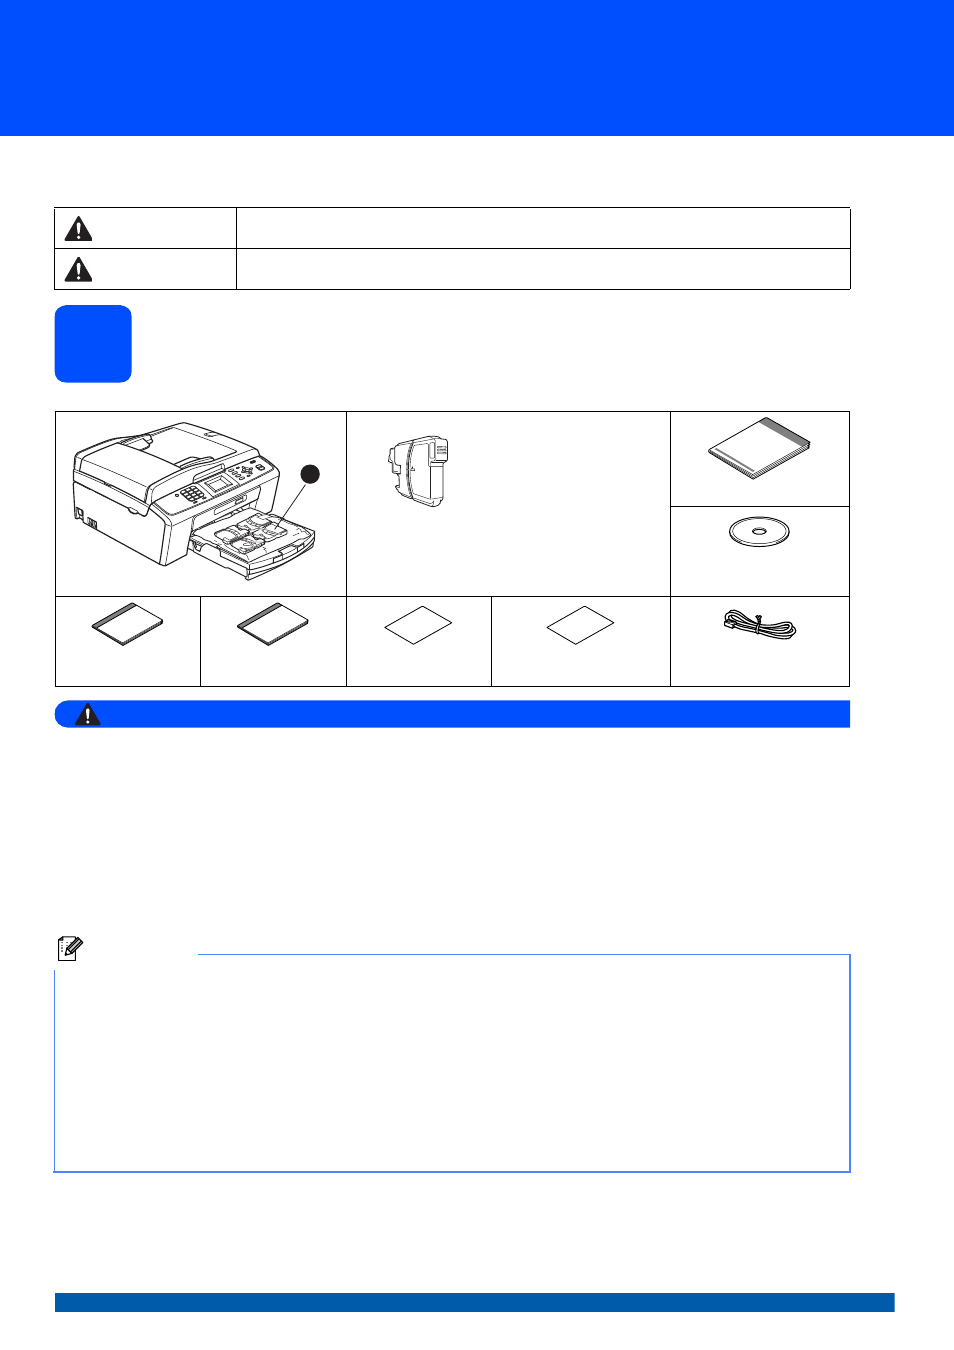
Unpack the machine and check the components
WARNING
Plastic bags are used in the packaging of your machine. To avoid danger of suffocation, please keep
these bags away from babies and children.
Most of the illustrations in this Quick Setup Guide show the MFC-J415W.
a
Remove the protective tape and film covering the machine, and also from the LCD.
b
Remove the plastic bag a containing the ink cartridges from on top of the paper tray.
c
Make sure you have all components.
WARNING
Warnings tell you what to do to prevent possible personal injury.
CAUTION
Cautions specify procedures you must follow or avoid to prevent possible minor injuries.
Starter Ink
Cartridges
[x4]
Black
Yellow
Cyan
Magenta
Quick Setup Guide
Installation CD-ROM
Documentation CD-ROM
Basic User’s Guide
Safety and Legal
booklet
Accessory Order
Form
Product Registration
Sheet (USA only)
Telephone Line Cord
Note
• The components included in the box may differ depending on your country.
• Save all packing materials and the box in case for any reason you must ship your machine.
• You need to purchase the correct USB cable.
USB cable
Please make sure you use a USB 2.0 cable (Type A/B) that is no more than 6 feet (2 meters) long (cable not
included).
Your machine has a USB interface that is compatible with the USB 2.0 specification. This interface is also
compatible with Hi-Speed USB 2.0; however, the maximum data transfer rate will be 12 Mbits/s. The machine
can also be connected to a computer that has a USB 1.1 interface.
1
Document Outline
- Quick Setup Guide MFC-J265W MFC-J270W MFC-J410W MFC-J415W
- Start Here
- 1 Unpack the machine and check the components
- 2 Load plain Letter/A4 paper
- 3 Connect the power cord and telephone line
- 4 Install the ink cartridges
- 5 Check the print quality
- 6 Choose your language (if needed)
- 7 Choose the correct Receive Mode
- 8 Set the LCD contrast (if needed)
- 9 Set the date and time
- 10 Set your Station ID
- 11 Fax Transmission Report
- 12 Set Tone or Pulse dialing mode (Canada only)
- 13 Set the phone line compatibility
- 14 Automatic Daylight Savings Time
- 15 Send in the Product Registration Sheet (USA only)
- 16 Choose your connection type
- For USB interface users (Windows® 2000 Professional/XP/XP Professional x64 Edition/ Windows Vista®/Windows® 7)
- For USB interface users (Mac OS X 10.4.11, 10.5.x, 10.6.x)
- For wireless network interface users
- 17 Before you begin
- 18 Confirm your network environment (Infrastructure Mode)
- Connecting the Brother machine to the wireless network
- Troubleshooting
- Install the drivers & software (Windows® 2000 Professional/XP/XP Professional x64 Edition/ Windows Vista®/Windows® 7)
- Install the drivers & software (Mac OS X 10.4.11, 10.5.x, 10.6.x)
- Install Optional Applications Windows®
- For Network Users
- Consumables
- brother USA/CAN
- Start Here