Setra System Model 231RS User Manual
Page 13
13
3.3 Remote Sensors Installation
Armored Cable Version (P/N: 231GRSXAJXXXX)
For Armored Cable version remote sensors, use the following instructions:
1. Install the remote sensors into the system plumbing (use 3/4” hex to tighten”)
Important:
Each remote sensor is labeled “HIGH PRESSURE SENSOR” or “LOW PRESSURE SENSOR”, respectively. Match up
the high pressure sensor to the high “HI (+)” pressure electrical terminals, and the low “LO (-)” pressure
sensor to the low pressure electrical terminals. Otherwise, the performance may not meet the product
linearity specifications.
2. Attach the cable provided to the 3-Pin Packard connector on the remote sensor.
3. Feed the cable through the PG fitting on the bottom of the unit and tighten the fitting.
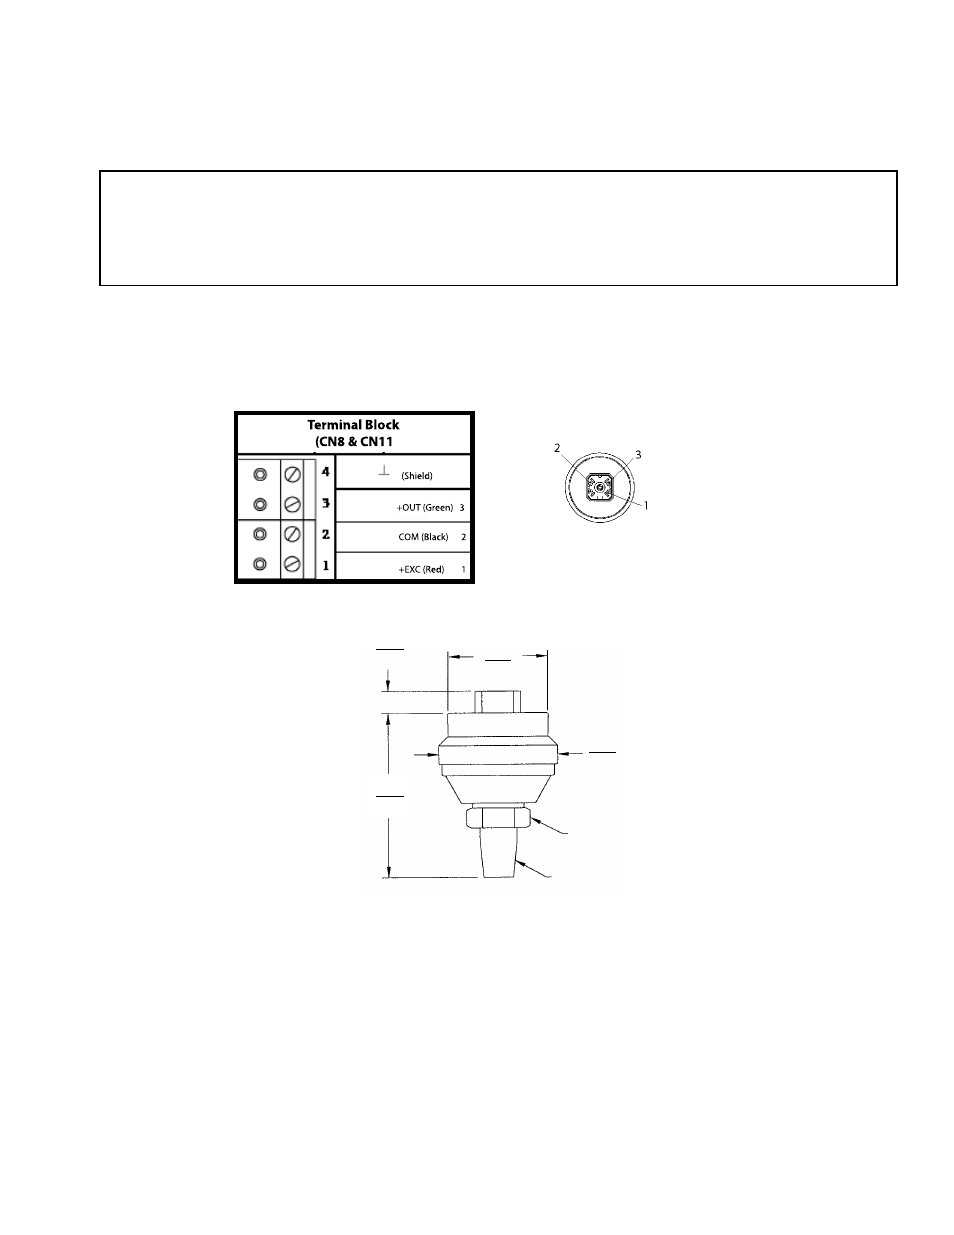
4. Remove the terminal blocks from the circuit board and use the following chart:
Important: Prior to putting the unit into service, complete configuration setup in Section 4. After configuration is
complete, press the “Zero” button.”
Top View: Hirschmann Connector
Type: G4A1M#931807-106
1/8" NPT
2.24
56.9
0.29
7.4
1.38
35.1
φ
φ
3/4" HEX
OPTIONAL HIRSCHMANN CONNECTOR
Type: G4A1M #931807-106
1.62
41.2
φ
φ
Chart 3. Electrical wiring color chart for
High & Low Pressure sensors (Armored
Cable version)