Alarm detail window – Milestone Central 3.7 User Manual
Page 23
Milestone XProtect Central 3.7; User’s Manual
By clicking the Edit icon next to the required alarm preview, you are able to view, edit and print
detailed information about the alarm in the Alarm Detail window (see the following).
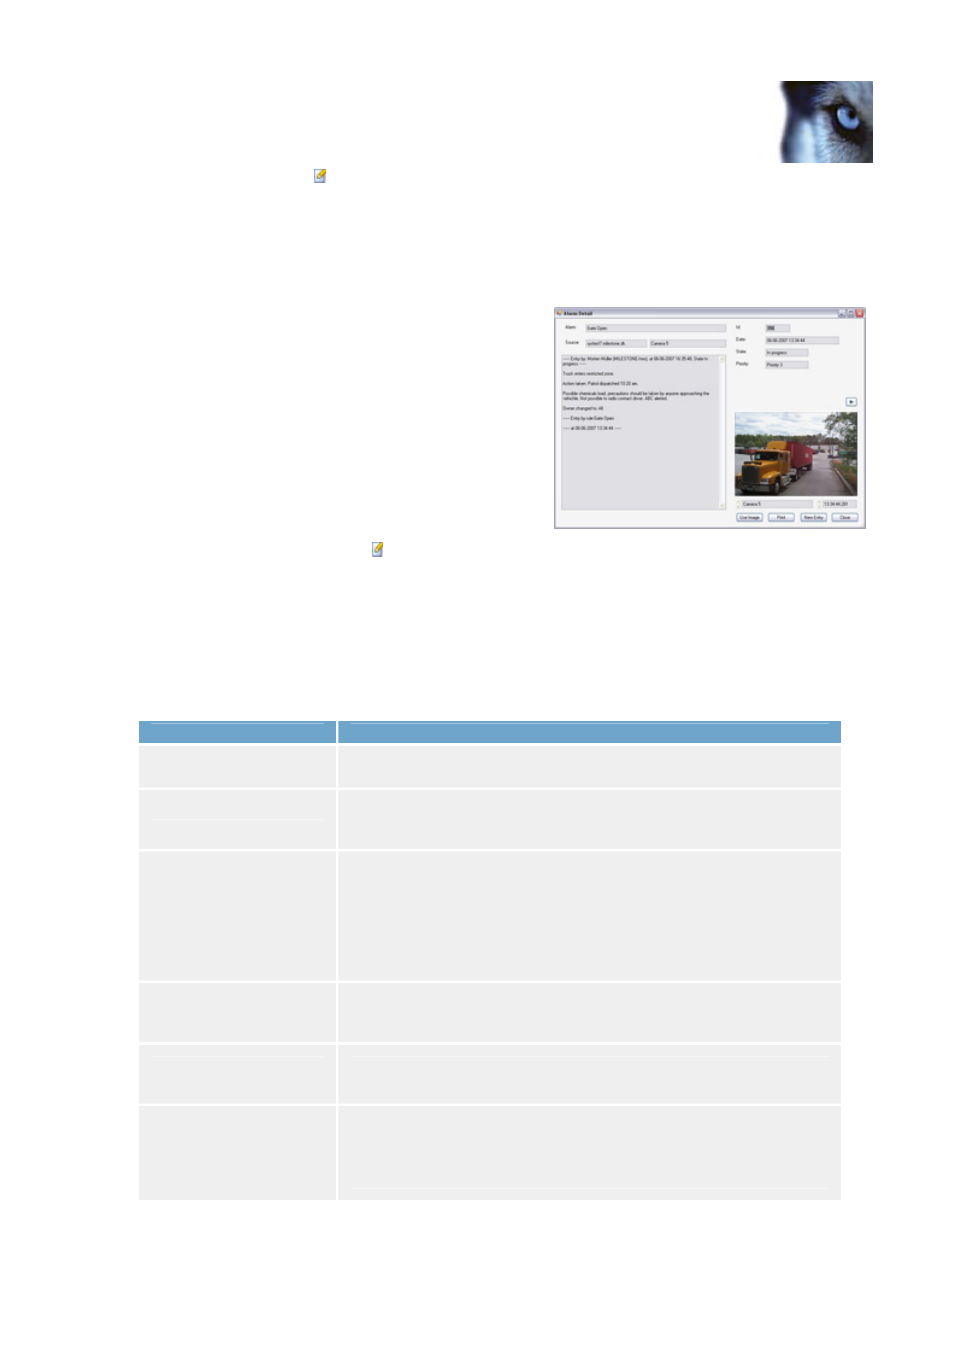
Alarm Detail Window
The Alarm Detail window lets you view detailed information about an alarm.
If required, the window lets you add more information
about the alarm. You are also able to print alarm
details, and—when relevant—to view recorded video of
the incident causing the alarm, or even live video from
the relevant camera.
You are able to access the Alarm Detail window in
three ways:
•
By double-clicking the required alarm in the
Alarm Overview section’s list of alarms. This
will display details about the selected alarm.
•
By clicking the Edit icon next to the required alarm on the Preview tab (see previous) in
the Client’s Information section. This will display details about the selected alarm.
•
By right-clicking a server or device indicator in the Client’s Map section, then selecting
Open Latest Alarm from the resulting menu (see Map Indicator Menus on page 34 for
further information). This will display details about the latest alarm registered on the server
or device in question.
The Alarm Detail window contains the following information:
Field, Button, List
Description
Alarm
Read-only field, displaying name of the alarm.
Source
Name of server (first field) and device (second field) on which
the alarm was triggered.
[Alarm History Field]
Field listing information about the alarm, including any state
changes (for example from New to Assigned). Each entry in the
list contains a timestamp as well as information about the user
responsible for the entry.
To add a new entry to the list, click the New Entry button.
Id
Unique identification number of alarm. Alarms are numbered
consecutively as they occur.
Date
Date and time at which the alarm occurred; presented in the
following format: dd-mm-yyyy hh:mm:ss.
State
Current state of the alarm; for example New, Assigned, Closed,
etc.
To change the state, click the New Entry button.
www.milestonesys.com Page
23
Alarms