Dwyer STFLO User Manual
Page 5

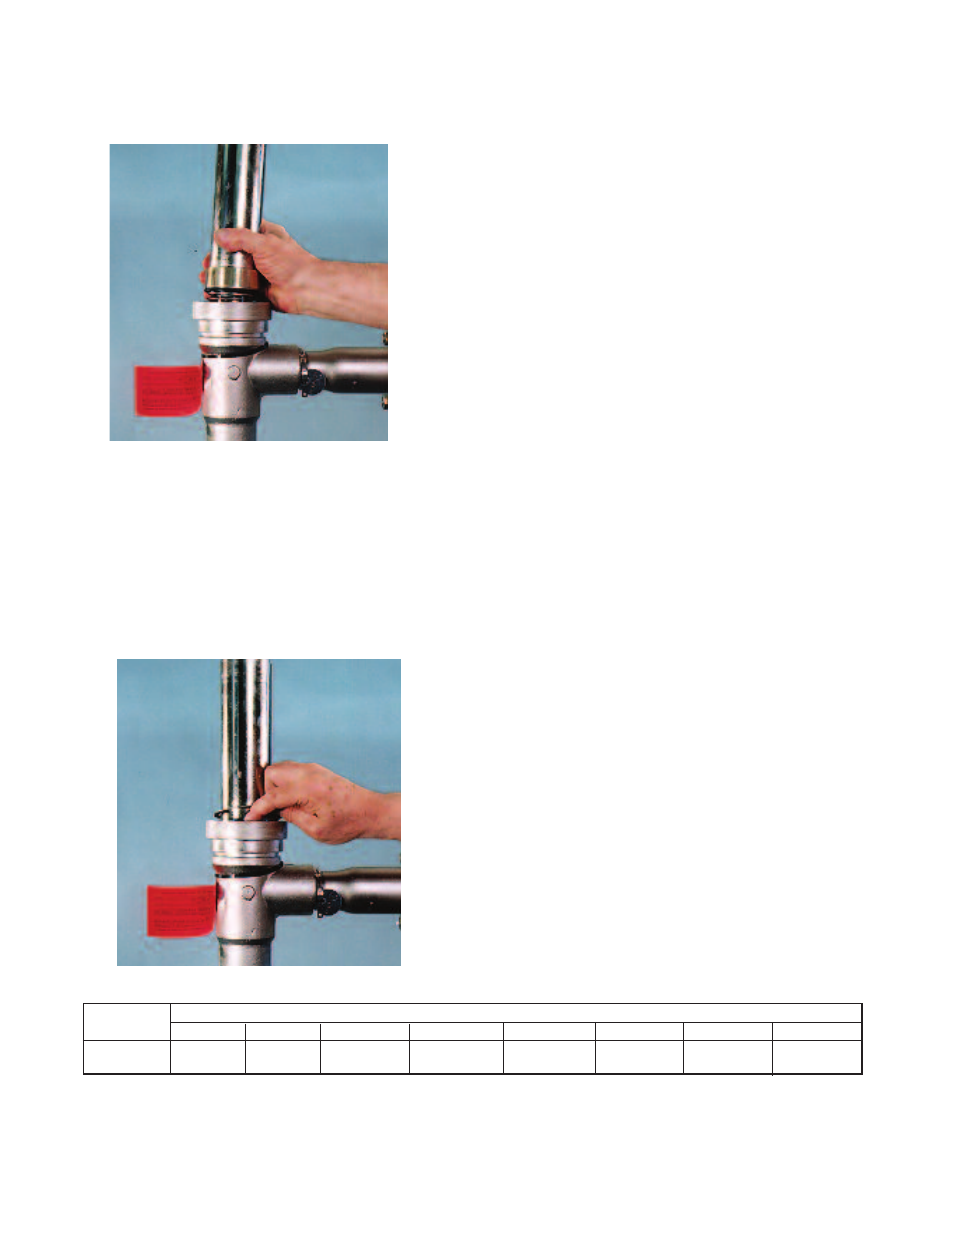
5. Using hands only, press the sight tube firmly down into the meter body
with a twisting motion. Be careful not to rock the sight tube side to side and
bend the snorkel tube/guide inward where it might interfere with float
movement. Rotate sight tube as necessary for scale visibility and/or
alignment of the raceway screw.
6. Slide the inner flange ring over the sight tube. When properly seated, the
top of the flange ring should be flush with the bottom edge of the snap ring
groove.
7. Separate the coils of the spiral retaining ring, and insert one end into the
body groove. Wind the ring into the groove, making sure the ring is properly
seated. Then replace the ball indicator (the tip of a screwdriver can be used
to help locate the magnet), and replace the raceway and raceway cover.
Slide the reading scale over the sight tube, aligning the top of the black
metal of the reading scale with the screw hole on the sight tube. The
reading scale should read zero. Use the set screws to secure the reading
scale in place. Verify that the indicator ball moves with the magnet.
If new flow internals are used, the scale may have to be remounted on the
sight tube. Depending on the model type, this can be done either by
loosening the mounting screw, or reattaching the scale with double sided
adhesive (new flow internals are shipped with a new scale).
REPLACEMENT PARTS
Under proper care, there should be no need to stock replacement parts. If
the service or environment is quite harsh, or frequent meter disassembly
dictated, a spare O-ring may be desirable.
Otherwise, parts only need to be replaced if damaged. Any visible damage
to the entire surface of the O-ring or sight tube (particularly from the bottom
edge) indicates need for replacement. To insure accuracy, the inside
surface of the meter core tube, slot edges, and OD of the float piston
should be free of nicks, chips, with no visible erosion of any surfaces. If
abrasive particles are suspended in the meter fluid, it may be desirable to
keep replacement core tube/float assemblies on hand (Dwyer Instruments,
Inc. may also be able to recommend a more abrasive-resistant
construction).
To order parts, include the model and serial number of the units involved,
and description of the part ordered. If converting the meter to a new
application, in addition to the model and serial numbers, SEND DWYER
INSTRUMENTS, INC. COMPLETE APPLICATION DATA INCLUDING
FLUID, MAXIMUM FLOW RATE, MAXIMUM AND OPERATING
PRESSURES
AND
TEMPERATURES,
AND
APPLICATION
PARTICULARS OR FLUID CHARACTERISTICS. This information is
essential for Dwyer Instruments, Inc. to provide proper items, and verify
that the new application is within the operating limits of the flowmeter.
TEMPERATURE VS. PRESSURE, OPERATING LIMITS, SERIES STFLO STAINLESS STEEL FLOWMETERS*
METER SIZE
& MATERIAL
3/4” NPT
1-1/2” NPT
MAXIMUM NON-SHOCK WORKING PRESSURE, PSIG @ ˚F
0˚F (-18°C)
1000 (68.9)
800 (55)
350˚F (176°C)
990 (68.2)
790 (54.4)
400˚F (204°C)
970 (66.8)
780 (53.7)
450˚F (232°C)
950 (65.5)
770 (53)
500˚F (260°C)
930 (64.1)
760 (52.4)
600˚F (315°C)
900 (62)
750 (51.7)
300˚F (148°C)
1000 (68.9)
800 (55)
70˚F (21°C)
1000 (68.9)
800 (55)
*
OPERATING LIMITS GIVEN ARE BASED ON WATER OR AIR. FOR MORE SEVERE SERVICE, CORROSIVE, AND OTHER MEDIA AND/OR ENVIRONMENTAL
FACTORS, AN ADDITIONAL CORRECTION FACTOR DOWN-RATING THESE LIMITS MAY BE REQUIRED. LIMITS ARE BASED ON TESTING AND PRACTICAL
EXPERIENCE. POSSIBLE EXTREME APPLICATIONS CONDITIONS CANNOT BE FORESEEN. THUS, DATA OFFERED ONLY AS A GUIDE. IT IN NO WAY
CONSTITUTES A SPECIFIC RECOMMENDATION OR WARRANTY EXPRESSED OR IMPLIED.
