Dwyer DH3 User Manual
Page 4
4
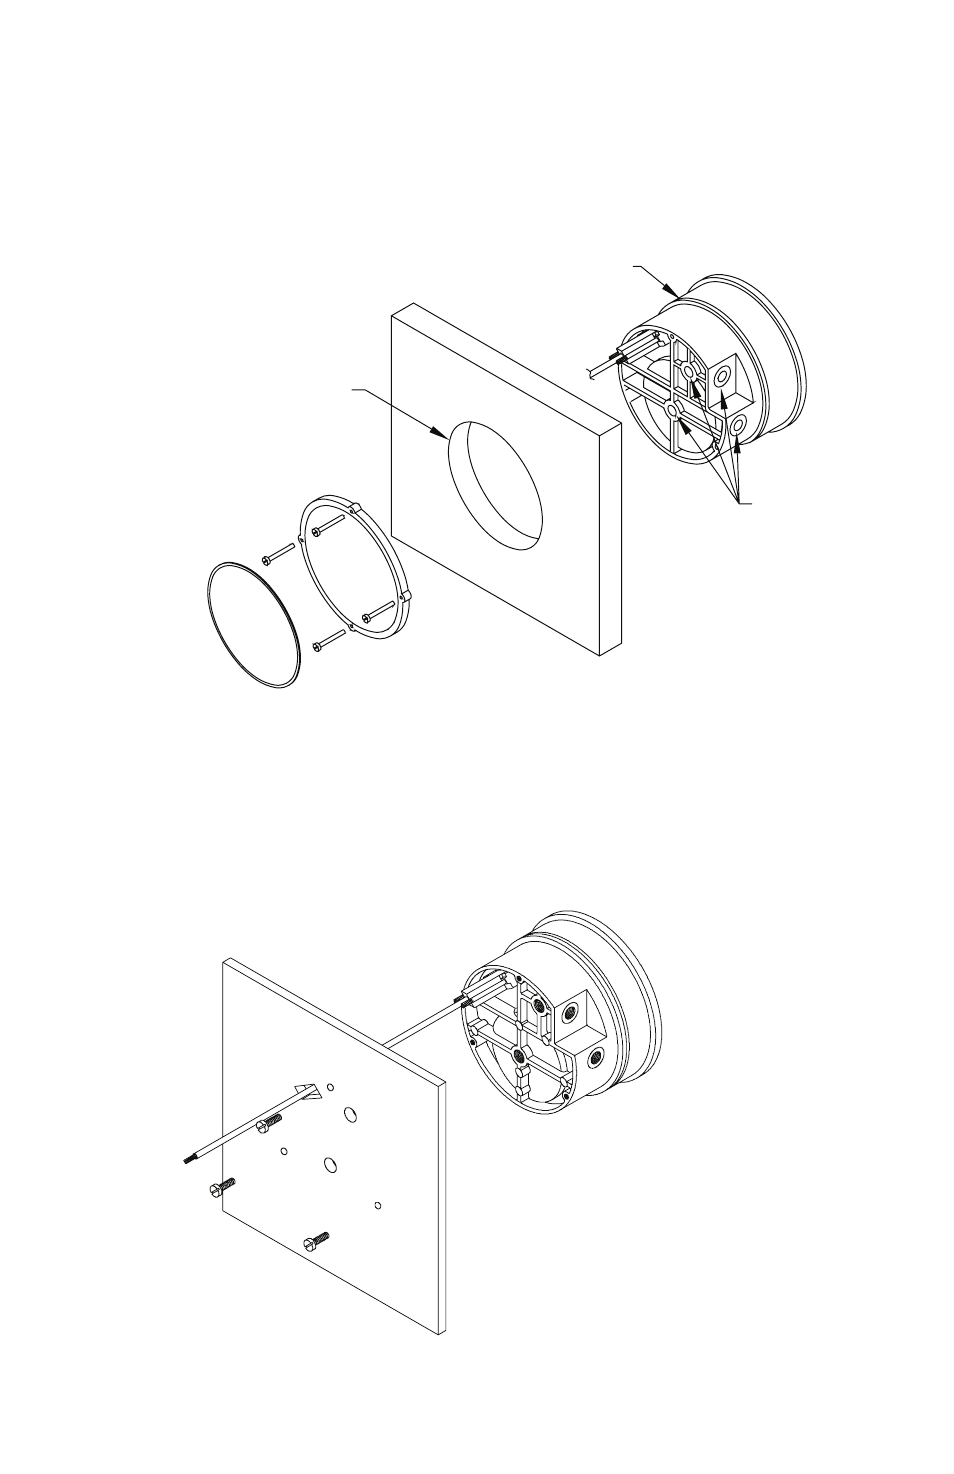
MOUNTING: The DH 3 may be either panel (flush) mounted or surface mounted.
Panel Mounting - Cut a 4-13/16˝ or 122 mm diameter hole in the panel and insert the unit
from the front. Slip on the mounting ring with the stepped side facing rear. Next, fit the snap
ring into the narrow groove at back edge of bezel. Thread four (6) 32 x 1-1/4˝ mounting
screws into tapped holes in mounting ring and set it against snap ring. Tighten screws
against rear of panel. See Fig. B.
Surface Mounting - Drill (3) 3/16˝ (4.76 mm) diameter holes for mounting and cut a 9/16˝
x 1-1/2˝ (14.3 x 38.1 mm) opening for access to terminal block as indicated in Fig. B. If rear
pressure connections are to be used, also provide 1/2˝ diameter holes as shown in Figs.
A and C. Insert 6-32 machine screws from rear of mounting surface, thread into tapped
holes on back of transmitter and tighten.
Fig. B
Fig. C
Ø4-3/4 [120.65] HOLE
PNEUMATIC
PRESSURE TAPS
SNAP RING
GROOVE