Installation procedures – Blue Angel Pumps BEZJRPP50 User Manual
Page 2
2
Operating Instructions
EXJRpp
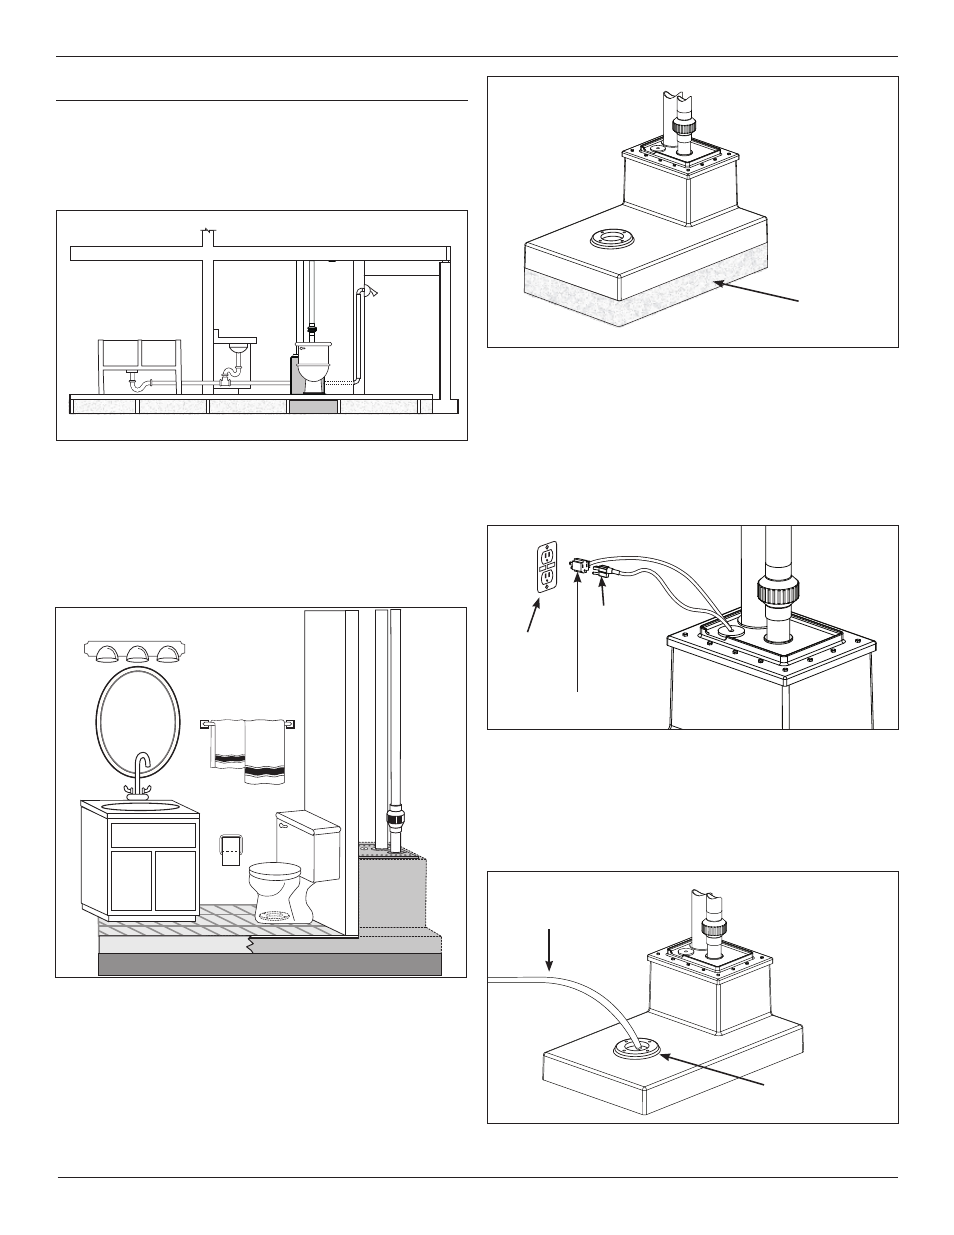
3. Determine the location or layout of other fixtures to
be used with your Rapid Restroom. Tubs, showers, and
sinks will be gravity fed into the tank, so they must be
positioned and installed accordingly (Figure 3).
4. The Rapid Restroom is designed to fit within a 2 in.
x 6 in. floor joist, for built in installations. You may
be able to build a wall between the toilet and the
pump tower, depending on the size of the toilet
(Figure 4).
5. Level the tank to within 1/8 in. for the length and
width of the tank. Do not use wooden shims to level
the tank, use hydraulic cement or similar material
for leveling (Figure 5).
6. After the Rapid Restroom is placed in its final
position, test the system before building sub-floors
or attaching fixtures.
a. Using the check valve temporarily connect the
discharge pipe to the house drain.
b. Using the piggyback switch plug, plug the pump
into a GFCI outlet (Figure 6).
c. Fill the tank with water (Figure 7); the pump
should turn on when the water level reaches
about 4 1/2 in. The closet flange should not fill to
overflowing before the pump turns on.
www.waynewatersystems.com
Installation procedures
(continued)
figure 3: fixture layout
figure 4: built-in Installation
figure 5: level tank
Hydraulic
Cement
figure 7: fill tank
Closet
Flange
Water
Hose
RESET
TEST
figure 6: grounding plugs
Piggyback Plug
GFCI
Outlet
Pump
Power
cord