SHIMPO FG-3000 User Manual
Page 6
10. TROUBLESHOOTINg
According to the following table, review possilbe solutions for
problems encountered. Do not disassemble the gauge by your-
self or attempt to repair. If you cannot resolve the fault yourself,
please contact Nidec-Shimpo.
6
Failure
Possible Causes
Potential Solutions
Unit will not
turn on
Low battery
Recharge and then re-
boot. If after 3-4 hours of
charging time the battery
does not properly hold a
charge, the battery needs
to be replaced. Contact
Nidec-Shimpo.
No key
sound
Key sound is
turned off
Turn on the key sound in
menu
No backlight Backlight is turned
off
Turn on the backlight in
menu
Error is too
large
The gauge is not
calibrated
Calibration of force gauge
is required. After calibra-
tion if the error remains
outside of the specifica-
tions, sensor may be
damaged. Contact Nidec-
Shimpo to get RMA for
return.
The RS232 serial port is used to connect the mini-printer to print
the memory data stored on the gauge.
RS-232 Specifications:
-Hardware Flow Control: None
-Data word length: 8 bits
-Stop bit: 1bit
-Parity: None
-Baud rate: 38400
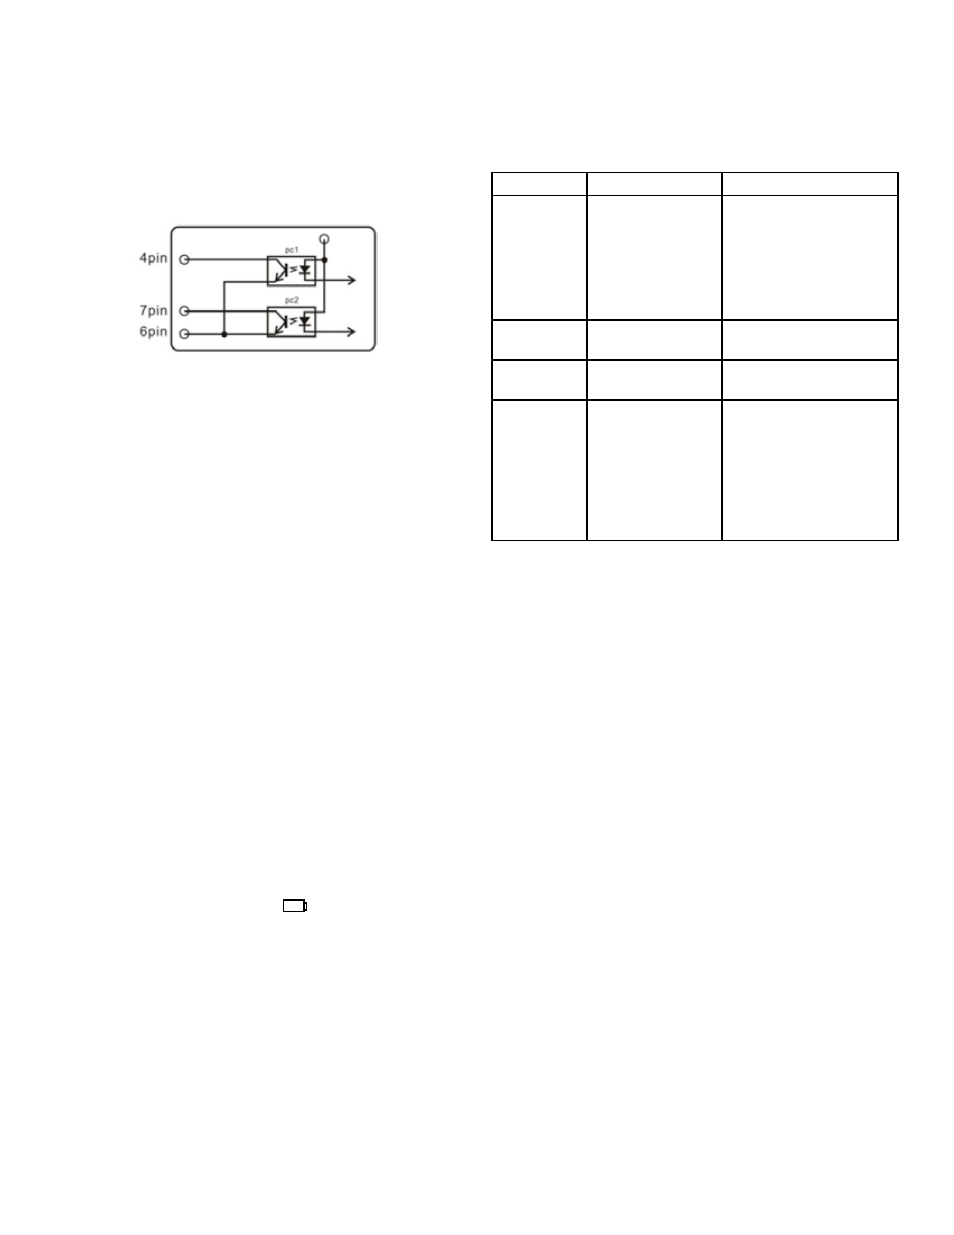
Fig. 8-2
8.2 Setpoint Output
Two NPN open collector setpoint outputs are available.
The internal circuit of the setpoint output is shown as Fig 8-2.
Pin7 with Pin6 will be connected when an overload alarm occurs.
In Preset Mode, Pin7 to Pin6 is connected when the measured
value exceeds the upper limit. Pin4 to Pin6 is connected when the
measured value passes below the lower limit.
CAUTION: Maximum permissible voltage: pin 7 to 6, pin 4 to
6 must be lower than 35v ; pin 6 to 7, pin 6 to 4 must be lower
than 6v .
Remember to remove the load after measurement. Applying a
load for a long time period may affect the accuracy of the instru-
ment.
9. MAINTENANCE
9.1 Maintenance
After use, please keep the instrument body clean. Do not let oil
and other substances persist on the body and screen so as not
to damage the instrument. Remember to remove the load after
measurement. Applying a load for a long time period may affect
the accuracy of the instrument.
9.2 Charging
When the battery is low, the icon “ ” will be displayed. The
batteries should be charged immediately.
Connect the gauge and the charger with the USB cable. Then
connect the charger with AC socket to start charging.