SHIMPO FG-3000 User Manual
Page 5
5
Fig. 5-6(d) Fig. 5-6(e)
5.7 Default
With this function, the force gauge can be restored back to the
original factory settings. Only perform this function when all other
troubleshooting tactics have first been attempted.
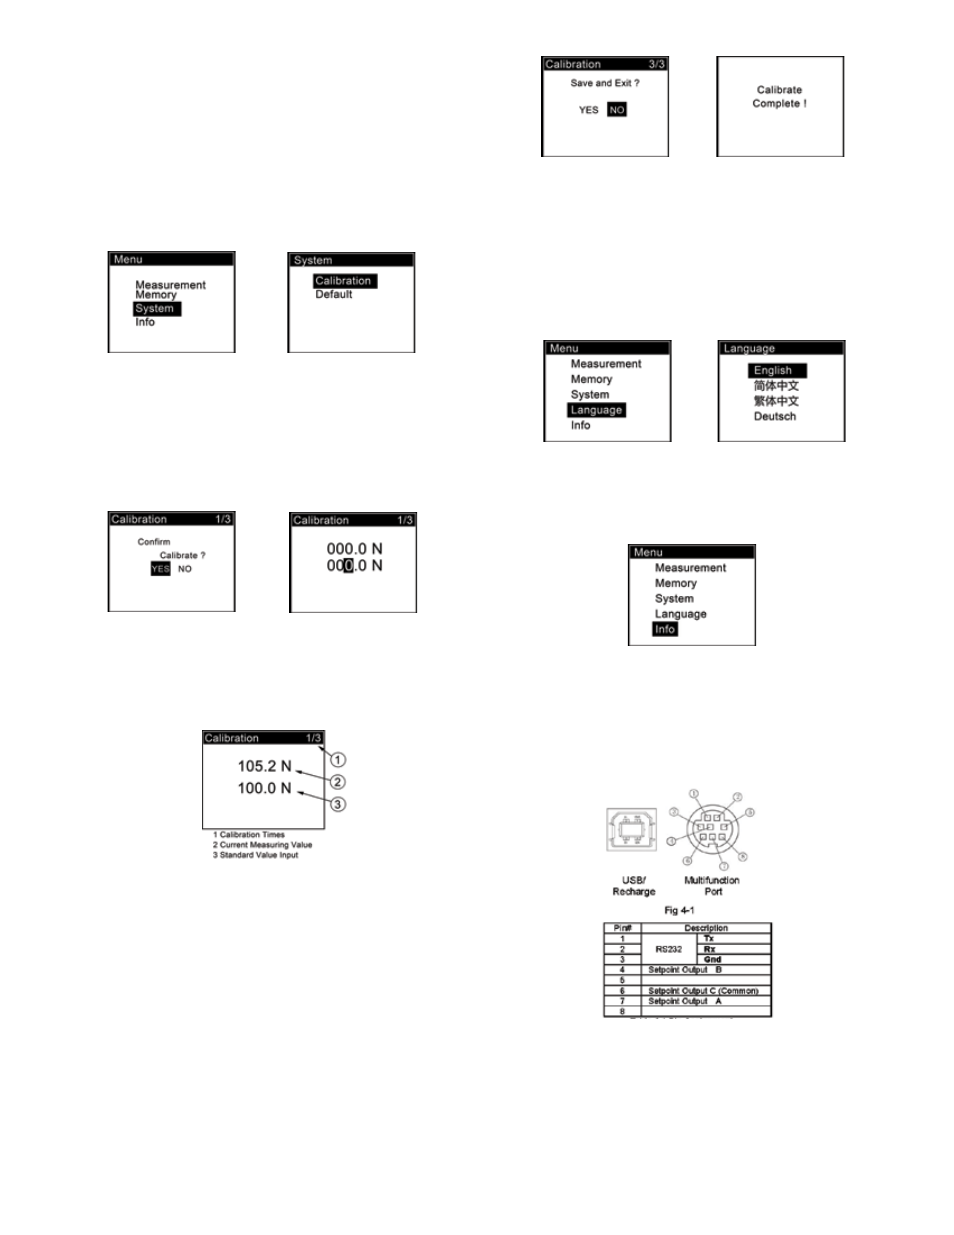
6. LANgUAgE
The force gauge can display in various languages. Set the lan-
guage as desired. See Fig. 6.
Fig. 6
7. INFO
Information about the force gauge such as model, version and
serial number is provided in this menu. Fig. 7
Fig. 7
8. COMMUNICATION PORT
The force gauge has a USB for recharging and communicating
with a PC, plus an 8 pin connection for printer connection and set
point output. Fig. 8-1
Fig. 8-1
5.6 Calibration
Because of the sensor material performance or the influence of
external factors, there may be errors of a certain level after
a period of usage.
It is recommended to send the force gauge to a specialized test-
ing organization for calibration.
If you have standard force weights or other standard load and a
test stand, you may utilize this function and procedure to calbrate
the sensor.
Fig. 5-6(a)
1) Mount the force gauge.
2) Use the tare by use of the ZERO key.
3) Enter Calibration sub-menu as in Fig. 5-6(a).
The calibration interface is shown in Fig. 5-6(b).
Fig. 5-6(b)
4) Load a standard force. Now the value in the standard input area
is just equal to the current measured value. Wait a moment for the
force to stabilize.
Fig. 5-6(c)
5) Press ZERO and MODE to input the standard force value.
6) Press MENU to enter the next calibration. Press LOG to inter-
rupt the calibration.
When 3 calibration points have been finished, a confirm window
will pop up asking to “Save and Exit”(YES)/(NO). Fig. 5-6(d)
Press ZERO or MODE to select, then press MENU.
If “YES” is selected, Calibration is complete. Fig. 5-6(e)