SHIMPO FGV-series User Manual
Instruction manual
1
Instruction Manual
Instruction Manual
Instruction Manual
Instruction Manual
Instruction Manual
FGV Series
FGV Series
FGV Series
FGV Series
FGV Series
Digital Force Gauges
Digital Force Gauges
Digital Force Gauges
Digital Force Gauges
Digital Force Gauges
Models FGV
Models FGV
Models FGV
Models FGV
Models FGV-0.5 — FGV
-0.5 — FGV
-0.5 — FGV
-0.5 — FGV
-0.5 — FGV-100
-100
-100
-100
-100
Do not use the gauge in hostile environments:
A. High humidity areas
B. High temperature environments
(see specifications table)
C. Caustic areas where various chemicals can seep into
the unit.
When not in use, place gauge back in its case to prevent
any damage due to an accidental drop etc. With a little care
you can have an instrument that can last and provide ser-
vice for many years.
P
P
P
P
Precautions
recautions
recautions
recautions
recautions
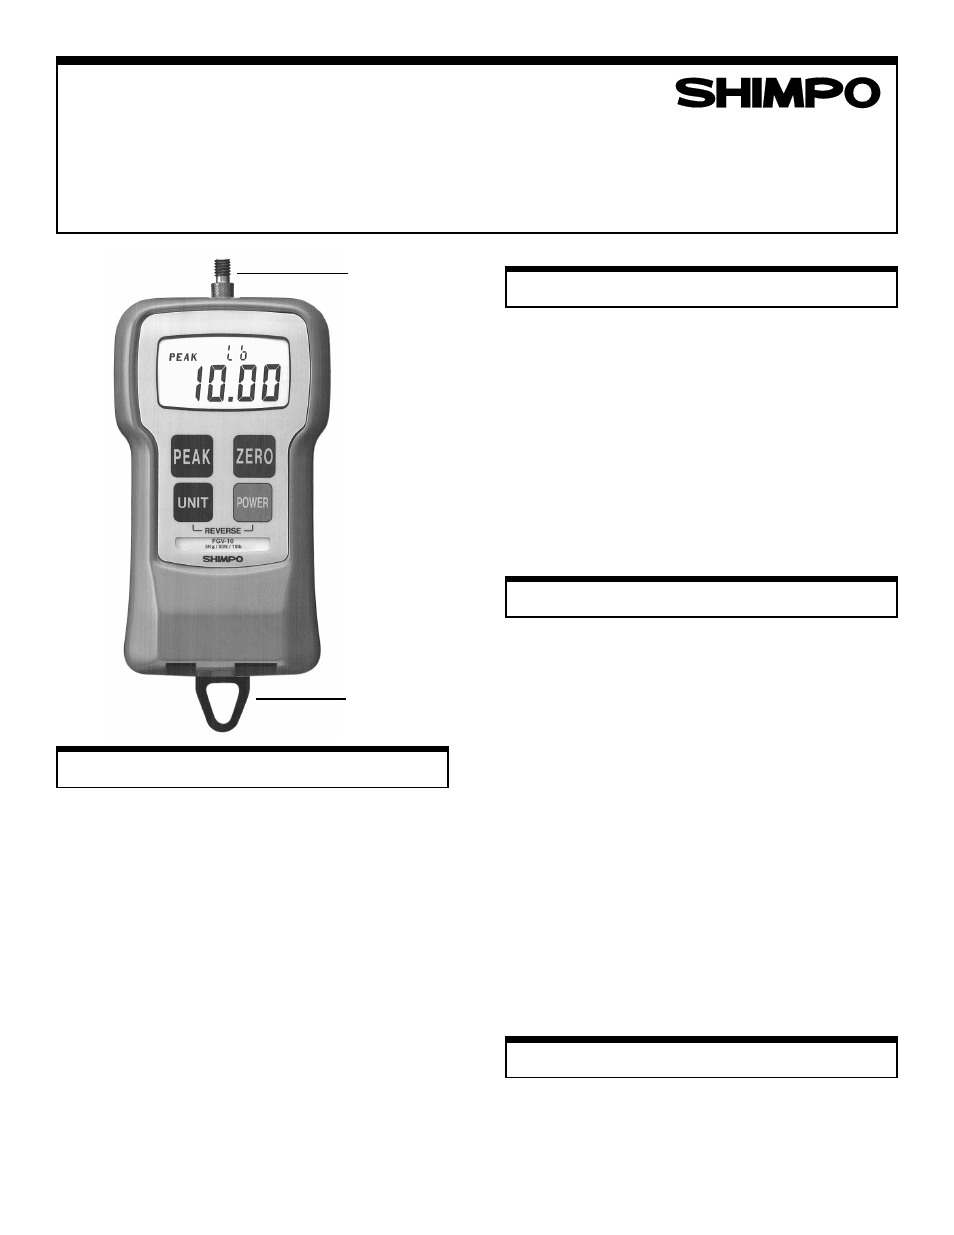
SHAFT
HANGER
You have just received one of the world's smallest, rugged,
economical and versatile force gauges; its ergonomic de-
sign makes this gauge a friendly instrument to the human
hand. With just the touch of a button you can measure force
in any engineering units desired, i.e. lbs, kgs or N. Any
force from a few oz. up to 100 lbs can be accurately mea-
sured with one of the FGV family gauges. This series offers
an RS232C and an analog output port for further process-
ing the displayed measurements.
The unit's microprocessor enables it to measure forces very
accurately in the "average" or "peak" mode. Its LCD dis-
play is smartly designed to inform the operator at all times
of exactly what is going on.
If the hanger is used or the gauge is placed on a test stand,
reversing the display so that it can be read right-side-up is
simple: press only two buttons and the digits and units indi-
cators reverse themselves instantly.
General Information
General Information
General Information
General Information
General Information
Operation
Operation
Operation
Operation
Operation
When the carrying case is opened make sure you have all
the accessories that come with the instrument.
1. Charge the batteries for approx. 12 hrs. before using the
gauge (batteries come discharged from the factory).
When batteries are charging the BAT indicator is ON.
When the batteries are fully charged the indicator goes
OFF.
2. Hand tighten appropriate attachment to unit's measuring
shaft (do not use a wrench or any other device to tighten
the attachment).
3. Press the POWER switch and release. On the release of
the switch the display will momentarily show all 8's (digit
segment self-check) and then will show some zeros with
the last one or two digits changing to some random num-
bers. Also the unit of measurement (lbs, kgs or N) will
appear above the digits and stay as long as the instru-
ment is on.
Change Display Units
Change Display Units
Change Display Units
Change Display Units
Change Display Units
To change the display units, just press the UNIT button and
the units will change every time this particular button is
pressed.