AST AG100 Datasheet User Manual
Page 2
TM
www.astsensors.com
© 2014 American Sensor Technologies Inc. AG100 03/13/2014.
All specifications subject to change without notice.
ON OFF
Press and release this button to turn the AccuGauge ON. Press and hold
this button to turn the AccuGauge OFF. When the AccuGauge is ON press
and release this button to turn on the backlight. The AccuGauge will auto-
matically turn OFF after one hour to conserve battery power.
BACKLIGHT
The backlight of the AccuGauge will illuminate the LCD display for 10 sec-
onds anytime one of the four buttons is pressed. To turn on the backlight
without changing the display, press and release the ON/OFF button.
UNITS
Press the UNITS button to cycle through the units of measurement the Ac-
cuGauge can display. The AccuGauge can measure pressure in PSI, BAR,
Kg/cm2, Inches Hg, Inches H
2
O and ATM. The unit of measurement can be
changed at any time and will not affect the operation of the AccuGauge.
RELATIVE PRESSURE
Press and release the ZERO button to place the AccuGauge in relative
pressure mode. The REL symbol will be displayed at the top of the LCD to
indicate the gauge is operating in relative pressure mode. The display will
rezero at the applied pressure that was acting on the Gauge at the moment
the button is pressed and display pressure readings +/- relative to that
pressure. Press this button again to return to GAUGE mode of operation,
which displays pressure relative to the local pressure.
ZERO
Over the course of time it may become necessary to reset the AccuGauge
to zero. Press and hold the ZERO button until the REL symbol appears
and disappears and the display reads zero pressure in the selected units
of measurement. Release the ZERO button and the display will read zero
pressure in the current units selected.
MIN MAX
The MIN MAX button allows the user to read the minimum and maximum
pressure the AccuGauge has detected during the time that the gauge has
been on. These readings are not saved and reset every time the gauge
is powered off. Press the MIN MAX button once and the MIN symbol will
be displayed along with the minimum pressure, press the MIN MAX button
again and the MAX symbol will be displayed along with the maximum pres-
sure. Press the MIN MAX button again and the MAX symbol will disappear
and the gauge will display the current pressure. Press and hold the MIN
MAX button to reset the minimum and maximum pressure readings.
LOW BATTERY
The AccuGauge has a battery condition indicator in the upper left corner of
the LCD display. The indicator is composed of a battery symbol and four
vertical bars. As the battery discharges the vertical bars will disappear
from right to left. When all four bars have disappeared the battery is nearly
discharged. As a final warning the symbol LOW BAT will be displayed and
indicates the battery is nearing complete discharge and should be changed
immediately. For best results replace the battery immediately. Use only
Alkaline or Lithium 9V batteries.
BATTERY REPLACEMENT
(NOTE: DO NOT open the AccuGauge unless it is necessary to change the
Battery.) To replace the AccuGauge’s Battery, use a Phillips Head screw-
driver to remove the four screws from the back plate of the gauge. Unplug
the battery cable from the battery terminals. Remove the battery from the
battery holder. Put a new battery into the holder, ensuring that it is firmly in
place. Plug the battery cable into the terminals of the battery. Make sure
that the polarity is correct. Replace the cover firmly in place. Replace the
four screws.
AG100 Operating Instructions Rev 1.1
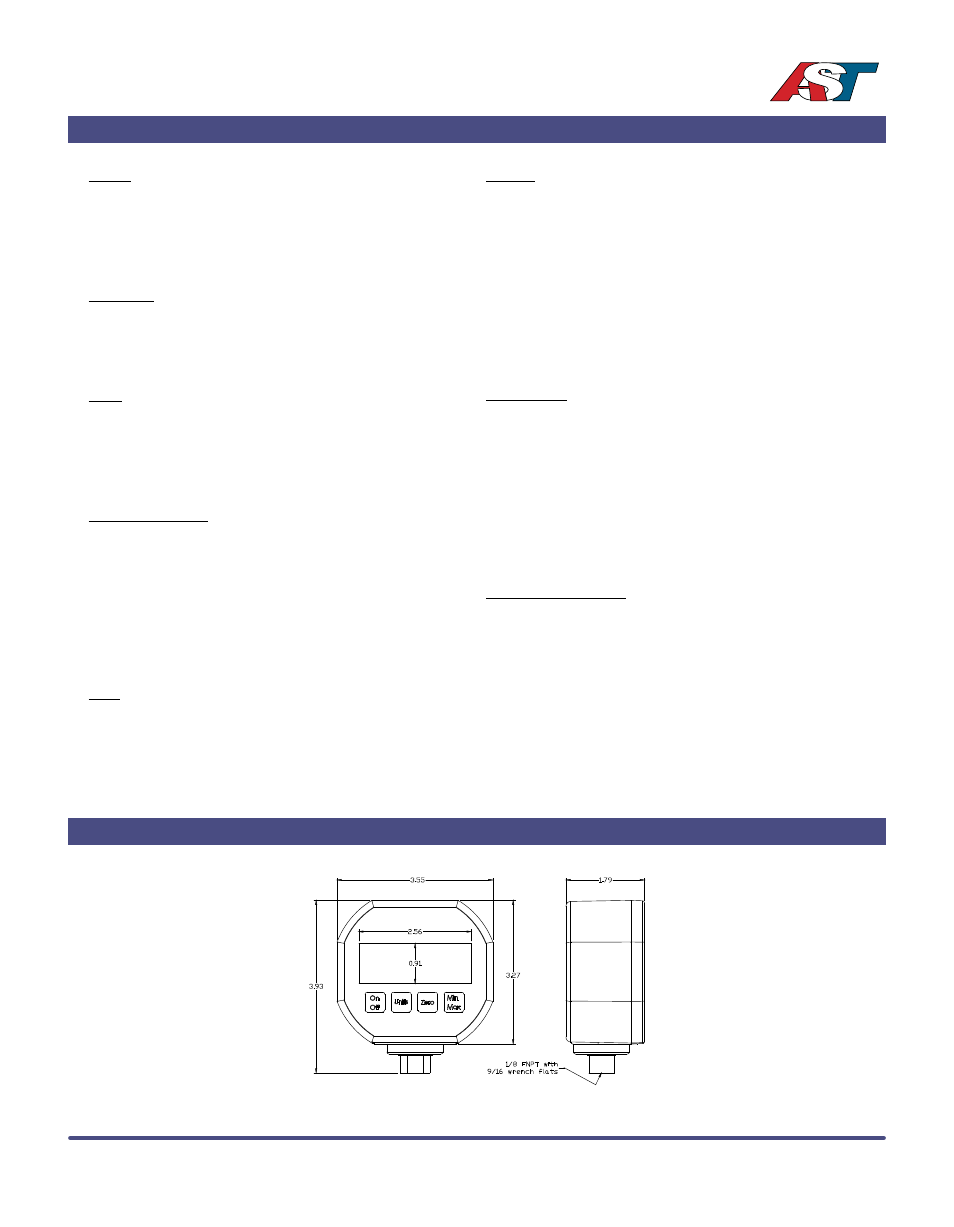
Dimensional Data