Tele vue – Tele Vue Encoder User Manual
Page 3
32 Elkay Dr., Chester, New York 10918 (845) 469-4551 www.televue.com
Tele Vue
V i s i o n a r y
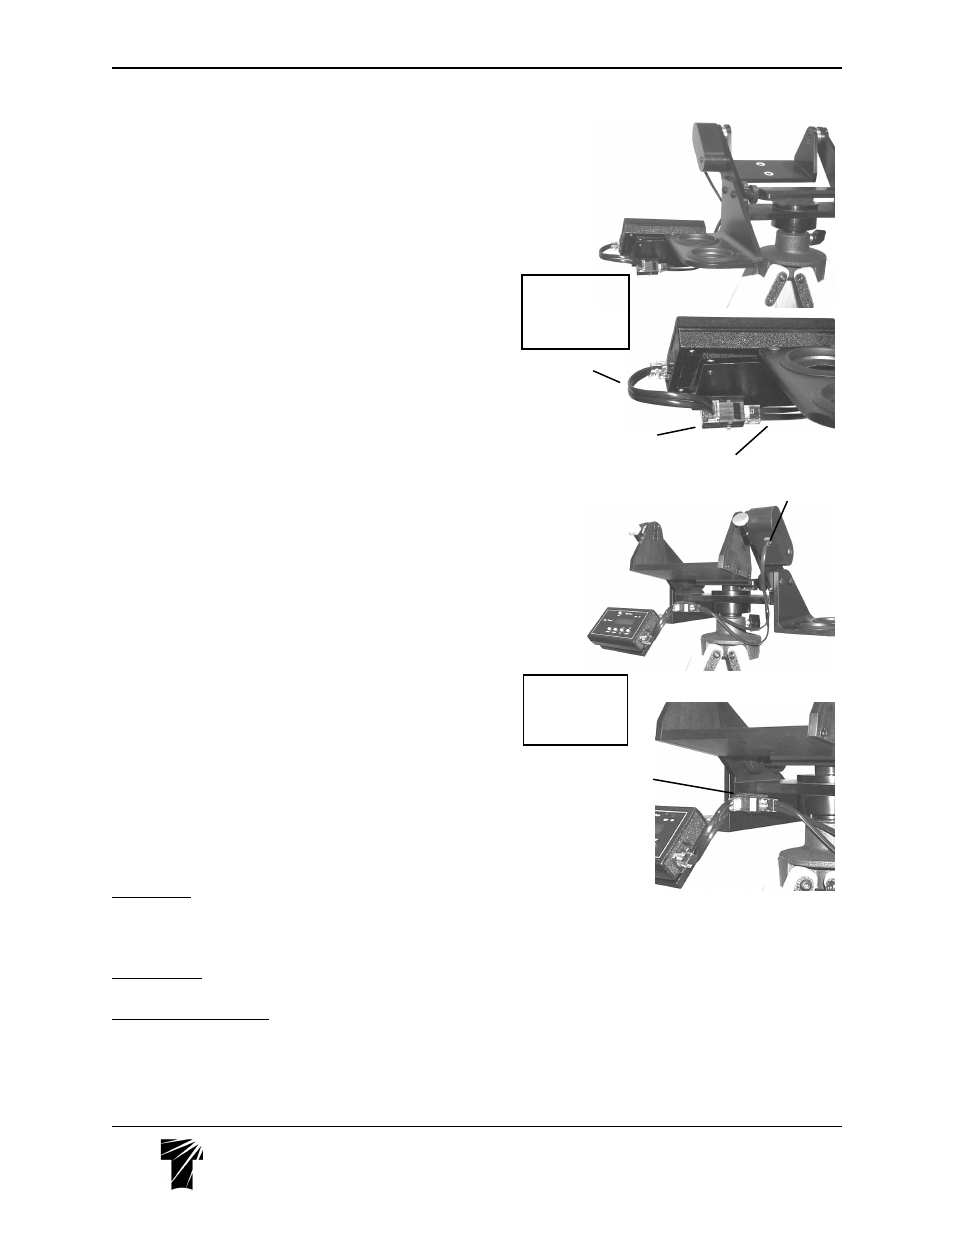
USE WITH SKY TOUR CADDY PLATE
The Sky Tour Caddy Plate conveniently places the Sky Tour Computer at
your finger tips, while the Eyepiece Caddies hold your eyepieces. These
are especially useful for Tele-Pod owners, and are a standard feature of the
factory mount / Sky Tour package.
20) Attach Caddy Brackets to each of the Yoke Arms as per the supplied
instructions
21) Attach the Sky Tour Caddy Plate to the preferred Caddy Bracket as per
the supplied instructions.
22a) If the Plate is attached to the right Caddy, use the Velcro to stick the
Harness Junction Box to the back of the plate, in the lower right hand corner.
Orient the Box so that the Main Wiring Harness plugs straight in from the left
end of the box. The Pigtail Harness will then plug in from the front. Loop the
Pigtail around and plug it into the Sky Tour Computer.
22c) If the Plate is attached to the left Caddy, use the Velcro to stick the
Harness Junction Box to the underside of the mount head, in the left corner,
against the left side Caddy Bracket. Orient the Box so that the Main Wiring
Harness plugs straight in from the right end of the box. The Pigtail Harness
will then plug into the Box directly toward you. Plug the other end into the Sky
Tour Computer.
REMOVING and REINSTALLING ENCODERS
IMPORTANT: Once the encoders are pushed into place, they cannot be
pulled out. Do NOT attempt to pull up or pry them out. They will break.
Instead, they need to be tapped out from the end of the 1/4" diameter
encoder shaft. Spread a towel or some other thick fabric over the work
surface and any part of the head that an encoder may hit once it has been
pushed free. Use an Allen key or small screwdriver as a "drift" (spacer) to
tap against.
1) Remove the button head screw(s) holding the respective encoder cover
in place.
2) Loosen the respective encoder shaft set-screw.
3a) Altitude Encoder - Place the drift against the end of the encoder shaft,
as seen in the bottom photo on the prior page. Tap lightly with a hammer to
dislodge the encoder
3b) Azimuth Encoder - The head must be removed to stick drift into the
3/8" hole in the middle of the underside of the Azimuth bearing. Follow
removal instructions below.
Tele Pod mount: the Quick Release Base must be removed by loosening
both the lower set screw in the bottom disc of the azimuth bearing and the
small set screw in the underside of the Quick Release Base’s flange, and
unscrewing the base.
Panoramic mount: the attachment post must be removed by loosening the
set screw and unscrewing the post until it comes off.
Gibraltar or Gibraltar5 mount: the mounting stud must be removed by
loosening the lower set screw in the bottom disc of the azimuth bearing and
unscrewing the stud.
Close-up of junction box
location and orientation
Right handed instal-
lation on Sky Tour
Caddy Plate as
viewed from in front
of the mount
Pigtail
Main Wiring Harness
Left handed
installation on Sky
Tour Caddy Plate
as viewed from
behind the mount
Close-up of junction box
location and orientation
Altitude
Encoder
Jack