Charging the battery, Inserting the battery in the proflex 800 – Spectra Precision ProFlex 800 CORS User Manual
Page 18
14
Charging the Battery
The battery charger comes with a separate universal AC
adapter fitted with a 1.5-m output cable. The AC adapter
includes a choice of four different, detachable plug types.
Follow the instructions below to operate the charger.
• Choose the plug type that is suitable for your country.
• Secure that plug on the AC adapter.
• Connect the cable from the AC adapter to the battery
charger.
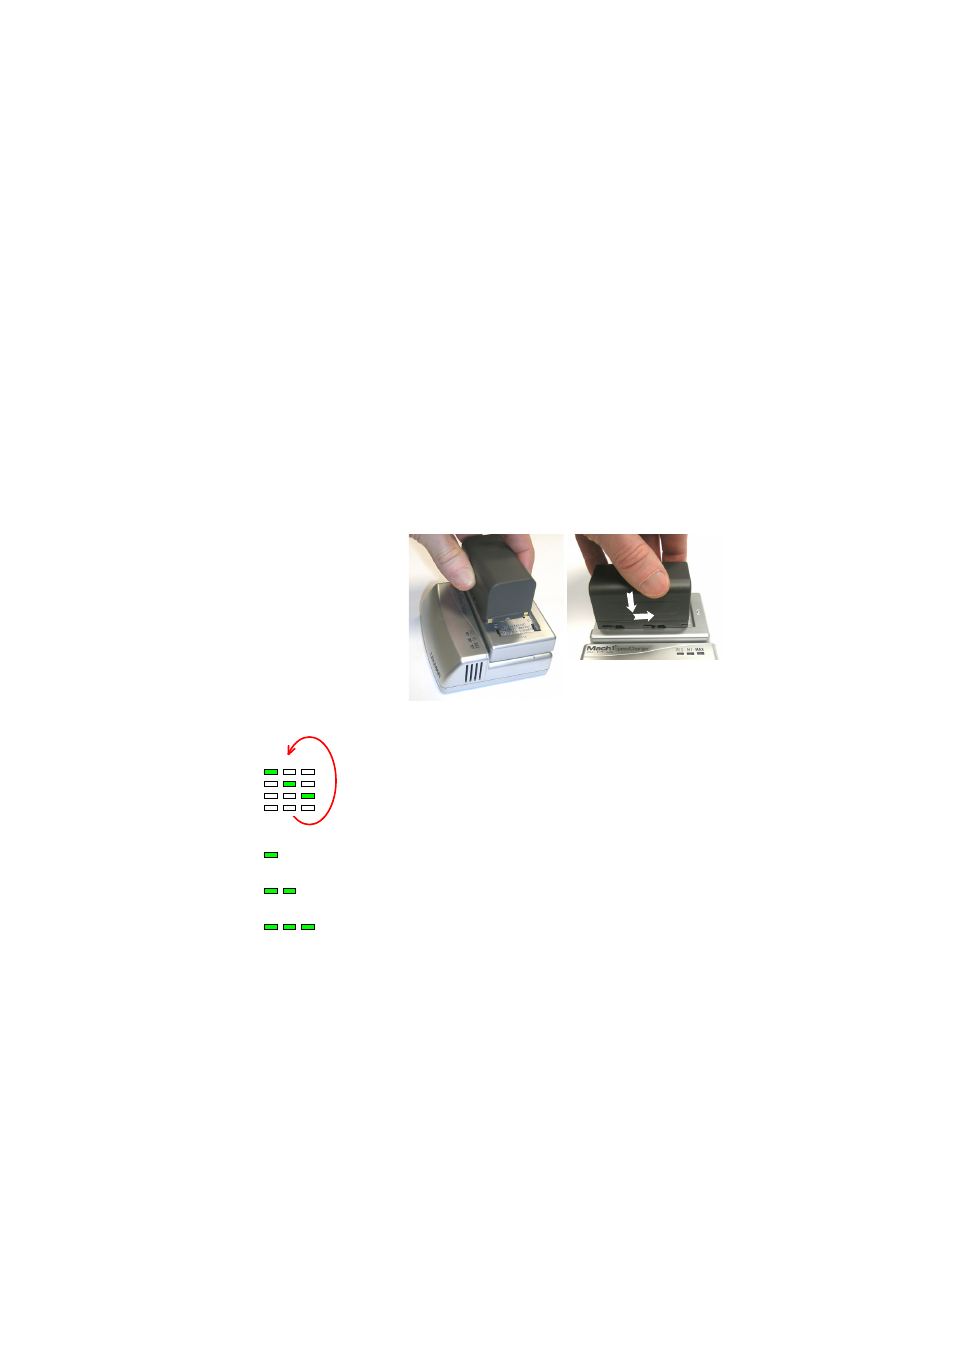
• Give the battery the right orientation with respect to the
charger [1] (the battery terminals should come into
contact with the two sets of connectors on the charger),
then push the battery against the plate and slide it forward
[2] until it locks into place.
• Plug the adapter into an AC outlet. Battery charging starts
immediately.
For a low battery that’s being charged, you will first see the
three LEDs switch on and off, one after the other, followed
by a short period of time when none of the LEDs is on (see
[3]).
After about two hours of charging, the MED LED will stay
on [4]. A few minutes later, the HI LED [5], and then the
MAX LED [6] will also stay on.
• When the three LEDs are on, this means the battery is
fully charged and can be disconnected from the charger.
Inserting the Battery in the ProFlex 800
• Insert the battery into the compartment making sure the
battery has the right orientation (the battery terminals
should come into contact with the two sets of connectors
located at the bottom of the compartment).
• Close the trapdoor, push the finger screw in tight, and turn
it fully clockwise.
[1]
[2]
1
1
2
MED
MAX
HI
MED
MAX
HI
[3]
[6]
MED
MAX
HI
[5]
MED
MAX
HI
[4]