Curt-o-matic, Warning, Installation – Hired-Hand Curt-O-Matic User Manual
Page 2: Emergency ventilation system, Figure 2 curt-o-matic iii, Figure 3 assembly components, Inside, Outside, Chain adjustment kit
Curt-O-Matic
Emergency Ventilation System
HIRED-HAND, INC. • 1733 Co Rd 68 • Bremen, AL 35033
· Phone 256-287-1000 • Fax 256-287-2000
Manual Part No. 4802-0103 rev 10-02
Page 2 of 4
INSTALLATION
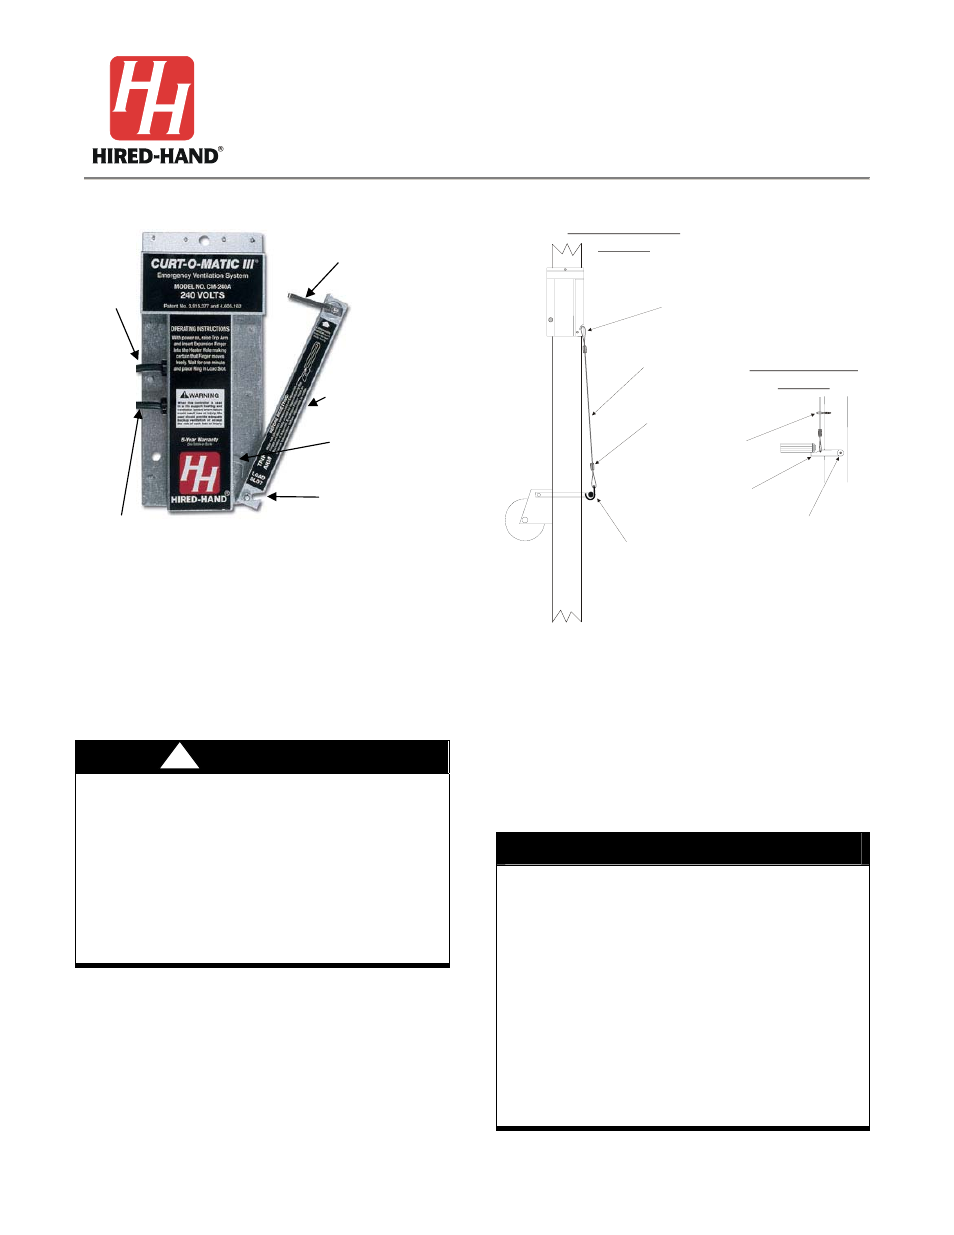
Figure 2
Curt-O-Matic III
Inside
Winches mounted on post inside house:
Curt-O-Matic should be mounted at least 16” above
winch. Mount the Winch Release Lever as shown in
Figure 3. Place the Cable Loop in the Curt-O-Matic
Load Slot. Run cable through eye screws to Winch
Release Lever.
WARNING
1. DO NOT secure the Winch Handle J-Hook to
the Winch Handle. The Winch Handle should
ONLY be resting in the J-Hook.
2. DO NOT over-tighten the Winch release Lever
mounting screw to the wall.
3. DO NOT mount the Curt-O-Matic on any
flammable surface.
4. Use ONLY accessories and hardware supplied
by Hired-Hand.
Outside
Winch mounted outside on corner of building:
If this set-up is used with a Power-Trak, the Curt-O-
Matic should be mounted on the lower U-bolt on the
corner bracket while using the Handle J-Hook.
Refer to Figure 3. Otherwise, mount the unit above
winch in a convenient location.
Cable Loop
in Load Slot
Place flat washers on
both sides of Winch Release
Lever and mount with screw.
Secure in place although
DO NOT OVER TIGHTEN!
Lever must rotate freely
and without obstruction.
Release Lever
CURT-O-MATIC
Handle J-Hook
Galvanized Cable
Crimp Sleeve
Eye Screws
Handle J-Hook
Option
Release Lever
Option
Figure 3
Assembly Components
Chain Adjustment Kit
Fasten spring hook (or Quick Link) to curtain cable
with cable clamp. Secure one end of chain to
building with the lag screw. Chain can be connected
to spring hook to preset drop. This will restrict how
far the curtain will fall. Refer to Figure 4
NOTES
1. The Curtain fall distance depends on system
setup and Quick-Link location. Set the Quick-
Link location as necessary to accommodate the
proper curtain position when the Curt-O-Matic is
activated/curtains lowered.
2. Verify the Winch or Winch Handle can not
become tangled with the Cable and/or Chain.
Relocate Cable or chain if necessary.
3. Test the setup when installation is complete to
ensure proper curtain drop distance and
operation without interference with the winch or
winch handle.
4. Figures are examples ONLY.
!
Wires to Alarm Input
(CM-III Model only)
Adjustable
Finger
Load Slot
Trip Arm
Assembly
(Includes
Finger)
Alarm Switch
(CM-III Model only)
Power