Hired-Hand Light Traps: Installing Light Trap for Fan User Manual
Page 3
Hired-Hand Mfg., Inc. • 1733 Co Rd 68 • Bremen, Alabama 35033 • Phone 256-287-1000 • Fax 256-287-2000
Sheet Part No. 4801-5500 Rev. 12-05
Page 3 of 4
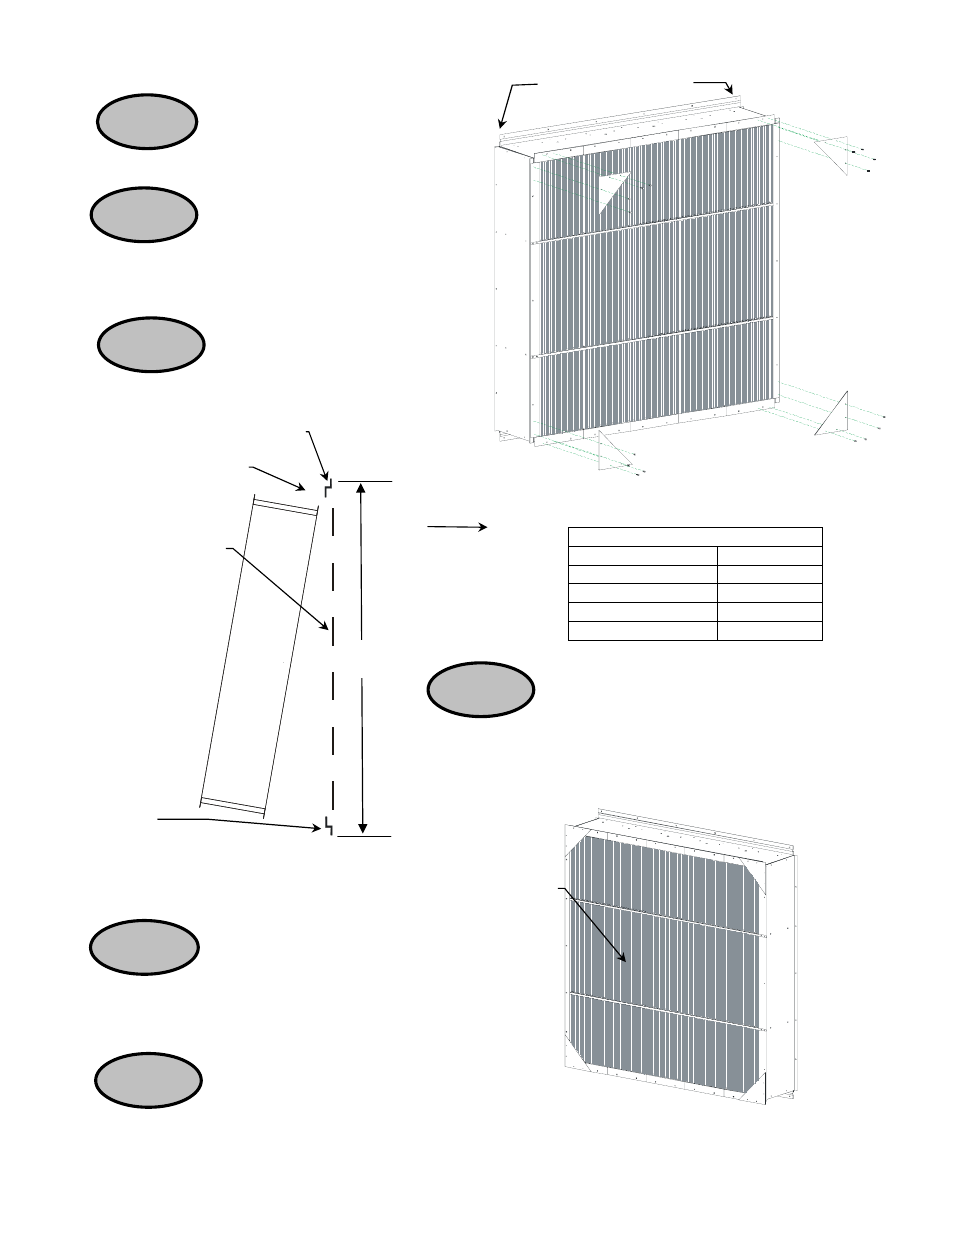
Figure 9 – Completed Light Trap
STEP 9
Attach the Corner Gusset to
each corner of the unit using four 1004-2492
tek screws per Gusset. See Figure 6.
STEP 11
Stand the unit upright and attach
Foam Adhesive to both sides. See Figure 7.
STEP 12
Disconnect the power cord to the fan and
relocate the power cord through the Light Trap. Do not
install the fan over the power cord! The Foam Adhesive
must make a firm contact with the mounting surface to
insure a good light seal. See Figure 8.
STEP 13
Lift unit into the Top Mounting Angle
and drop into the lower angle, which will hold the
unit in place during operation. Take up any slack
left in the power cord. See Figure 8.
Figure 7 – Fan Corner Gussets
Relocate the fan
power cord through
the Light Trap
Extrusions
Figure 8 – Install Mounting Angles
STEP 14
Installation Complete. See Figure 9.
Foam Adhesive on
back sides
Top Mounting Angle
Drop Light Trap
into Lower
Mounting Angle
Wall
Bottom
Mounting
Angle
Lift Light Trap under
Top Mounting Angle
D
STEP 10
Attach Mounting Angles to the wall using
1004-0054 lag bolts. NOTE: The bottom of the lower
angle and the top of the upper angle should be 5”
longer than the ordered unit. See Table 2
Table 2 – Mounting Distance
Height D
72" 77"
60" 65"
48" 53"
36" 41"
To
Outside